Routes identify each number dialed by users. Information is identified by the number dialed and destination group it belongs to.
This window identifies all destinations by dialed number. Destinations that do not exist in this database cannot be dialed by the PBXware MT.
Depending on what is selected when you edit the Routing mode on the master tenant in Settings->Tenants->Master Tenant->General Settings->Routing mode, you will have two routing modes:
- E.164 Routing mode
- Simple Routing mode
Depending on those routing modes, Routes section is different so we will go through them separately.
E.164 Routing mode
When you are using E.164 Routing mode all destinations are defined by E.164 standard.

- Update PBXware daemon database:
Updates daemon database with imported data. Click to update.
- Import Database:
Imports current data from the central destination database. Click on button and enter Import URL.
- Export database:
Export daemon database with newly added details. Click to export.
TIP: Import and update operations need to be performed at regular maintenance times. In addition, the network administrator should be notified of any destination that is not accessible.
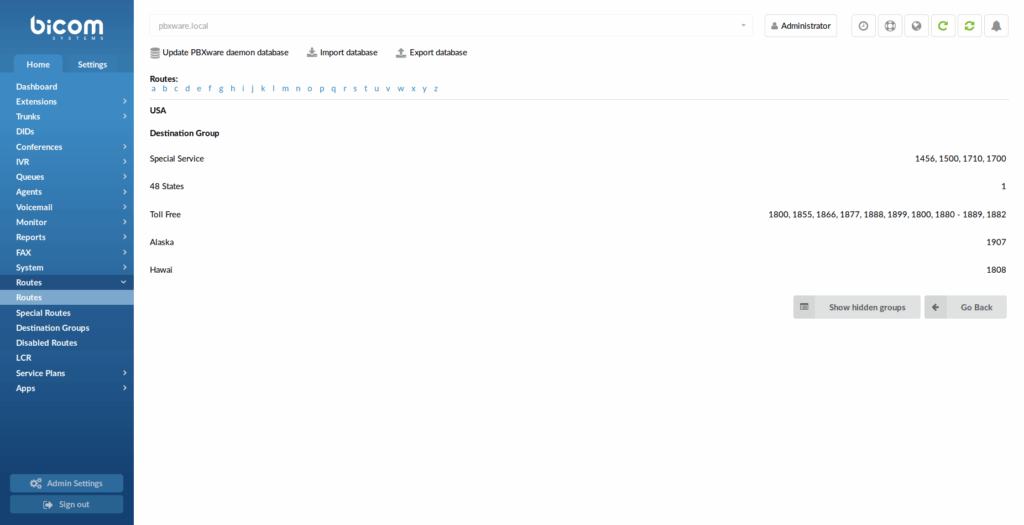
- Routes:
Displays all available destination routes alphabetically. Click on letter and all destination which have selected letter as a first letter, will pop up.
After picking desired route more information is available:
- Destination group:
Further description of selected route. Displays destinations by proper, mobile etc.
Example:
- Special Service
- 48 States
- Toll Free
- Alaska
- Hawaii
. - Show Hidden Groups

Show hidden route groups. Click on the button to display all available groups.
In order to view destination numbers for the United Kingdom, click on the “u” letter under “Routes” navigation. All United Kingdom destination groups will be displayed. Click on one (e.g. Proper) to view all destination numbers assigned to it.
Add/Edit Routes
After picking route and destination within that route Add Destination/Edit Destination option will be shown.
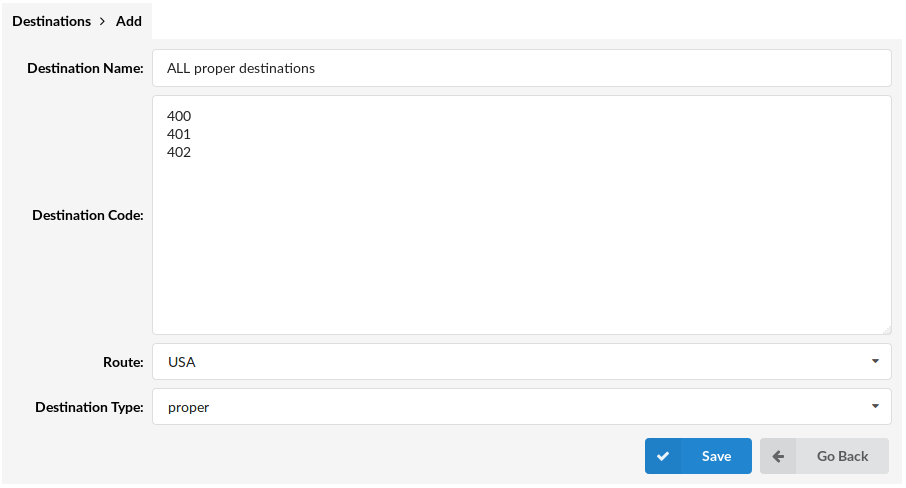
- Destination Name:
Unique destination name.
(E.g. All proper destinations)
- Destination Code:
Destination code identifier. Number that identifies the destination.
(E.g. 442, where all numbers start with 442*******))
- Route:
Route to which the destination code belongs
(E.g. If route “442” belongs to the United Kingdom, select “United Kingdom” here)
- Destination Type:
Group to which destination code belongs
(E.g. If route “442” belongs to proper phones, select “Proper” here. If it belongs to mobile provider, O2 for example, select “O2” here)
.
Special Routes

Special Routes feature allows PBXware administrator to add special services numbers that will be distinguished from extensions numbers (even if they have the same number of digits) and dialed through specified trunk, similar to how Emergency Services numbers are dialed through Emergency Trunk.
NOTE: All existing special routes will be converted to the new format (destination type will be set to trunk and value preserved).
- Name:
Unique name of the Special route.
- Type:
Type of the Special Route (Emergency, Info services or Other).
- Number:
Special route number.
.
Add Special Route
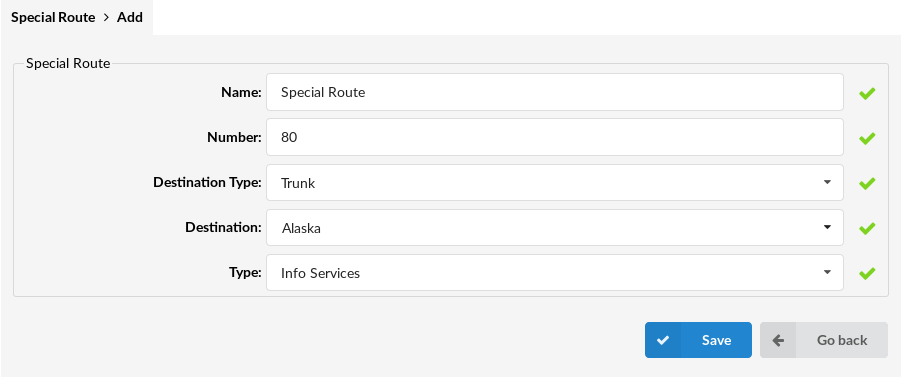
- Name:
Add a name of the special route
(E.g. Test)
- Number:
Enter a special route number
(E.g. 80)
- Destination Type:
Select the type of the special route
(E.g. Trunk)
- Destination:
Select the destination for the special route
(E.g. Alaska)
- Type:
Select the type of the special route
(E.g. Info Services)
.
Destination Groups
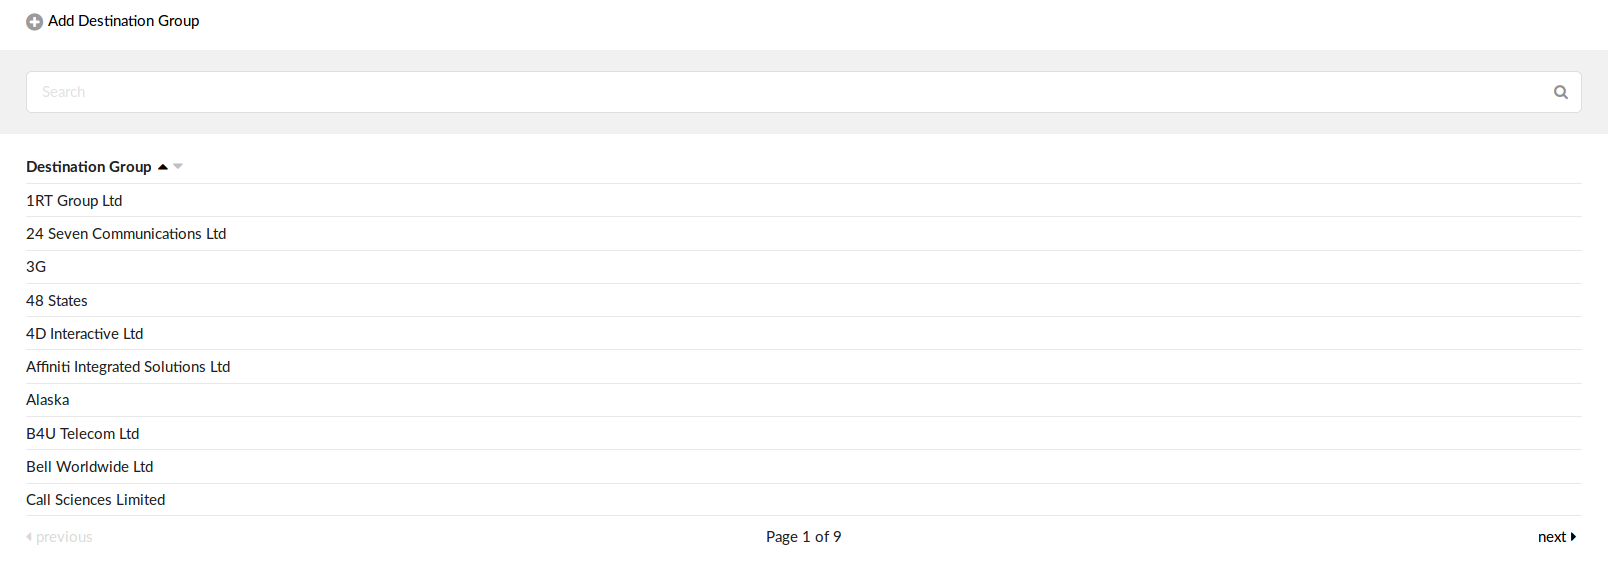
Each country can be assigned with many destination groups/service providers. You may add one by clicking on the Add Destination Group from this location. All groups that have no numbers assigned will not be displayed when Routes information is required.
Destination group which the user have created can later be used as a destination type when adding a destination in Routes->Add Destination.
- Destination Group:
Name of the destination group.
(E.g. 48 States)
Deletes a destination group from the system.
NOTE: It is possible to delete only the destination group which is not assigned to a route as a “Destination type”.
Add/Edit Destination Group
You will see this option if you have clicked on the “Add Destination Group” option.
- Destination Group:

Destination Group name.
(E.g. 48 States)
.
Disabled Routes
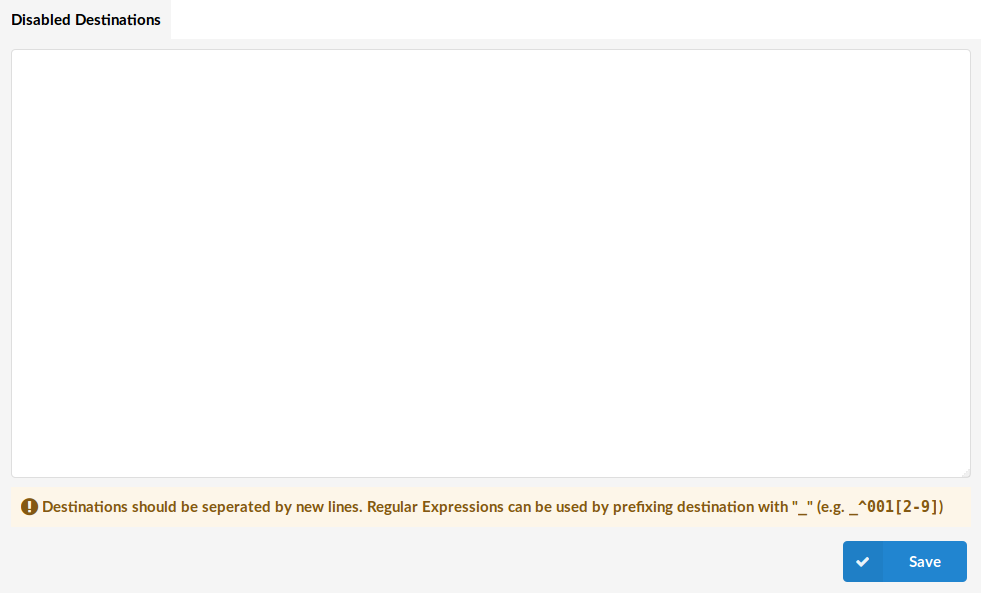
If you want some destinations to be disabled, you can add them to Disabled Routes. On Multi Tenant systems, it is also possible to add disabled destinations per tenant, with Master Tenant rules still being applied.
NOTE: Destinations should be separated by new lines. Regular Expressions can be used by prefixing destination with “_” (e.g. _^001[2-9]). Expressions that are defined here must be POSIX-compliant.
Simple Routing mode
This routing mode does not require numbers to be entered in the E.164 form and allows greater flexibility when used right.

- Route
Name of the route.
(E.g. Mobile)
- Start digits
First digits by which the system would recognize a call.
(E.g. 06)
- Required Length
Full length of dialed number recognized.
(E.g. 9)
- Regex
Regular expression which can be used to fine tune which starting numbers to fall under that route.
(E.g. 06[123])
- Prefix
Prefix which should be added to dialed numbers.
(E.g. 0044)
- Strip Digits
Whether the prefix by which the number was recognized, will be stripped when dialing.
Edits the route configuration.
Deletes a route from the system.
.
Add routes
By clicking on Add route you will be able to add a new simple route to the system.
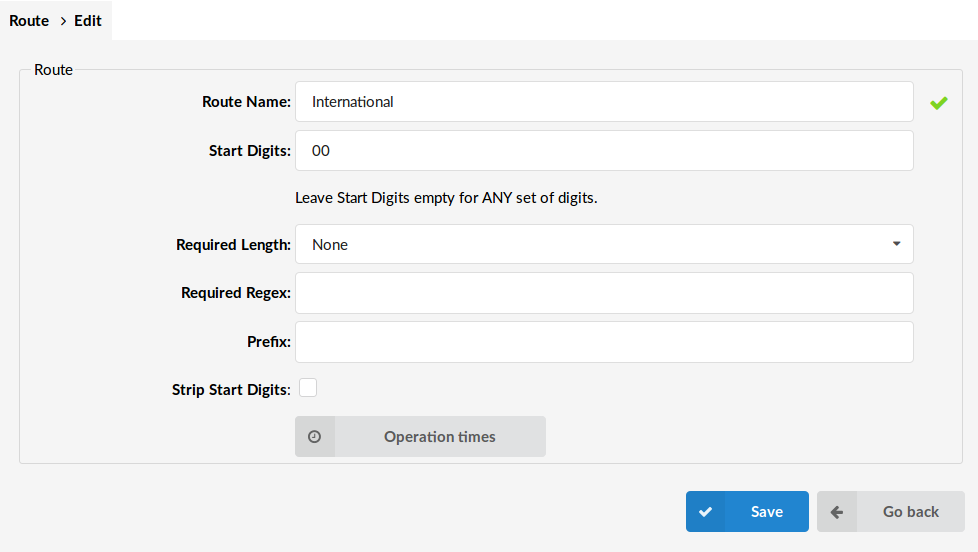
- Route Name:
Name of the route being added.
(E.g. Mobile)
- Start Digits:
Starting digits of the numbers which will fall under this Route. If you leave this field empty, any number will be taken into account, but in that case you must select how many digits those numbers will have.
(E.g. 06)
- Required Length:
Length of dialed numbers which would be recognized as this route. If this field is set to none, any length of numbers will fall under this route, but Start Digits must be set, for this to work.
(E.g. 9)
- Required Regex:
This is an optional regular expression which can be used to fine tune numbers recognized by this route.
(E.g. 06[1-5] – In this example only numbers starting with 061, 062, 063, 064 or 065 will fall under this route. Also you could use other regular expressions here).
- Prefix:
Prefix which should be added to dialed numbers.
(E.g. 00)
- Strip Start Digits:
Whether to strip start digits from the dialed numbers.
.
Operation Times
Set the system open/closed times. Depending on the time when the call is received, the call can be redirected to different PBXware MT destinations.
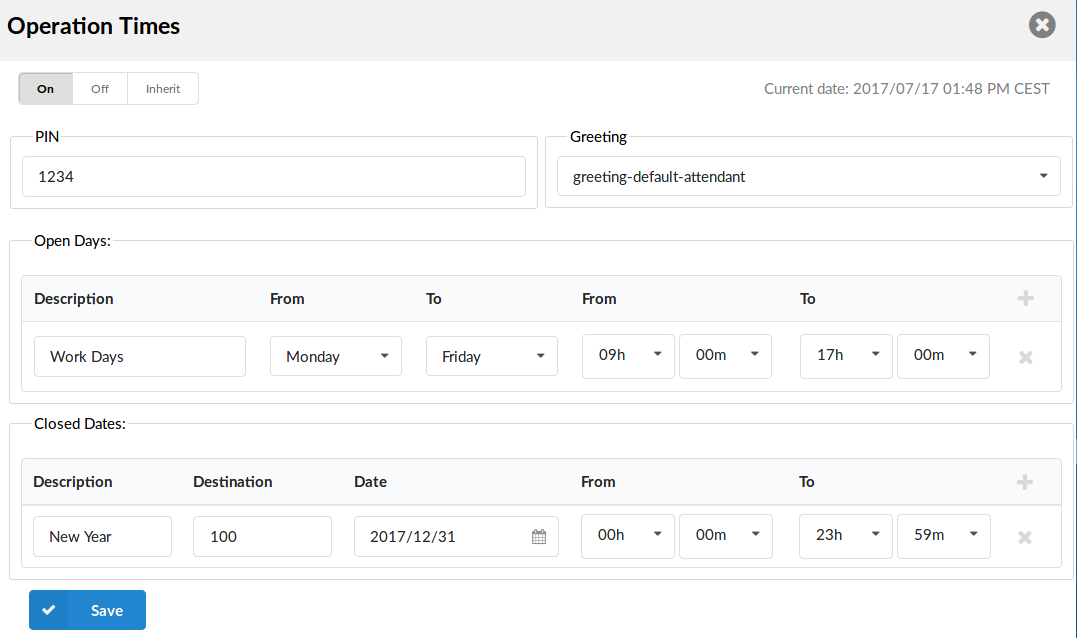
- Operation Times:
Enable operation times.
(E.g. On, Off, Inherit)
The Inherit option will allow administrators to simply put the Higher Level Operation Times settings back into effect if deemed necessary.
- PIN
If you have a PIN set here, the system will ask you for it so you could pass through the Operation Time.
(E.g. 3425)
- Greeting:
Greeting sound file played to callers during the closed times.
(E.g. greeting-***)
- Open days:
Sets the working hours during which the DID redirects calls as set in the DID Add/Edit window. If any call received during the hours is not set here, “Range Destination” is checked, and if they do not apply, the call is redirected to “Default Destination”.
- Closed dates
Sets the specific date/s when all calls are redirected to the ‘Default Destination’. If the “Destination” field in the Closed dates is set, calls will not go to the “Default Destination” but to this number.