Queues
What are Queues?
The voice queue is a crucial feature of the Contact Center that helps to distribute inbound communication flexibly to the members/agents in the same group, using various intelligent strategies and functions for call distributions. It allows users to set up a group of phones that will take calls in the order they receive, giving each representative time to address the caller’s needs and gather their notes. When all agents are busy, additional calls are held on hold, and users can set informative messages for their callers while they wait until the next agent is available again.
The queues are also known as Automatic Call Distribution (ACD), meaning the callers will automatically be routed to the proper representative (best-skilled agent). They can solve their problems faster without repeating their questions to several agents.
How does it work?
The primary role of a queue is to route all incoming calls to the most suitable agent for the caller’s question. Customer calls are distributed to available agents using a “first-in, first-out” approach. It is a linear pattern in which the first caller in the queue is sent to an available agent. When more than one agent is available, the agent selection strategy determines who will receive the call. Through pre-recorded messages, an attendant can greet callers and inform them how many people are waiting in the queue or the current hold time. These messages can be customized and provide essential information to assist the callers.
The system simultaneously records information (like caller number, queue position, etc.) for abandoned calls. When the queue position is set and ready and at least one agent becomes available, the system automatically dials the caller who is registered as an abandoned call and connects it with the first free agent. This feature is known as a “Callback” option and can be beneficial when call volumes are high, queues are full, or there are no more available agents.
NOTE Abandoned call means the caller disconnects before reaching an agent.
What can be done with it?
Queues can be used, for example, to determine business hours rules, where users can specify how calls should be handled when their Contact Center is open and how they should be dealt with during holidays and weekends. The users can make their callers’ on-hold times a bit more pleasant by uploading pre-recorded greetings, personalized messages, or music files that will be played while waiting for agents. By determining call distribution and routing rules, users can decide what strategy should be used for routing calls – to the least busy agent, someone with matching skills, or all to one agent in a particular group.
Agents may handle calls from current or potential customers regarding accounts management, scheduling, technical support, complaints, queries about products or services, or intent to purchase from the organization.
Queues can also be used in combination with IVRs, where a customer can access a relevant Queue by dialing the number IVR offered to them without waiting for the Agent to transfer them to a particular Queue. All these intertwined features can help users’ businesses satisfy customers’ needs and serve them evenly.
Queues Sections
This section allows users to create a new queue, monitor, edit, and/or delete an existing one, or monitor all queues together in a real-time scenario. The landing page provides information about queue names, numbers, ring strategy, and the number of agents assigned to a specific queue. Users can also search through all existing queues by queue names or numbers.
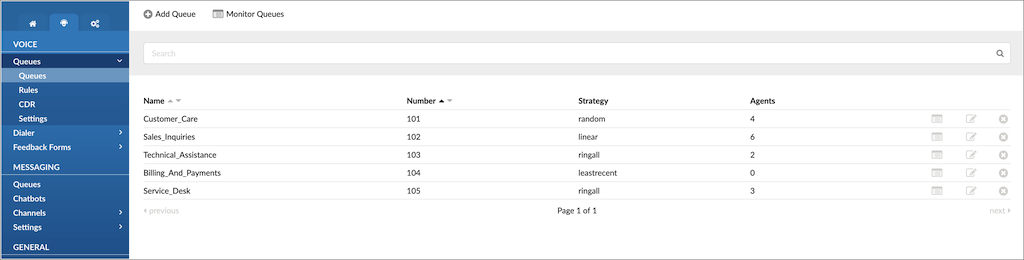
The landing page provides the following information:
- Name
This field displays the name of the queue, such as “Support,” representing the purpose or department associated with the queue.
(E.g., Marketing, Sales, Support)
(Display)
- Number
This field shows the network number assigned to the queue, providing a unique identifier. For example, it could be “1001” for easy reference.
(E.g., 1001, 2003, 3005)
(Display)
- Strategy
This field indicates the queue strategy, which determines how incoming calls are distributed among the agents. An example could be “ringall,” where all agents’ phones ring simultaneously.
(E.g.,ringall, linear, random)
(Display)
- Agents
This field displays the number of agents currently assigned to the queue. For instance, it could be “5” agents who are members of the queue.
(E.g., 5, 7, 14)
(Display)
- Edit

Clicking this button allows users to edit the configuration settings of the queue, such as its name, strategy, or assigned agents.
(Button)
- Delete

This button enables users to remove the queue from the system. When clicked, a confirmation prompt may appear, asking for confirmation before permanently deleting the queue.
(Button)
- Monitor Queue icon – Monitor queue
Clicking this icon provides the ability to monitor the queue’s activity, including the number of calls waiting, agents available, and other relevant information.

(Button)
Search
By default, the search is performed by queue name or queue number. The user can enter a phrase in the search field to filter the records.

(E.g., Provide a search phrase here and hit enter to filter the records)
([a-z][0-9])
Monitor Queues
By selecting this option, users will be prompted to a different window. From there, they may access the list of all available queues and general information about each queue.
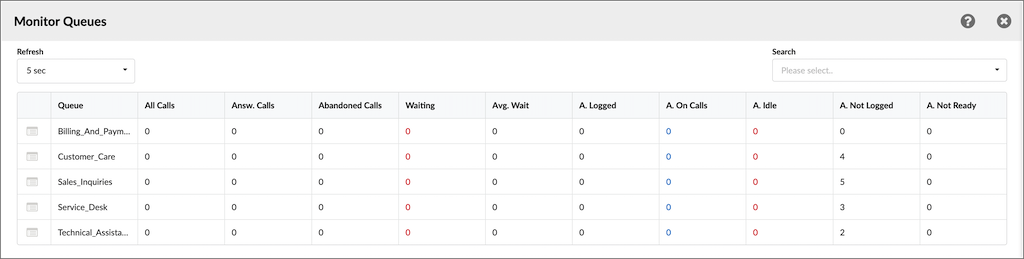
Users may specify the details using the ‘Refresh’ and ‘Search’ fields to access information and customize data tracking.
- Refresh
Select the number of seconds and have the page refreshed accordingly.
(E.g., Selecting ’10 sec’ will result in data being automatically refreshed every ten seconds.)
(Select box)
- Search

Select or enter the name of the Queue to be monitored.
(E.g., TestQ1, BaresipQueue, QueueMobile)
(Multi-select box)
NOTE: It is possible to perform searches by selecting a single or multiple Queues. The selection action will impact the displayed data and show only the specified Queues.

Click this button to open a Queue Monitoring page for a specific Queue.
(Button)
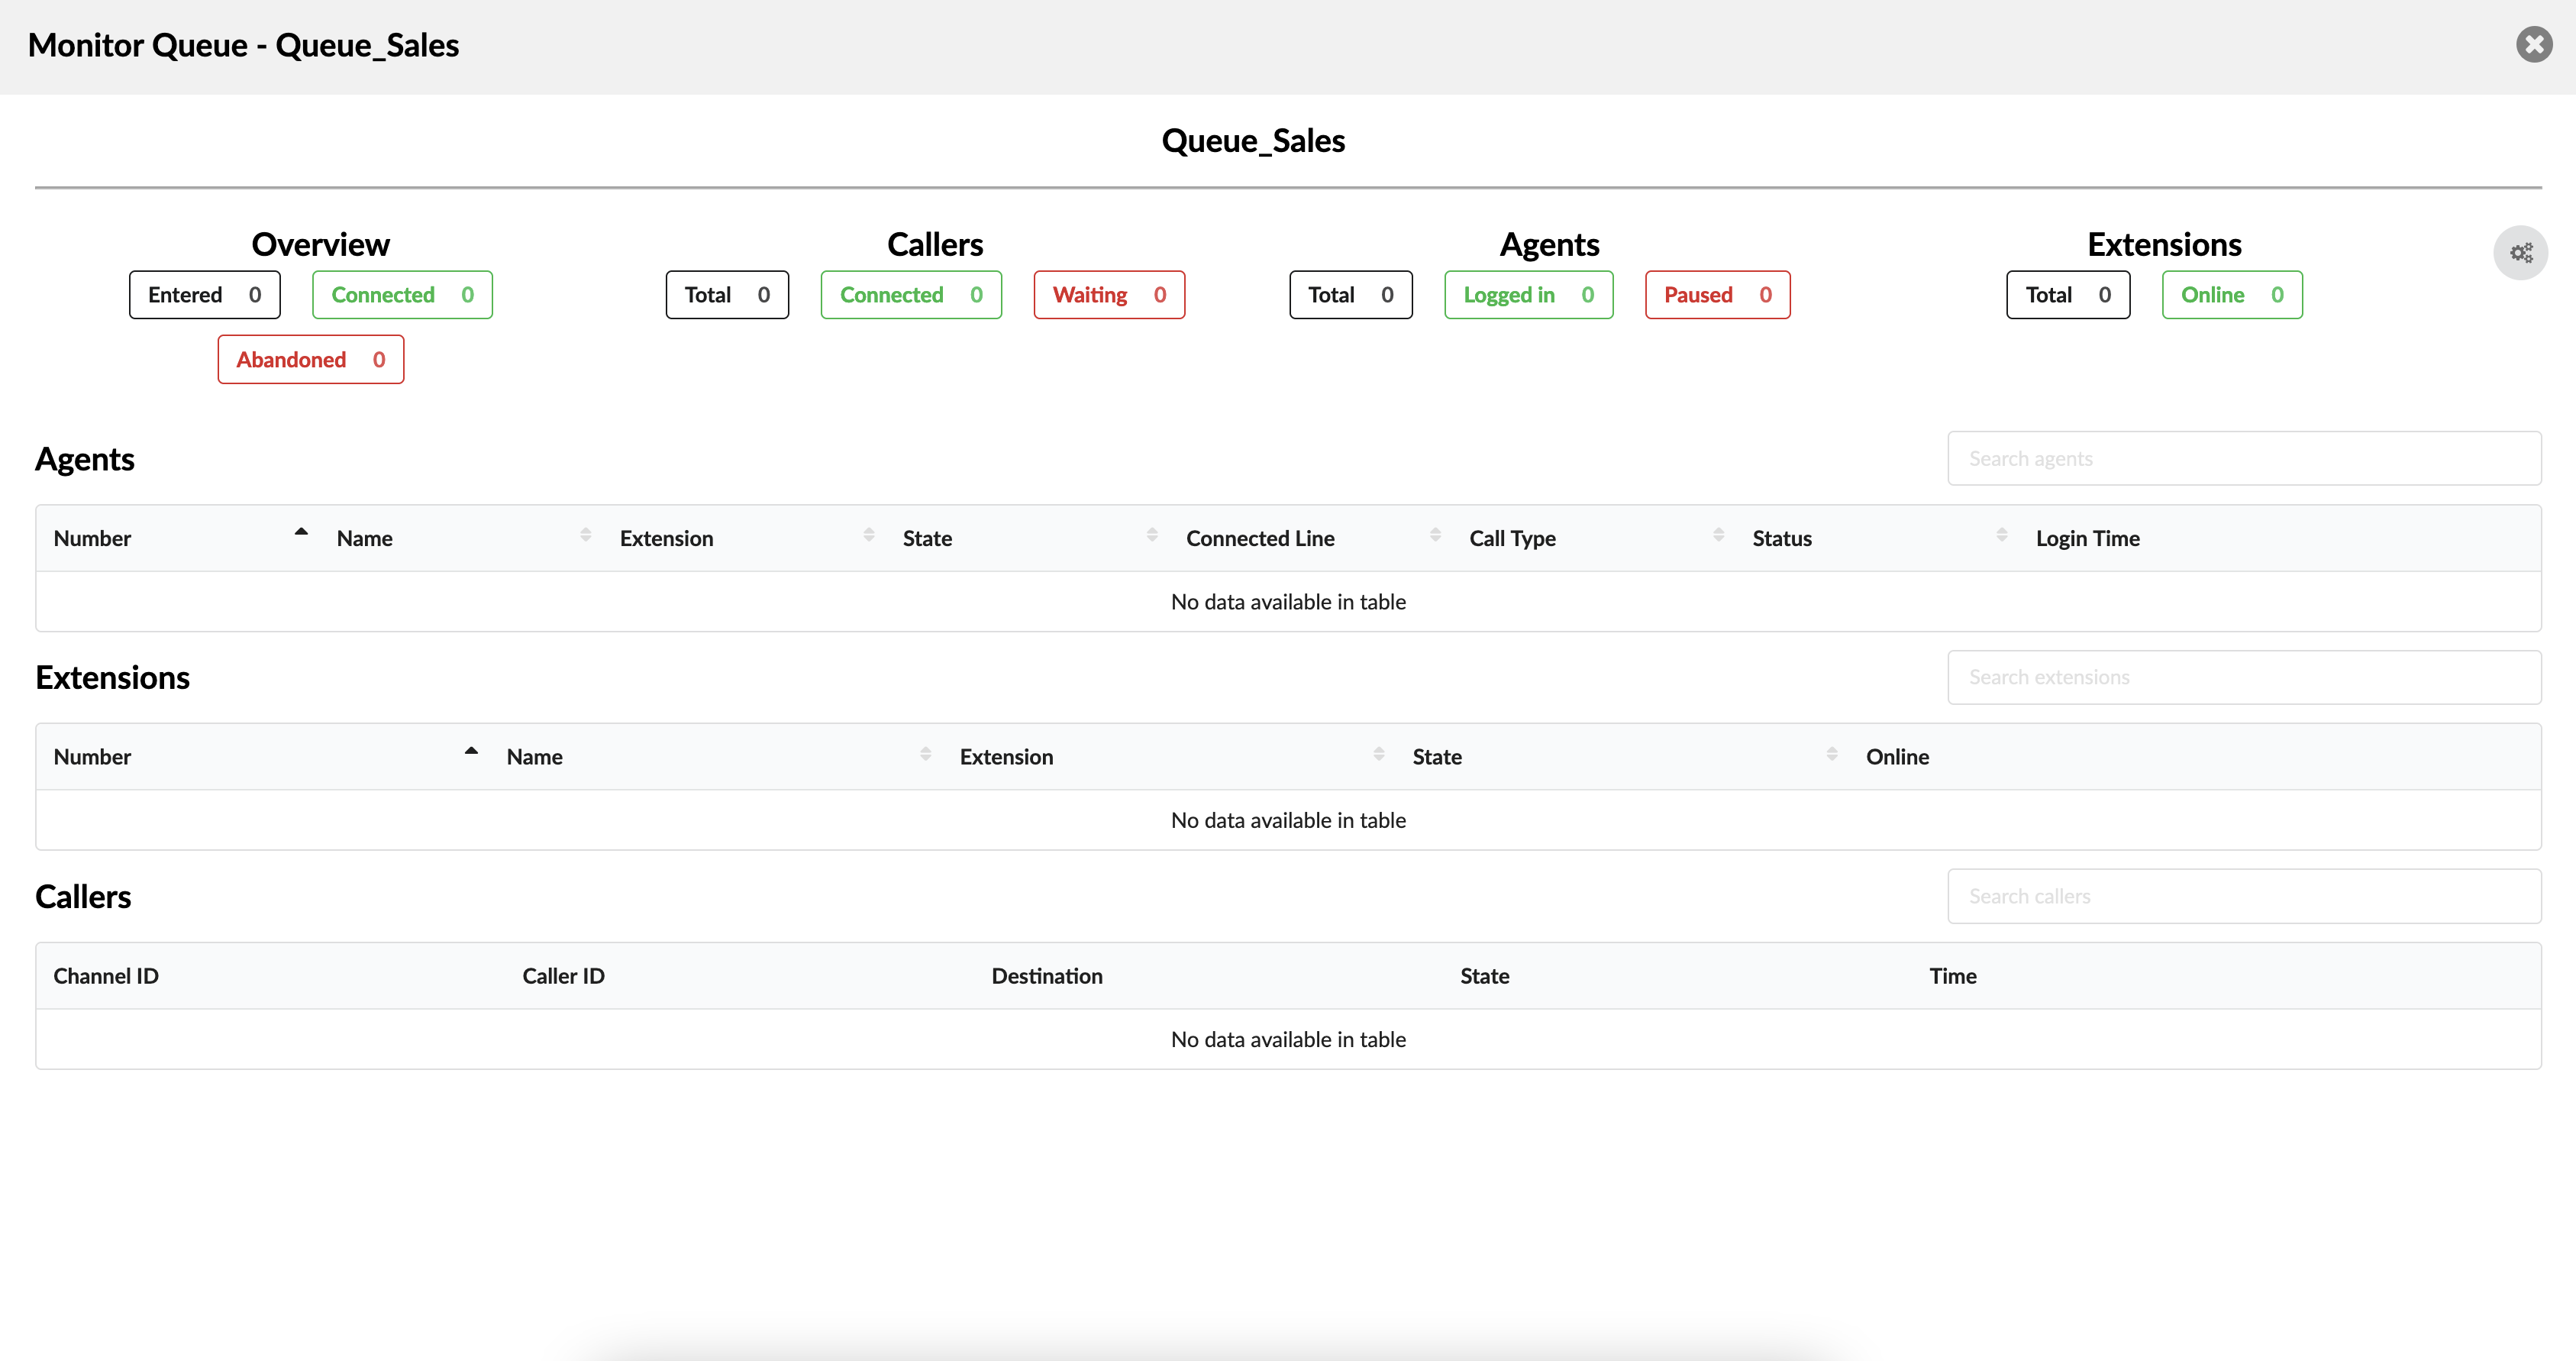
Once users click this button, they will be redirected to a Queue Monitoring page they have previously selected. On this page, they will have all the necessary information to monitor any activity in the Queue successfully. Additionally, at the top of the page, they will be presented with the Queue’s name for easier data tracking.
For more information, please refer to the screenshot.
Overview
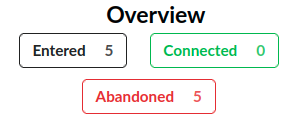
Displays historical data for a given day
(E.g., Entered 5, Connected 0, Abandoned 5)
(Display)
NOTE: It will reset at midnight, and it also refreshes every 10 seconds by default.
Callers
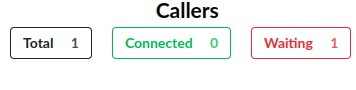
Displays real time data about callers in a Queue.
(E.g., Total 1, Connected 0, Waiting 1)
(Display)
Agents
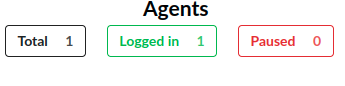
Displays real time data about agents in a Queue.
(E.g., Total 1, Logged in 1, Paused 0)
(Display)
Extensions
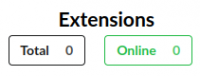
Displays real time data about static members.
(E.g., Total 0, Online 0)
(Display)
Settings icon

Click this button to show/hide detailed information about Agents/Extensions/Callers.
(E.g., Show Agents, Hide Extensions, Show Callers)
(Button)
Agents
This section shows real time data about agents.
- Search

Filter data about agents by using the search bar.
([a-z][0-9])
The information is as follows:

- Number
Displays the agent’s number.
(E.g., 8689)
(Display)
- Name
Displays the agent’s name.
(E.g., A8689)
(Display)
- Extension
Displays an Extension with which an agent is logged in.
(E.g., 278)
(Display)
- State
Displays the agent’s state.
(E.g., ONCALL)
(Display)
- Connected Line
Displays the Caller ID.
(E.g., 202 (202))
(Display)
- Call Type
Displays the call type.
(E.g., Outgoing Call)
(Display)
NOTE: The ‘Call Type’ section can display one of the three following options:
 | An agent received a call. (E.g., Someone called a Queue, and this particular agent received the call.) |
 | An agent received a call to his/her Extension. (E.g., Someone called this agent by dialing his/her Extension number.) |
 | An agent called someone. (E.g., An agent was the one who made the call.) |
- Status
Displays the agent’s status.
(E.g., LOGGED IN)
(Display)
- Login Time
Displays the agent’s login time.
(E.g., 11:16:01)
(Display)
- Monitor

Listen to an active conversation. Once this button is clicked, users can select which Extension will monitor the selected call.
(E.g., A Queue agent 1001 is on a call with the caller Jane Doe (1000). Click this button and enter ‘1005’ into the pop-up window. The Extension 1005 will ring, and once the handset is picked up, the conversation between Jane Doe (1000) and agent 1001 will be heard.)
(Button)
- Transfer

Transfer a party from the active conversation to a different Destination. Once this button is clicked, users can select a Destination to which this call will be transferred.
(E.g., A Queue agent 1001 is on a call with the caller, Jane Doe (1000). Click this button and enter ‘1005’ into the pop-up window. The caller, Jane Doe (1000), will be transferred to agent 1005.)
(Button)
- Hangup

Hang up the active conversation. Once this button is clicked, users can confirm that they want to hang up the selected call.
(E.g., A Queue agent 1001 is on a call with the caller, Jane Doe (1000). Click this button and confirm the action to hang up the selected call. The conversation between the caller, Jane Doe (1000), and agent 1001 will be terminated.)
(Button)
Extensions
This section shows real time data about SIP members.
- Search

Filter data about Extensions by using the search bar.
([a-z][0-9])
The information is as follows:

- Number
Displays the member’s number.
(E.g., 106)
(Display)
- Name
Displays the agent’s name.
(E.g., Grand106)
(Display)
- Extension
Displays the Extension number.
(E.g., 106)
(Display)
- State
Displays the state.
(E.g., OFFLINE)
(Display)
- Online
Displays the time of how long this Extension has been online.
(E.g., 00:00:00)
(Display)
- Monitor
Listen to an active conversation. Once this button is clicked, users can select which Extension will monitor the selected call.
(E.g., A Queue agent 1500 is on a call with the caller, Jane Doe (1000). Click this button and enter ‘1005’ into the pop-up window. Agent 1005 will ring, and once the handset is picked up, the conversation between Jane Doe (1000) and agent 1500 will be heard.)
(Button)
- Transfer
Transfer a party from the active conversation to a different Destination. Once this button is clicked, users can select a Destination to which this call will be transferred.
(E.g., A Queue agent 1500 is on a call with the caller, Jane Doe (1000). Click this button and type ‘1005’ into the pop-up window. The caller, Jane Doe (1000), will be transferred to agent 1005.)
(Button)
- Hangup
Hang up the active conversation. Once this button is clicked, users can confirm that they want to hang up the selected call.
(E.g., A Queue agent 1500 is on a call with the caller, Jane Doe (1000). Click this button and confirm the action to hang up the selected call. The conversation between the caller, Jane Doe (1000), and agent 1500 will be terminated.)
(Button)
Callers
This section shows real time data about Queue callers.
- Search

Filter data about callers by using the search bar.
([a-z][0-9])
The information is as follows:

- Channel ID
Displays the Channel ID.
(E.g.,1610013268.19)
(Display)
- Caller ID
Displays the Caller ID.
(E.g., 204 (204))
(Display)
- Destination
Displays the Queue member who is on call.
(E.g., Agent/1001)
(Display)
- State
Displays the call state.
(E.g., WAITING)
(Display)
- Time
Displays the call time.
(E.g., 00:04:06)
(Display)
- Transfer
Transfer a party from the active conversation to a different Destination. Once this button is clicked, users can select a Destination to which this call will be transferred.
(E.g., A Queue agent 1001 is on a call with the caller, Jane Doe (1000). Click this button and enter ‘1005’ into the pop-up window. The caller, Jane Doe (1000), will be transferred to Extension 1005.)
(Button)
- Hangup
Hang up the active conversation. Once this button is clicked, users can confirm that they want to hang up the selected call.
(E.g., A Queue agent 1001 is on a call with the caller, Jane Doe (1000). Click this button and confirm the action to hang up the selected call. The conversation between the caller, Jane Doe (1000), and agent 1001 will be terminated.)
(Button)
Add Queue
To create a new queue, click on the “plus” icon or the “Add Queue” button. This will open a new window containing several sections, each of which will be explained in detail below.
- Queue Name:
Unique queue network name/identifier.
(E.g., Provide a unique queue identifier/name here)
([a-z][0-9])
- Queue Number:
Unique network queue number.
(E.g., This number is to be dialed in order to access the queue)
([0-9])
- Max Waiting Callers:
A maximum number of callers allowed to wait in a queue at the same time. Users should set this number in accordance with the number of agents answering the queue calls.
For example, if the Max Waiting Callers field is set to 8, only eight callers will be allowed to enter the queue. If caller number 9 tries to join the queue, the system will transfer them to another destination.
([0-9])
- Ring to Answer:
How many rings will be played to a caller before the call enters the queue.
Set this value to 0 if you want calls to hear Queue music on hold as soon as the call is connected.
(E.g., 5) ([0-9])
- Agents:
This button opens up a screen where you can add and manage queue agents.
(E.g., Click on the button to manage queue agents)
(Button)
Agents

- Agents
Pressing the button ‘Agents’ list will open a pop-up window.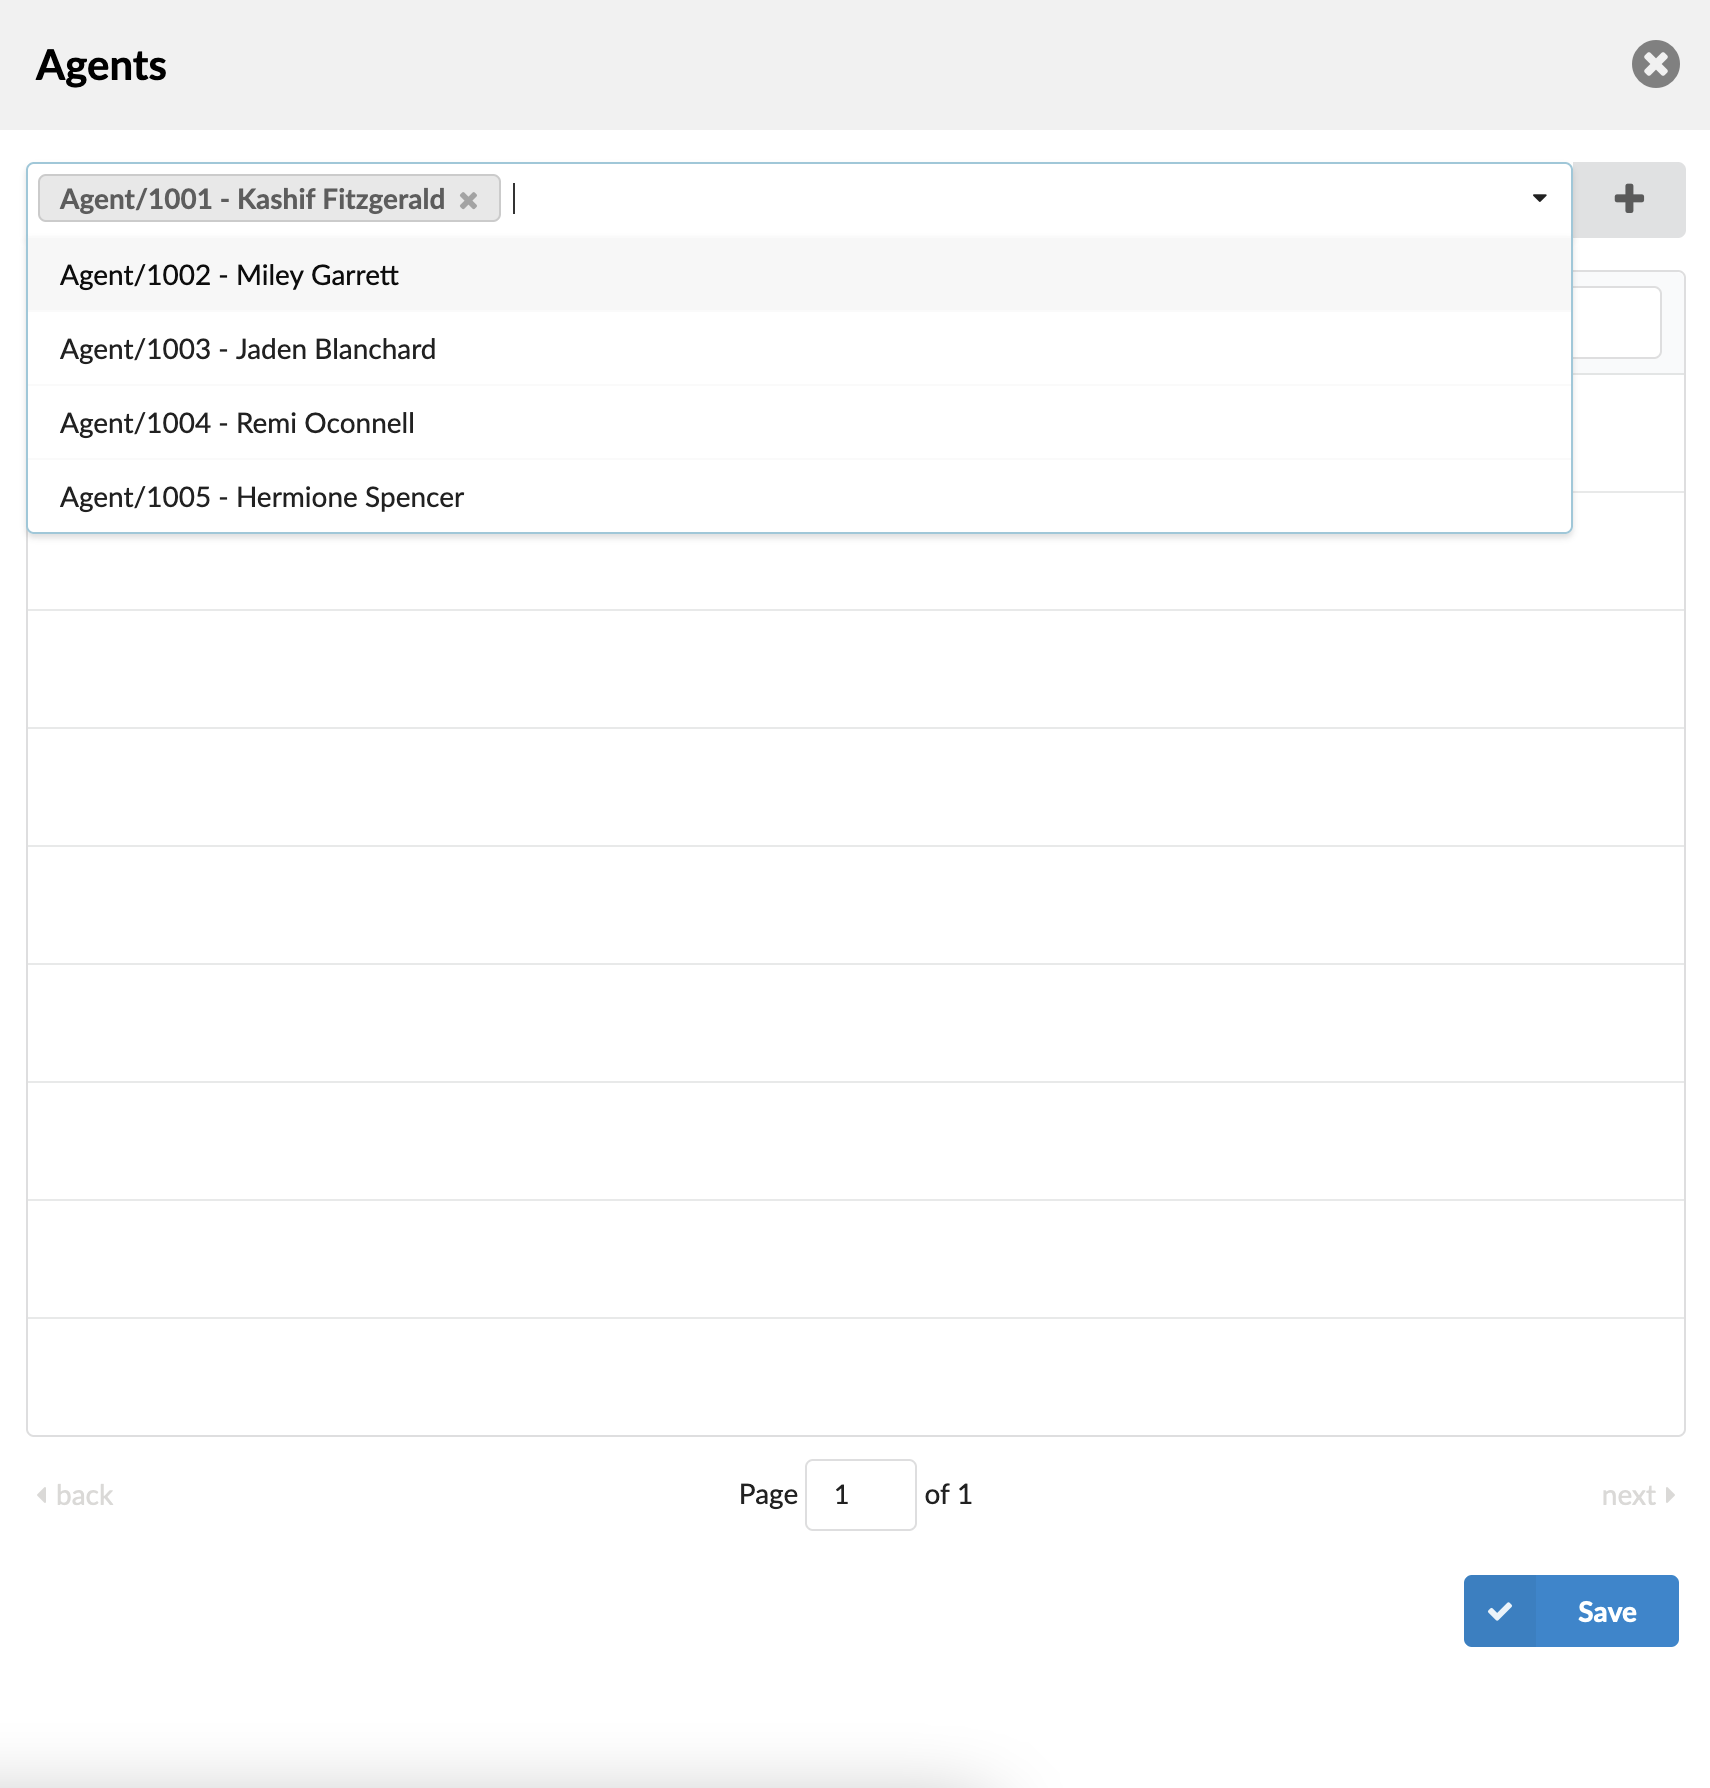
- Select agents
Dropdown where you can select one or more Agents/Agents Groups/Extensions to add to the Queue list.
(E.g., Agent/1001, Agent/1002)

Press this button to add selected Agents/Agents Groups/Extensions to the Queue list.
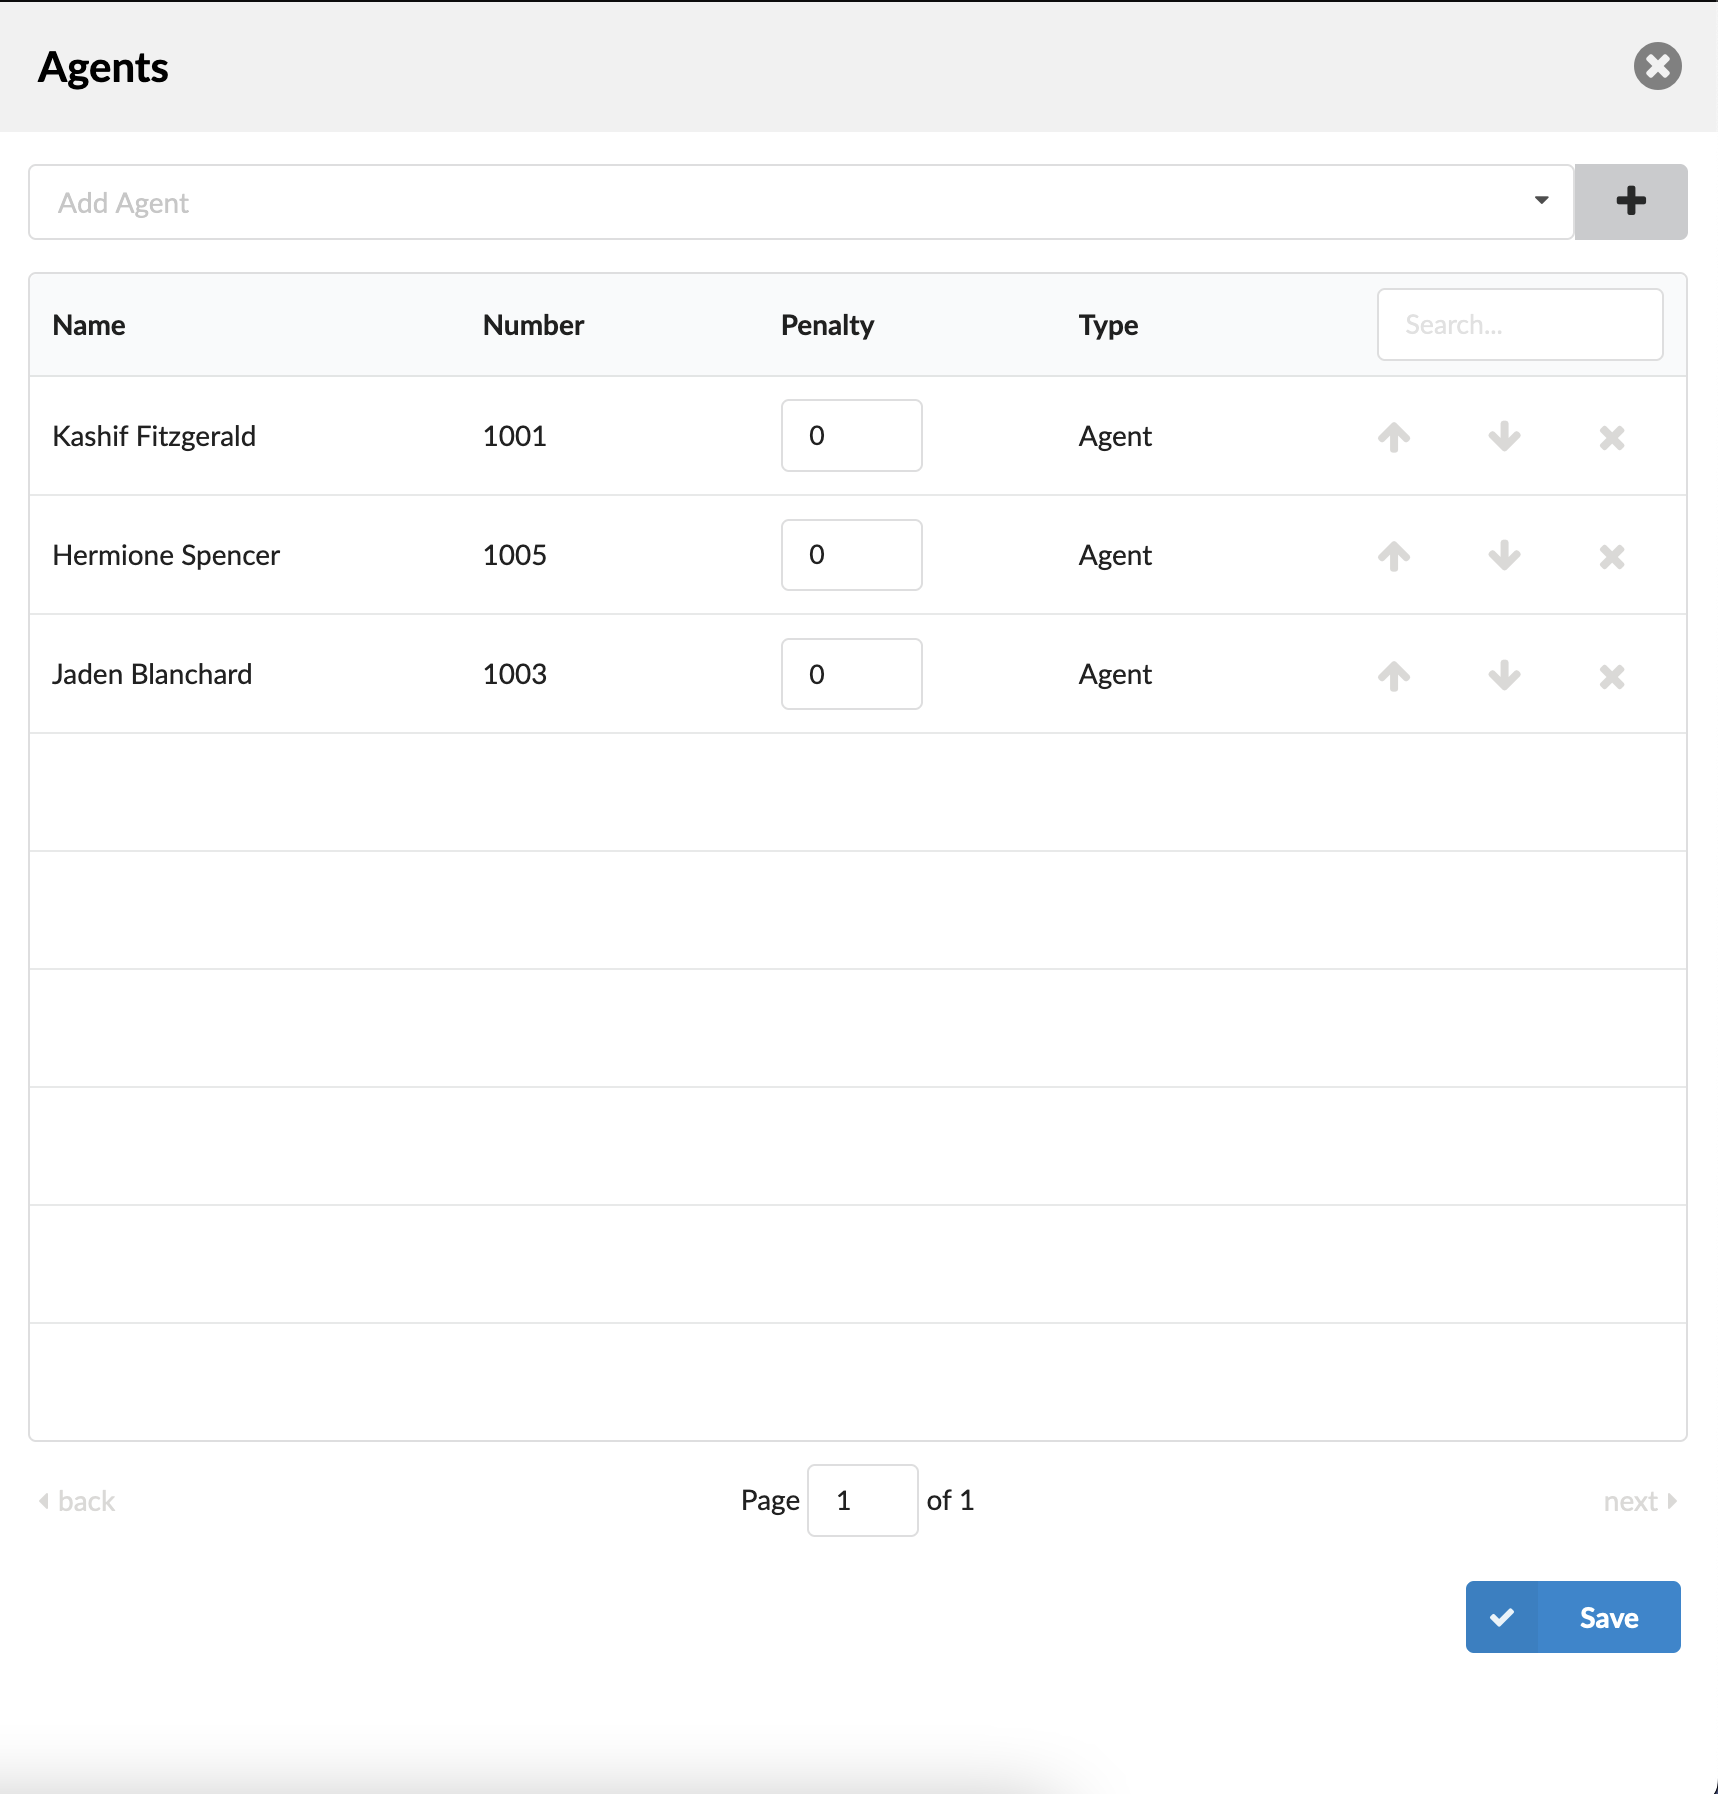
There is a table that shows queue agents with the following details:
- Name
Agent’s name
(E.g., Hermione Spencer)
([0-9][a-z])
- Number
Number of the agent on the system
(E.g. 1001)
([0-9])
- Penalty
This value can be set per agent, so the system can decide which priority to use when sending calls to agents.
(E.g., Set values between 0 and 10 where 0 is the highest priority and 10 is the lowest priority. If the strategy is defined as ‘ringall’, then only those available agents with the lowest priorities will ring. ).
([0-10])
NOTE: If an agent does not pick up, it will not automatically go to the next agent. It will keep ringing until it is picked up. It will only go to the next agent if the current agent is either busy or unavailable.
- Type
Queue member type.
(E.g., Agent)
(Display)
- Search
Search queue agents.
(E.g., Provide a search phrase here to filter the records)
([a-z][0-9])
- Move up

Move the queue agent one place up in the queue list.
- Move down

Move the queue agent one place down in the queue list.
- Remove agent

Remove agent from queue list.
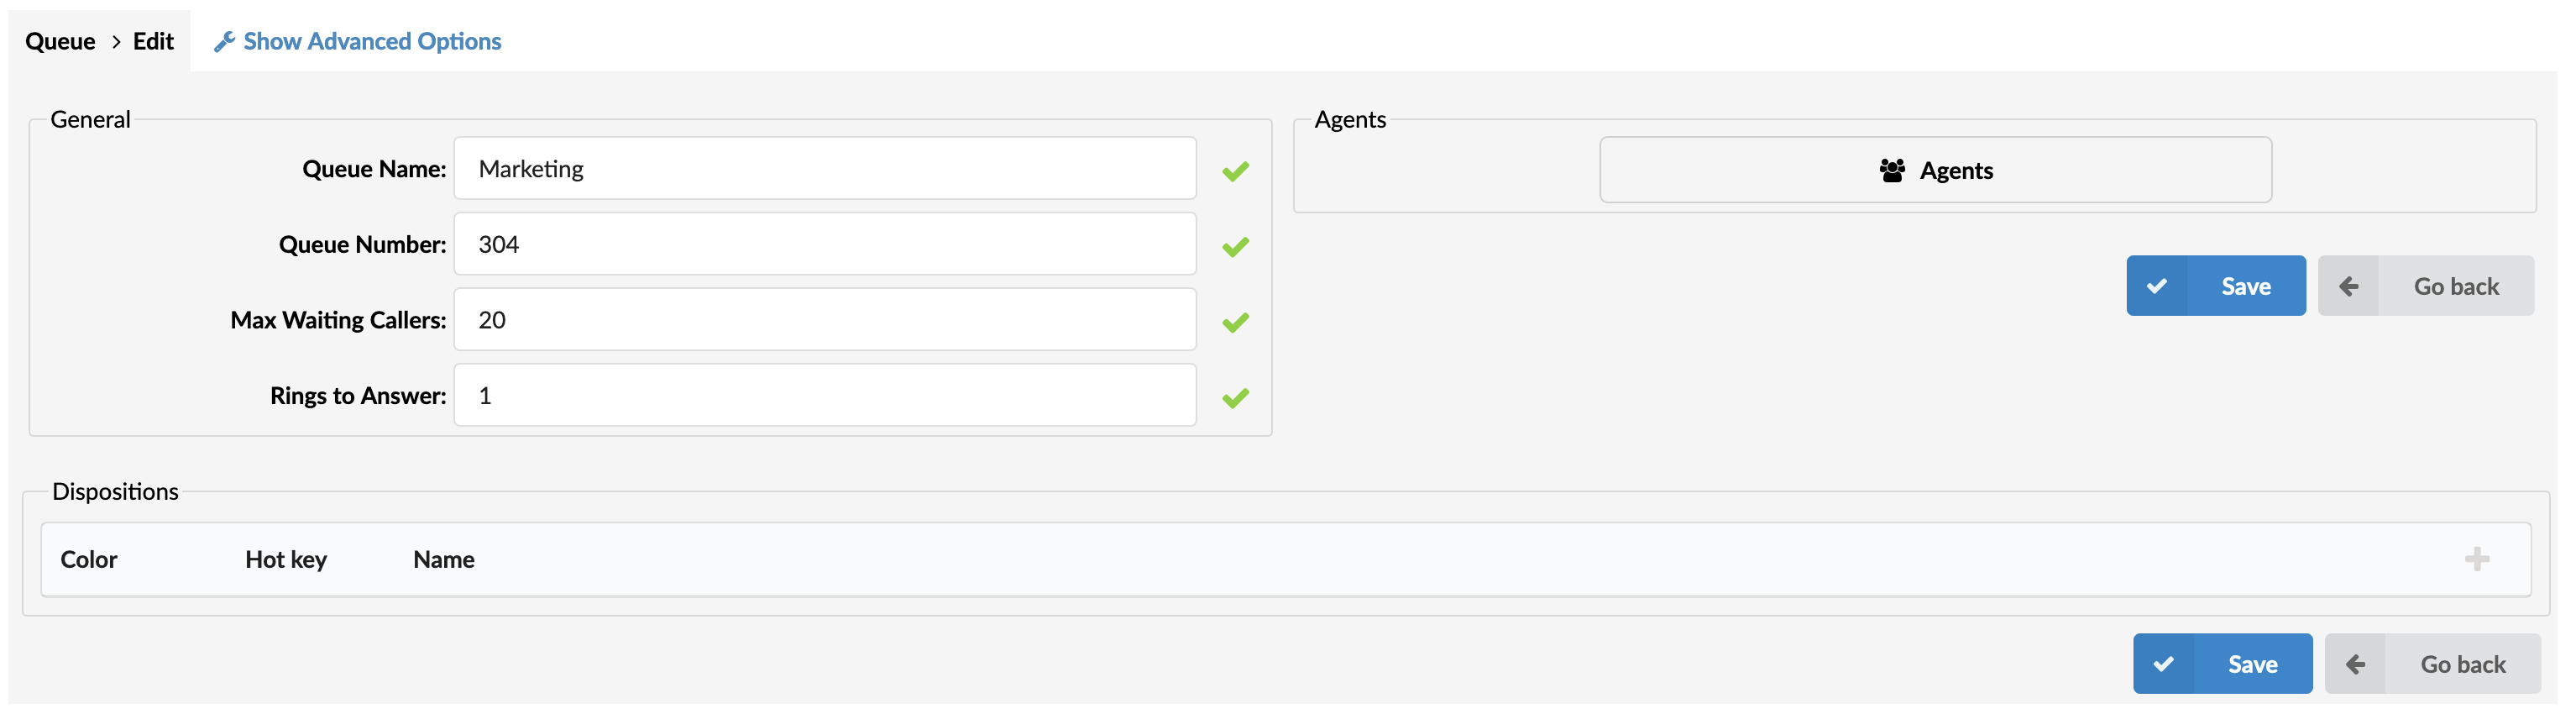
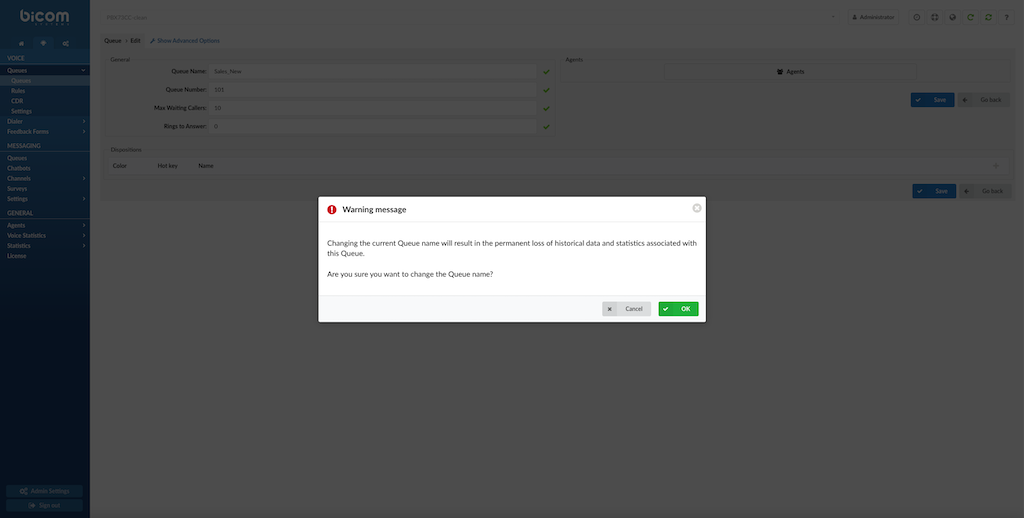
Edit Queue
Clicking this button allows users to edit the configuration settings of the queue, such as its name, strategy, or assigned agents.
Note: Changing the Queue name can cause potential data loss, and users will be informed with a warning message when attempting to change it; Changing the current Queue name will result in the permanent loss of historical data and statistics associated with this Queue. Are you sure you want to change the Queue name?
Dispositions
Agents can see Dispositions in Agent panel. They can be applied and added at the end of each call.
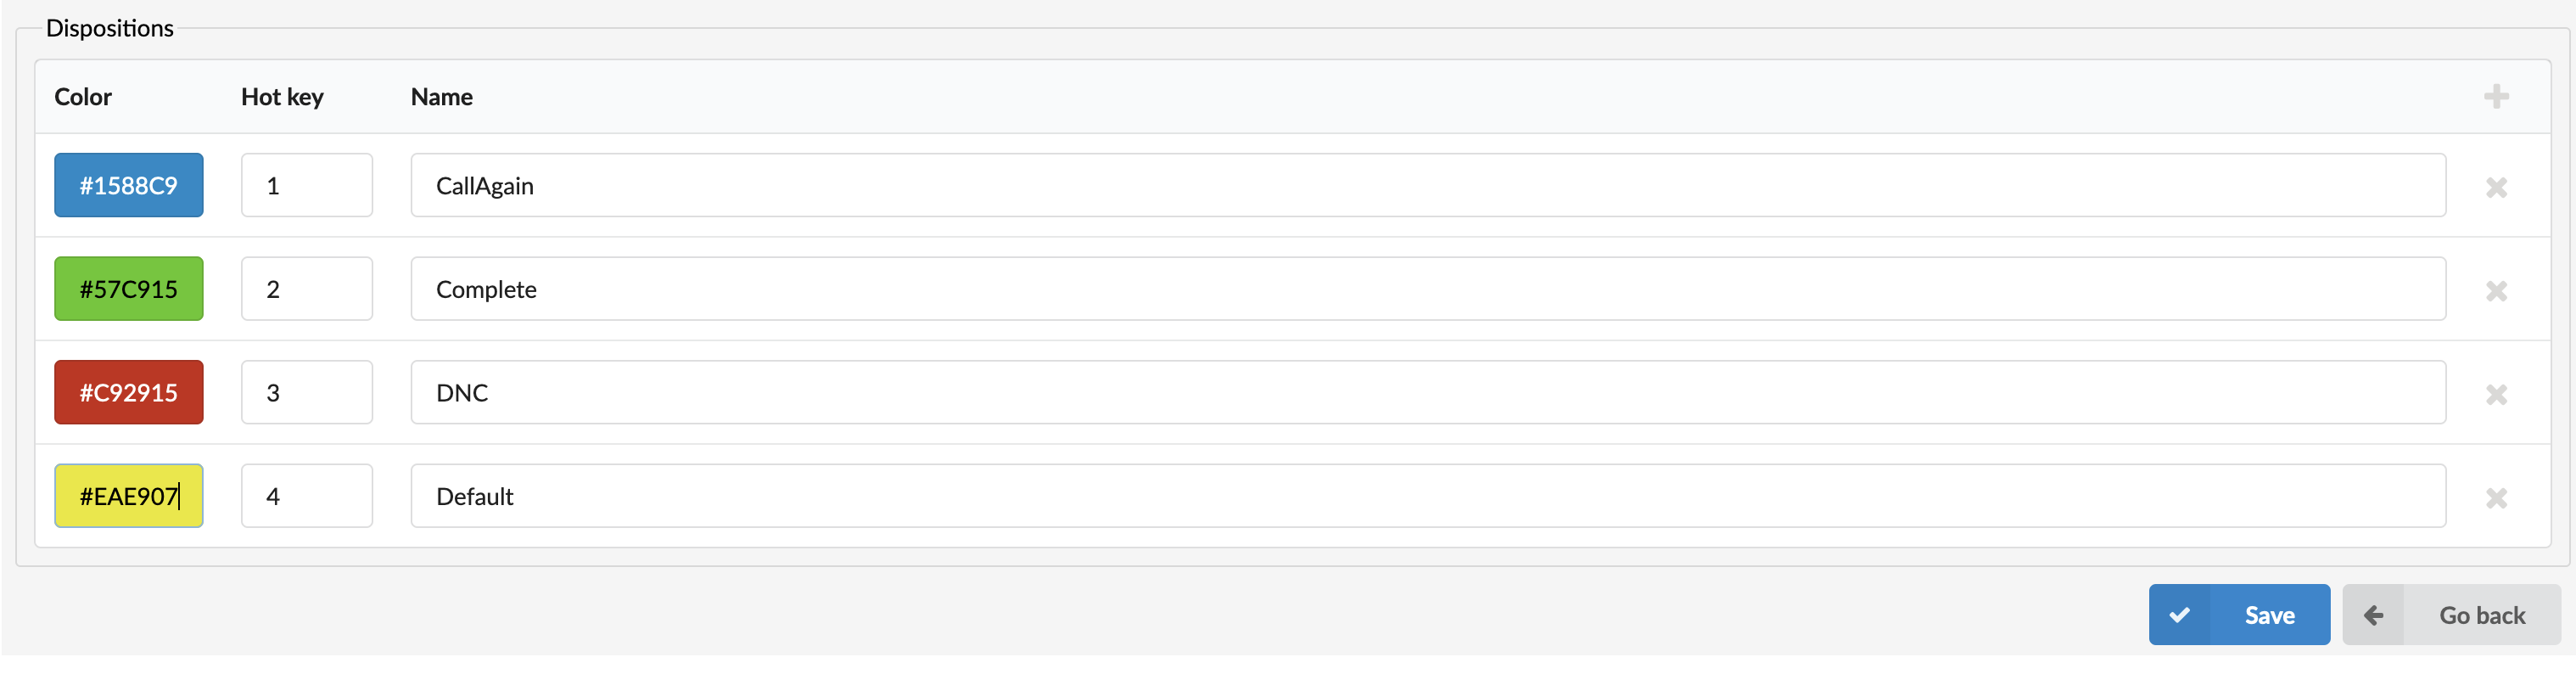
- Color
Set the desired color for a Disposition.
(E.g., #1588C9)
(#[0-9])
NOTE: This is useful on the gloCOM interface when presenting a list of Dispositions to Agents. The ‘Color’ field helps Agents find and select Dispositions accurately.
- Hotkey
Enter a number to select a Disposition faster, or leave this field empty.
(E.g., 2)
([0-9])
NOTE: The ‘Hot Key’ option refers to a keyboard shortcut that Agents use to improve their performance. When using Hot Keys, Agents do not have to use the interface.
- Name
Set a name for a Disposition.
(E.g., Completed)
([a-z][0-9])

Click this button to add a Disposition.
(Button)

Click this button to delete a Disposition.
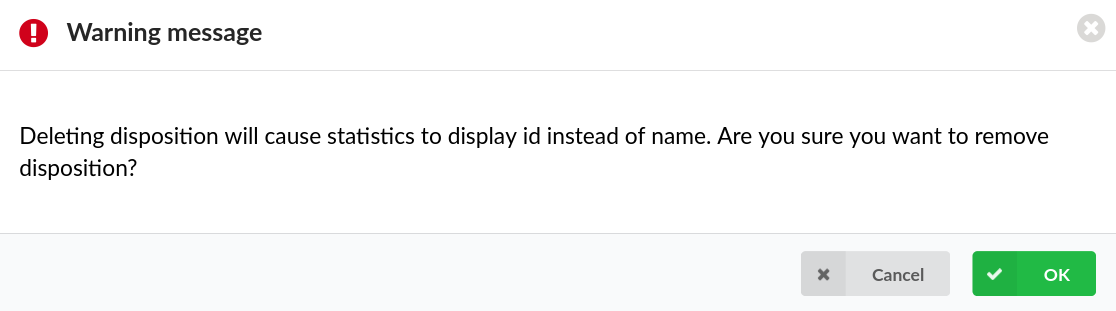
NOTE: Upon clicking the button, the following warning message will appear:
“Deleting dispositions will cause statistics to display id instead of name. Are you sure you want to remove disposition?”.
If users click the Cancel button, the action will be abandoned. On the contrary, if OK is clicked, the selected Disposition will be deleted.
For more information, please refer to the screenshot.
(Button)
Advanced Options
General
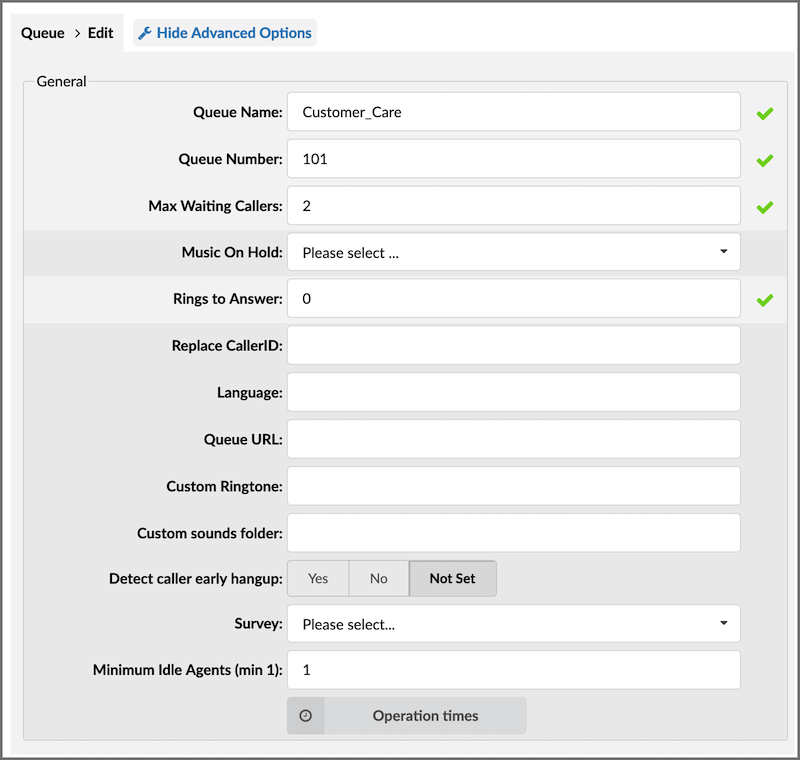
This section provides various settings to configure essential parameters for the call queue, such as its name, number, capacity for waiting callers, and audio preferences. It also includes options for managing caller identification, language settings, and URL integration. Additionally, it offers customization for ringtones, sound folders, and caller behavior detection. A survey option can be set for post-call interactions, and minimum agent availability is defined to ensure proper queue handling.
- Music On Hold:
Music on hold is a feature that plays a recording of music or speech when an inbound caller is placed on hold. With this option, the admin can select the MOH (Music On Hold) class name, and when callers enter the queue, all sound files belonging to the chosen MOH class are played in the background. This option is important because inbound callers will not hear “silence.” Being on hold frustrates callers; many will even hang up before connecting with an employee, leading to a bad customer experience. Music on hold makes the hold time seem shorter, reducing frustration and increasing caller retention rate.
(E.g., User A enters the queue. After the greeting message is heard, all sound files belonging to the selected MOH class are played in the background)
(Select box)
- Ring to Answer:
Set how many rings will be played to a caller before the call enters the queue.
For example, if this option is set to 0, inbound callers will hear music on hold as soon as the call is connected.
- Replace CallerID:
Replace the caller id with the custom value.
(E.g., Type ‘Lobby – %CALLERID%’ to display the caller id information as ‘Lobby – 5552879’ where 5552879 is the actual number calling in)
([a-z][0-9])
- Language:
Define the custom language for all sound files played by the queue.
(E.g., To play Spanish sound files to all users waiting in the queue, type ‘es’ here.)
NOTE: PBXware comes with English sound files by default. To install sound files in other languages, please see ‘ Settings: Protocols: Sip: Language’ for more information.
([a-z])
- Queue URL:
Send the following URL to the agent’s softphone if it supports that option, and the softphone can open that URL so the agent can see the caller’s additional info if available. A softphone must support this option for it to be used.
(E.g., Additional info on the Queue URL field can be obtained here)
([a-z][0-9])
- Custom Ringtone:
Ring agent phones with custom ringtone set here.
([0-9][a-z])
- Custom sounds folder:
Custom sounds folder name.
Create a new folder for these sounds in:/opt/pbxare/pw/var/lib/asterisk/sounds/, and put your custom queue sounds here.
([a-z][A-Z])
TIP:
Sounds should be named as follows:
- queue-youarenext – Your call is first in line and will be answered by the next available representative)
- queue-thereare – You are currently the caller number
- queue-callswaiting – Waiting to speak with a representative
- queue-holdtime – The estimated call time is currently
- queue-minutes – Minutes
- queue-seconds – Seconds
- queue-lessthan – Less than
- queue-thankyou – Thank you for your patience
- queue-periodic-announce – All of our representatives are currently busy. Please stay on the line and your call will be answered by the next available representative
- Detect caller early hangup
Set this feature to ‘No’ to pass abandoned calls to the queue and still have these in statistics or set it to ‘Yes’ if an abandoned call during greeting should be detected and not routed to the queue and shown in Statistics.
(E.g., Yes, No, Not Set)
(Option button)
- Detect caller early hangup:
This option monitors and detects when a caller hangs up before their call is answered by an agent or connected to a queue. It helps identify and log instances of abandoned calls, which can provide insights into potential issues such as long wait times or caller frustration.
- Survey:
This option allows users to choose a survey that will be presented to callers after the conversation concludes. The survey is triggered when the agent ends the call, enabling callers to rate the agent’s performance on a scale of 1 to 5 based on their recent interaction.
Activating the survey on voice queues allows users to gather valuable feedback on agent performance during operational hours.
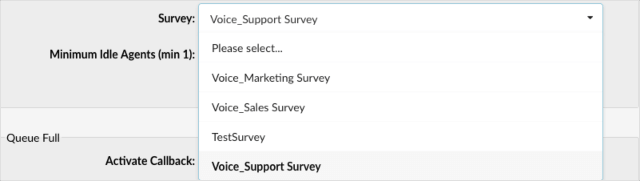
For instance, a customer calls the support hotline and speaks with an agent to resolve an issue. Once the agent ends the call, the system automatically plays a survey asking the customer to rate the service they received from 1 to 5 using their phone keypad. This feedback helps the company evaluate agent performance and customer satisfaction.
- Minimum Idle Agents (min 1)
Minimum Idle Agents that must be in the queue. This is used in blending mode.
NOTE: For the blending mode to work, users must define specific criteria for each queue. As shown in the screenshot, one of the required fields to determine is the minimum number of Idle Agents that this Queue must have. This will tell the system to primarily try to fulfill Inbound requirements before putting Agents in Outbound.
For instance, if the Minimum Idle Agents field is set to “2” on a Support Queue, the system will try to add Agents from Outbound Campaign to the Support Queue. If, at any time, Agents go beyond 2, all extra Agents will be put in the dedicated Campaign.
The most critical element to understand is that the blending mode is a lazy system with no timeout triggering, unlike other solutions. This means that Agents themselves are triggering the blending system by doing some actions like Ending Calls/Logging in,/Unpausing. This reduces complexity and provides stability to the system.
In a real-case scenario, Agents are always busy and are handling some calls. Therefore, there is always a sufficient number of actions that can trigger the blending mode. The advantage of having it done this way is that it avoids any other unexpected behaviors from the Agent’s point of view. If it was done differently, the system would be busy and constantly switch the Agent from IN to OUT, so the Agent could lose a lot of time just trying to resolve from which direction he received a call. Instead of doing so, the Agent already knows that s(he) could be moved to Queue or Campaign only when the current call is ended or because of some other predefined action.
Operation Times
This section provides options to configure the default behavior and operational hours for a queue, including how calls are routed during different periods.
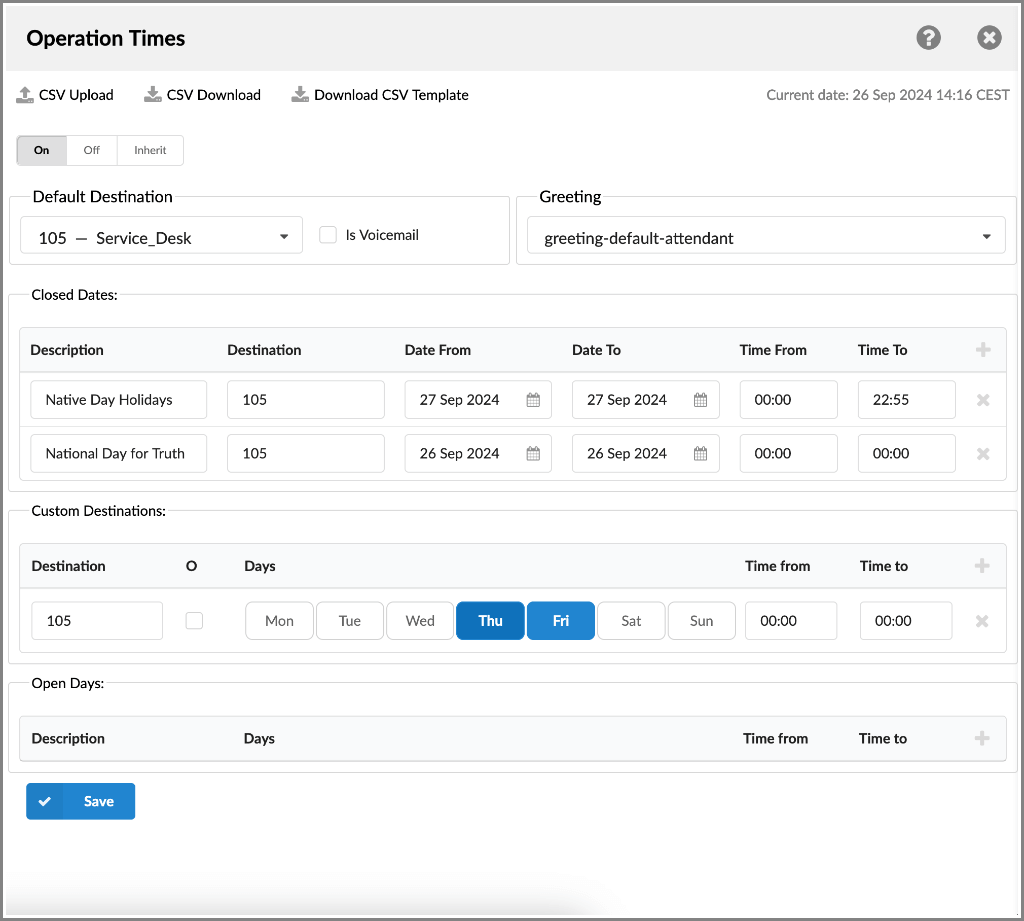
- CSV Upload
Upload Operation Times configuration from a CSV file.
(Button)
- CSV Download
Download the current Operation Times configuration to a CSV file.
(Button)
- Download CSV Template
Download the template of the Operation Times configuration to a CSV file.
(Button)
- Operation Times:
Enable operation times.
(E.g., Yes, No, Inherit)
(Option buttons)
- Default Destination
PBXware extension on which all calls are redirected during closed time hours.
(E.g., 1000)
([0-9])
- Is Voicemail
Whether default destination is Voicemail or not.
(checkbox)
- Greeting:
Greeting sound file played to callers during the closed times.
(E.g., greeting-***)
(Select box)
Description of destinations follows in this priority order:
- Closed dates: Sets the specific date/s when all calls are redirected to the ‘Default Destination’. If the ‘Destination’ field in the Closed dates is set, calls will not go to the ‘Default Destination’ but to this number.
- Custom Destinations: Redirects all calls received during set hours to the PBXware extension provided here
- Open dates: Sets the working hours during which DID is to redirect calls as set in DID Add/Edit window. If any call is received during the hours not set here, ‘Custom Destination’ is checked, and if they do not apply, the call is redirected to ‘Default Destination’ (Closed dates)
Queue Full
This section manages call handling when the queue reaches its maximum capacity. Queue Full settings determine what happens to callers when the queue cannot accommodate any more waiting calls.

Queue Full
- Activate Callback
Choose whether a callback should be activated when the queue is full.
(E.g., Yes, No, Not Set)
(Option buttons)
- Redirect Destination
This option allows admins to set “Redirect Destination” in case the queue is full. The “full queue” means that the number of “Max Waiting Callers” is reached, and other calls cannot enter the queue.
For example, queue Support accepts a maximum of 10 users waiting at the same time. Any new user who enters the queue will be redirected to the destination number provided here.
([0-9])
- Redirect to Voice Mail
This option allows for the redirection of calls to the voicemail of the selected destination.
For example, the user sets the redirecting destination and redirects calls to that destination voicemail.
(E.g., Yes, No, Not Set)
(Option buttons)
Queue Timers
This section is used to configure how long callers can wait in a queue and what actions should be taken if the wait exceeds set limits.
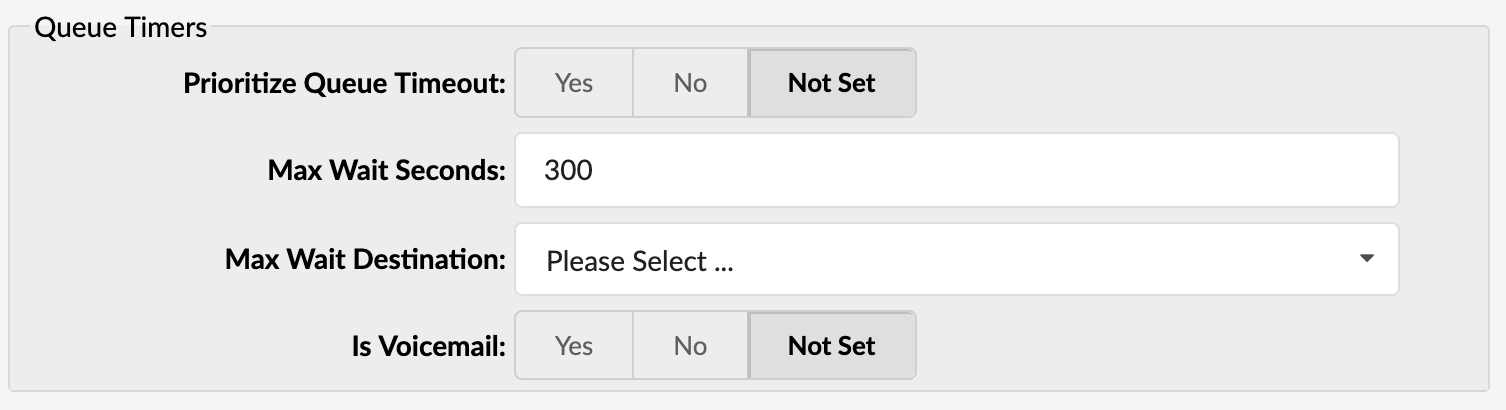
- Prioritize Queue Timeout
It controls the priority of the two possible timeout options specified for a queue. Agent Ring Timeout field has a timeout value that can be specified to control the absolute time a caller can be in the Queue. The timeout value in queues.conf contains the amount of time (along with retry) to ring an Agent. Sometimes these values conflict, so you can control which value takes precedence. The default ‘Not Set’ setting will use Agent Ring Timeout value, same as setting this to ‘Yes’. Option ‘No’ will override the Agent Ring Timeout field and use the value from queues.conf.
(E.g., Yes, No, Not Set)
(Option buttons)
- Max Wait Seconds:
Max Wait Seconds sets the maximum duration a caller can stay in the queue before further action is taken.
For instance, user A is already waiting 5 minutes in the queue. If this field is set to 300 (300s = 5min), user A will be redirected to the ‘Max Wait Destination,’ or a callback will be activated depending on the configuration.
NOTE Please note that settings from Server => Server configuration => Absolute Timeout will override this option.
([0-9])
- Max Wait Destination:
This option works along with the ‘Max Wait Seconds’ field. Drop down to select the destination the caller will be redirected to once the time set under ‘Max Wait Seconds’ exceeds.
For instance, user A waits 5 minutes in the “Sales” queue. If the ‘Max Wait Seconds’ field is set to 300 (300s = 5min) and the Max Wait Destination option is set to a new queue named “Support,” user A will be redirected to the “Support” queue.
([0-9])
- Is Voicemail:
Set whether the max wait destination is pointing to voicemail.
(E.g., Yes, No, Not Set)
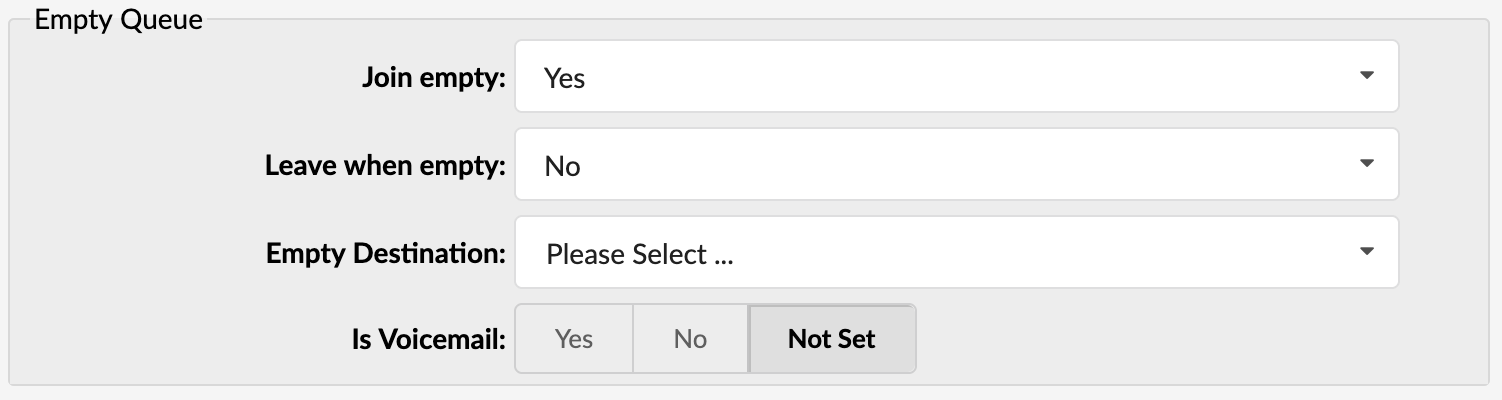
Empty Queue
This section outlines the settings for managing call handling when a queue is empty.
Empty Queue
- Join Empty
With this option, the administrator may set whether a caller can join a queue if no agent is logged in or unavailable.
It is recommended that this option be set to ‘No.’ Users cannot enter the queue if no one answers the call.
The following options are available:
- Yes – Join queue if no agents or only unavailable agents are in the queue
- No – Do not join the queue if no agents are available
(Select box)
NOTE: Please consider that agents on pause break are also regarded as available agents. So even if this option is set to “No,” users can enter empty queues if there are agents within the queue on pause.
- Leave when empty
With this option (if set to “Yes”), the system automatically removes callers from the queue if no agents are present.
- No – This option is disabled
- Yes – If you wish to remove callers from the queue if there are no agents present
(Select box)
- Activate Callback
Choose whether a callback should be activated when no agents are inside a queue.
(E.g., Yes, No, Not Set)
(Option buttons)
- Empty Destination:
This option allows admins to set a destination and redirect callers to the following destination in case no agents are available.
(E.g., 7001)
([0-9])
- Is Voicemail:
Set whether the empty destination extension is pointing to voicemail.
(E.g., Yes, No, Not Set)
Greeting

Greeting
- Greeting:
With this option, admins may select a greeting sound/message that will be played to all callers once they enter the queue. A custom sound greeting file can be recorded and chosen.
(E.g., queue-greeting-introduction)
For instance, user A is calling queue “Support,” the moment the call enters the queue, the user will hear a greeting like: “Thank you for contacting our support. All our representatives are currently busy….”
NOTE Please note that the file name has to be in the following format: queue-greeting-$NAME.gsm.
Position Announcements
The “Position Announcements” section in your general settings is designed to manage how information about a caller’s status in a queue is communicated to them.
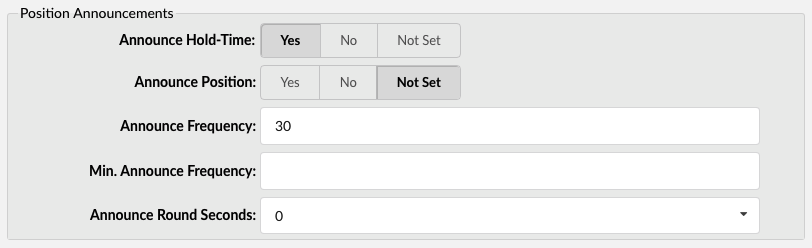
Position Announcements
There are two types of position announcements: ‘Hold Time’ (Tells the queue position) and ‘Periodic Announcements’ (Plays custom message)
- Announce Hold-Time:
With this option set to ‘Yes,’ admins will enable hold-time announcements. That means a single caller waiting in a queue would hear how long the hold time is and how long they will be on hold.
For instance, the message may be: “The estimated hold time is currently N minutes. Thank you for your patience.”
- Announce Position:
Admins will enable the position announcements with this option to ‘Yes’. This means a single caller waiting in a queue would hear their position in the queue.
For instance, the message may be: “Your call is now first in line and will be answered by the next available representative.”
- Announce Frequency:
This option allows admins to set time (seconds) and determine how often to play the announcement messages.
For instance, if this field is set to 30, a single caller waiting in the queue will hear the announcement message every 30 seconds.
([0-9])
NOTE: If this option is set to ‘0’, the announce message will not be played.
- Min. Announce Frequency
Specify the minimum amount of time before we announce the caller’s position in the queue again. This is used when the caller’s placement may frequently change to prevent the caller from hearing multiple updates in a short time. The default value is 15 seconds.
(E.g., 30)
- Announce Round Seconds:
Rounding level for hold-time announcements. If this is set to 0, only minutes, not seconds, are announced; other possible values are 0, 5, 10, 15, 20, and 30.
(E.g., When set to 30, a wait time of 2:34 will be rounded to 2:30.)
Periodic Announcements
The “Periodic Announcements” section in your general settings focuses on managing automated updates provided to callers during their wait time.

Periodic Announcements
- Periodic Announce:
Select the sound file that is played periodically to callers waiting in a queue.
(E.g., Record a message ‘Hang in there buddy!’ and set it as a periodic announcement. This message will be played to callers every ‘Periodic Announce Frequency’ seconds)
NOTE: File name has to be in the following format ‘periodic-announce-$NAME.gsm’
- Periodic Announce Frequency:
Specifies how often these announcements are made, allowing you to customize the timing to suit your audience’s needs without causing annoyance.
(E.g., If this field is set to 30, all callers waiting in queue will hear the ‘Periodic Announce’ message every 30 seconds, as long as they stay in the queue).
- First Periodic Announce Delay:
Determines the initial waiting period before the first announcement is delivered, providing a brief respite for callers before they receive updates.
(E.g., 30)
Agents Announcements
The “Agents Announcements” section in your general settings is designed to manage how information is relayed to agents regarding caller status and queue dynamics.

Agents Announcements
- Agent Announce:
Select the pre-recorded message that will be played to the agent before the call is connected.
NOTE: To be displayed in the drop-down list, the sound file must have an ‘agent-announce-‘ prefix.
- Report Holdtime:
Set this option to yes to inform the agent how long the caller was in the queue before the call was connected.
(E.g., Yes, No, Not Set)
CRM Features
- New Lead URL:
If the incoming call CallerID is unknown, it will be transferred to the URL entered in the New Lead URL field.

Agents Settings
The “Agents” section in your general settings is focused on configuring how incoming calls are managed and how agents interact with the system, optimizing the overall efficiency of the call-handling process.
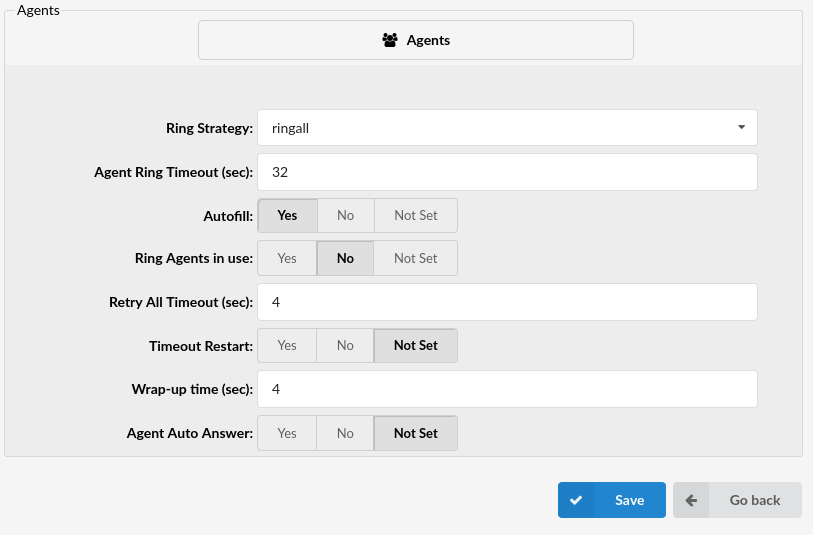
Agents
- Ring Strategy
Set the way calls are transferred to queue Agents answering the calls.
Available options:
- ringall – Ring all available Agents until one answers (default)
- linear – When used with static members, the members will be rung in the order how they are configured in GUI.
- leastrecent – Rings the interface that least recently received a call. In a queue where there are many calls of roughly the same duration, this can work. It does not work as well if an agent has been on a call for an hour, and their colleagues all got their last calls 30 minutes ago, because the agent who just finished the 60-minute call will get the next one.
- fewestcalls – Rings the interface that has completed the fewest calls in this queue. This can be unfair if calls are not always of the same duration. An agent could handle three calls of 15 minutes each and her colleague had four 5-second calls; the agent who handled three calls will get the next one.
- random – Rings a random interface. This actually can work very well and end up being very fair in terms of evenly distributing calls among agents.
- rrmemory – Round robin with memory. rrmemory should pick up at the last interface it was at when the last call came into the queue.
- rrordered – Same as rrmemory, except the queue member order from the GUI file is preserved so interfaces will ring in the order specified in the GUI.
- wrandom – Rings a random interface, but uses the member’s penalty as a weight when calculating their metric. So a member with a penalty of 0 will have a metric somewhere between 0 and 1000, and a member with a penalty of 1 will have a metric between 0 and 2000, and a member with a penalty of 2 will have a metric between 0 and 3000. Please note, if using this strategy, the member penalty is not the same as when using other queue strategies. It is ONLY used as a weight for calculating metric.
(E.g., linear)
- Agent Ring Timeout (sec)
Set the Agent ring timeout.
(E.g., 10, 15, 35)
- Autofill
Should callers be served one by one or in a parallel fashion.
(E.g., With this option turned ‘Off’, even if there are five agents available, calls will not be transferred to them until the first caller waiting in a queue is connected to an agent. When the first caller gets served, caller number two gets served, and all others keep waiting. It is recommended to keep this feature always turned ‘On’ so callers can be served in order)
- Ring Agents in Use
Whether agents in use should be called when a new caller comes into the queue.
(E.g., If the agent is already in an active conversation, with this option set to ‘Yes’, the Agent will ring when a new caller enters the queue)
- Retry All Timeout
Time interval in seconds, for how long to wait before trying the queue agent again.
(E.g., If agent Smith cannot answer the incoming queue call and hangs up the ringing line, the call will not be transferred back to his extension for a time in seconds provided in this field).
- Timeout Restart
If this option is set to yes and a BUSY or CONGESTION signal is received on the line, the agent’s timeout for answering will be reset. This can be useful with agents that have permission to cancel a call with a reject.
(E.g., A call enters the queue and is transferred to Agent X. Agent X has a Polycom phone (for example) and sends a BUSY signal by hitting the ‘Reject’ key. This will reset the internal timer. The call will be transferred to other queue agent(s). The original agent will not be contacted until all other agents are tried and the call does not get answered by any of them).
- Wrap-up Time (sec):
After a successful call, this will determine how long to wait (time interval in seconds) before sending a new call to a potential free agent.
(E.g., 15, 25, 30)
- Agent Auto Answer:
Choose whether the callback agent’s phone will be answered automatically. It only works for supported UAD.
(E.g., Yes, No, Not Set)
- Returning customer:
If this option is set to “Yes”, the system will recognize repeat callers and attempt to route them to the same agent they previously spoke with, if that agent is available. If the agent is unavailable, the call will be routed according to the ring strategy set on the queue. This feature helps maintain continuity and improves the customer experience by allowing them to connect with a familiar agent.
(E.g., Yes, No)
- Timeframe (days):
This field specifies the number of days within which the Returning Customer feature is valid. If a customer calls again within this timeframe, the call will be routed to the same agent they previously interacted with, provided that agent is available. If the agent is not available, the call will follow the ring strategy defined for the queue. Set the number of days according to your desired period for recognizing returning customers.
(E.g., For instance, if you set the Timeframe to 1 day, and a customer calls the queue and speaks to an agent, then calls again within the next day, the system will route the call to the same agent they previously interacted with, provided that agent is available. If the agent is not available, the call will follow the ring strategy defined for the queue. This ensures that customers who return shortly after their initial call are connected with a familiar agent, enhancing their experience.)
(E.g., 3, 5, 7)
NOTE: Returning customer entries older than 99 days will be automatically deleted from the system. This helps maintain system efficiency and ensures that only relevant data is retained.
Queue Rule
Queue Rule
- Queue Rule:
Select which queue rule will be in charge when a matching agent answers a call.

NOTE: If it is set to ‘None,’ it will work as it works now. Once a call enters the queue Rule for that call cannot be changed.
(E.g., Priority Agent Routing, Longest Idle Agent, Round-Robin Distribution )
Recording
Recording
- Record Queue Calls:
Select whether the recording of Queue calls is enabled or not.
(E.g., John enters the ‘Sales’ Queue and is transferred to Agent Smith. Their entire conversation is recorded and available for review from ‘Reports’.)

(Option buttons)
NOTE: Once this feature is activated, all Queue calls will be recorded in the desired sound format.
NOTE: Please note that if the ‘Record calls by default’ option is enabled on the system in the ‘Call Recordings’ section under ‘Servers’, it will be applied to all Queues created on the system. Additionally, users can enable or disable this option for each Queue respectively.
Incoming Options
The “Incoming Options” section in your general settings is designed to customize how incoming calls are handled.
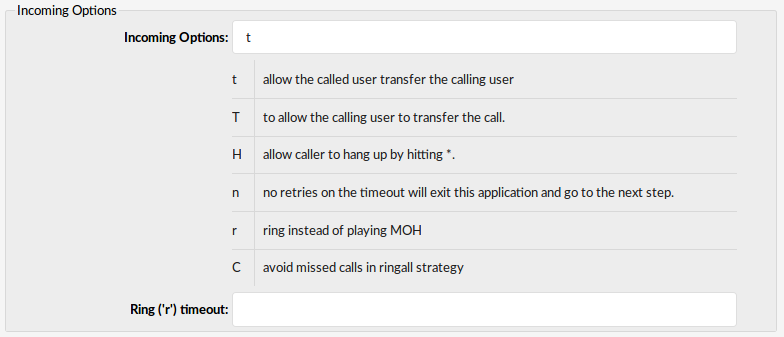
Incoming Options
- Incoming Options Set the advanced queue call options.
Available options:
- t – allow the called user to transfer the calling user
- T – allow the calling user to transfer the call
- H – allow the caller to hang up by pressing *
- n – no retries on the timeout; will exit queues and go to the next step
- r – ring instead of playing MOH
- C – avoid missed calls in the ringall strategy
- w – Instant Recording with Monitor
- x – Instant Recording with MixMonitor
([a-z])
- Ring (‘r’) timeout
When ‘r’ is selected as Incoming Options, and this timeout is used, the queue will first ring after entered number of seconds, after which MOH will start.
(E.g., 10)
([0-9])
Dial Options:
- t – Allow the called user to transfer the call by hitting #
- T – Allow the calling user to transfer the call by hitting #
- r – Generate a ringing tone for the calling party, passing no audio from the called channel(s) until one answers. Use with care, and don’t insert this by default into all of your dial statements, as you are killing call progress information for the user. You almost certainly do not want to use this. Asterisk will generate ring tones automatically where it is appropriate to do so. ‘r’ makes it go to the next step and additionally generate ring tones where it is probably not right.
- H – Allow the caller to hang up by dialing *
- C – Reset the CDR (Call Detail Record) for this call. This is like using the NoCDR command
- w – Allow the called user to start recording after pressing *1 or what is defined in features.conf, requires Set(DYNAMIC_FEATURES=automon)
- x – Allow the called user to start recording the conversation to disk via MixMonitor.
Exit Digit
The “Exit Digit” section in your general settings focuses on managing how callers can exit a call flow or navigate through the system, providing a user-friendly experience for managing their interactions.
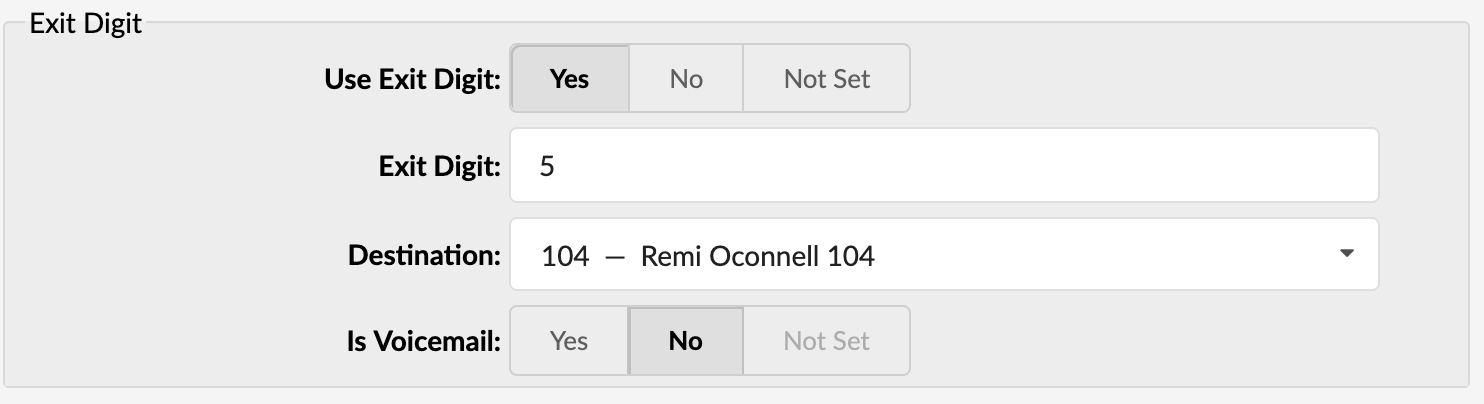
- Use Exit Digit
This option allows users to exit the queue by dialing a single digit, after which they will be automatically redirected to a predefined PBXware destination.
(E.g., John enters the sales queue. A greeting message explains that the user may quit the queue by pressing the digit defined under the ‘Exit Digit’ option, and be transferred directly to the operator or some other destination (set under the ‘Destination’ option)).
(E.g., Yes, No, Not Set)
(Option buttons)
- Exit Digit
Define the exit digit here. Once this digit is dialed by the user waiting in the queue, it will transfer the call to the set ‘Destination’.
(E.g., John enters the sales queue. The greeting message explains that the user may quit the queue by pressing the digit defined here (E.g., 9) and is transferred directly to the operator or some other destination (set under the ‘Destination’ option)).
([0-9])
- Destination
The local PBXware destination number is dialed once the ‘Exit Digit’ is dialed.
(E.g., John enters the sales queue. The greeting message explains that the user may quit the queue by pressing the digit defined under the ‘Exit Digit’ option and be transferred directly to the PBXware destination specified here).
([0-9])
- Is voicemail:
Set whether the exit digit destination is pointing to voicemail.
(E.g., Yes, No, Not Set)
(Option buttons)
Abandoned Calls Notification
The “Abandoned Calls Notification” section in your general settings is focused on managing how your organization is alerted about calls that are abandoned by callers before being answered, which can be crucial for improving customer service and operational efficiency.

Abandoned Calls Notification
Here you can set whether there will be any notification when the call inside a queue is abandoned.
- Enable Notification:
Enable or disable the Abandoned Calls Notification feature.
(E.g., Yes, No, Not Set)
(Option buttons)
- Notification E-mail address:
The e-mail address which will receive notifications of abandoned calls, where an abandoned call is one where the caller hangs up the call while waiting to be answered.
(E.g., admin@domain.com)
([a-z][0-9])
Callback
The “Callback” section in your general settings is designed to manage the processes and parameters associated with callback requests from callers, particularly those who have abandoned calls.
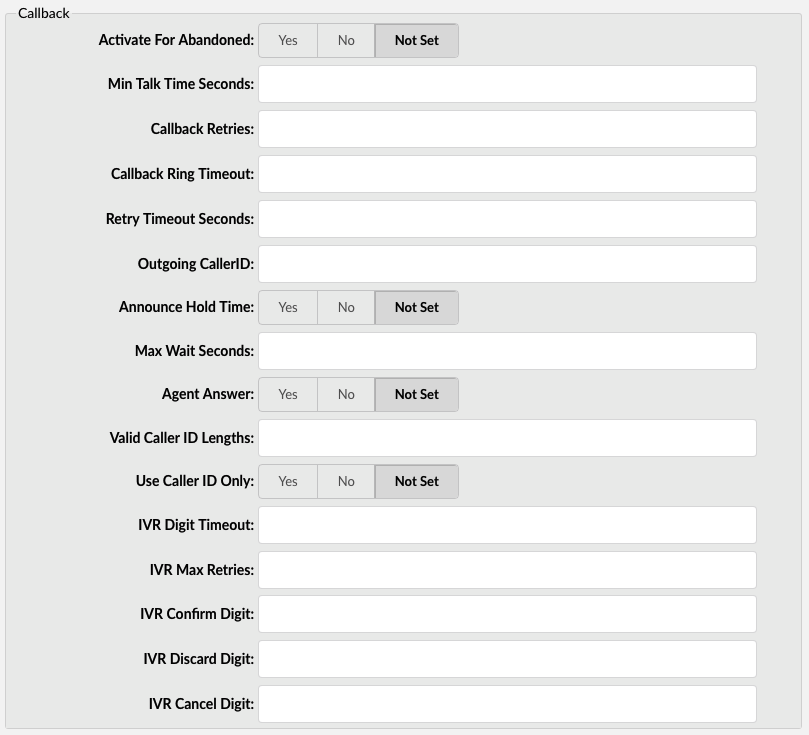
Callback
Queue Callback saves customers from long, frustrating waits and provides convenient phone support. With the Queue Callback feature, callers entering a phone queue can request a callback and then just hang up. No more long hold times, no more fighting other callers to get through – customers simply put in a call and then continue going about their work while waiting for the callback. It’s the perfect solution for everyone.
This feature is highly customizable and can be catered to meet your needs. Things such as the maximum wait time, number of callback retries, and the amount of time to wait in between retries can be customized. The menu has several options for clients to submit their information for a callback.
NOTE: Queue callback is a license-enabled feature, so if it is not available in your queue settings but you would like to have it, please contact your account manager for more information.
- Activate For Abandoned:
Whether Queue Callback will be activated for calls that were abandoned before an agent answered.
NOTE: Options Activate for Abandoned and Min Talk Time Seconds aren’t connected anymore, so if one wants to activate callbacks for abandoned calls, they will set ‘AFA’ only, and if they’re going to activate callbacks for calls hung up in first ‘N’ seconds after agent answer, they will set ‘MTTS’.
- Min Talk Time Seconds:
The minimum time the call must last after an agent answers it for the callback not to be activated.
For example, suppose we set this value to 10. In that case, calls that get disconnected in less than ten seconds after the agent answers the call will be called back by the PBXware, assuming that it disconnected unintentionally.
(E.g., 10, 15, 25)
- Callback Retries:
A number of retries, the callback will try to reach the number of abandoned calls.
(E.g., 3)
([0-9])
- Callback Ring Timeout:
Time in seconds that the UAD/Phone will ring for a callback.
(E.g., Set 30 in this field, and callback will ring for 30 seconds)
([0-9])
- Retry Timeout Seconds:
Delay between callback retries in seconds.
(E.g., 60)
([0-9])
- Outgoing CallerID:
Set the CallerID the caller will see when the system performs the callback.
(E.g., John Doe <1000>)
- Announce Hold Time:
Set this value to Yes for the system to tell the called user how long they will wait until an agent answers their call.
(E.g., Yes, No, Not Set)
(Option buttons)
- Max Wait Seconds:
This is the maximum time that system will wait to make a Queue Callback.
(E.g., Max Wait Seconds is set to 900, and the caller has activated the Callback feature. The callback will wait for 900s for the free agent to be connected to the caller. If there are no available agents in 910 seconds, the Callback will not make a call).
([0-9])
- Agent Answer:
Whether to first call the agent before the callback tries to reach the number of abandoned call.
(E.g., Yes, No, Not Set)
(Option buttons)
- Valid Caller ID Lengths:
Set the value for a valid caller ID length, separated with commas.
(E.g., 3,6,9,12)
([0-9])
- Use Caller ID only:
Use callback only with the Caller ID rather than allowing the caller to enter a number at which they would like to be called.
(E.g., Yes, No, Not Set)
(Option buttons)
- IVR Digit Timeout:
Type in and confirm the number of seconds the system should wait before the IVR Digit Timeout. The default value is 3 seconds.
(E.g., 5)
([0-9])
- IVR Max Retries:
The maximum number of wrong entries in the IVR before the user is disconnected.
(E.g., 3)
([0-9])
- IVR Confirm Digit:
Press this number to confirm your entry in the callback IVR. Default 1.
(E.g., 2)
([0-9])
- IVR Discard Digit:
Press this number to discard your entry in the callback IVR. Default 2.
(E.g., 3)
([0-9])
- IVR Cancel Digit:
Press this number to cancel your entry in the callback IVR. Default 3.
(E.g., 1)
([0-9])
Callback Announcements
- Caller Announce:
Play a custom message to a caller before they answer the call.
The file name has to be in the following format ‘qc-announce-caller-announce-$NAME.gsm’.
- Agent Announce:
Play a custom message to a queue agent before they answer the call.
The file name has to be in the following format ‘qc-announce-agent-announce-$NAME.gsm’.
Rules
Different agents in the queue can have different penalties. SBR allows one to create Sets of Rules to change the value of the Min Penalty and Max Penalty channel variables in mid-call. This means opening a call to more members or potentially a different set of members is possible. Agents with different penalties can answer a call at different periods of time, depending on the Rule.
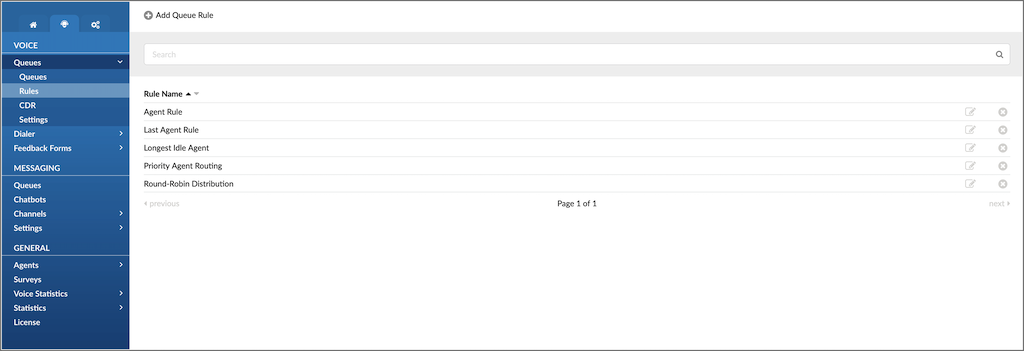
Rules
This screen lists all system rules with the following details:
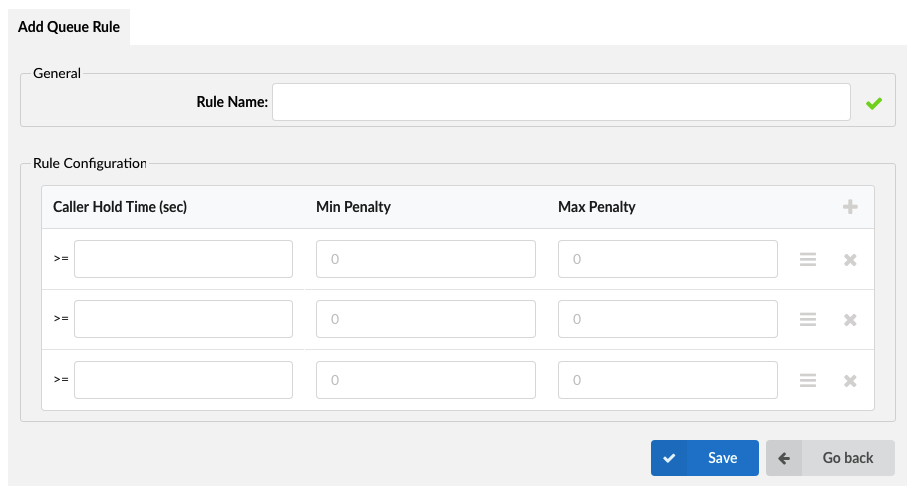
Add Queue Rules
General
- Rule Name
Rule name.
(E.g., Support Rule)
(Display)
Rule Configuration
- Add a new rule.
- Delete a rule.
Search

Search
Search Rules by Name.
- Search:
Search phrase
(E.g., Provide a search phrase here and hit enter to filter the records)
([a-z][0-9])
Add/Edit Queue Rule
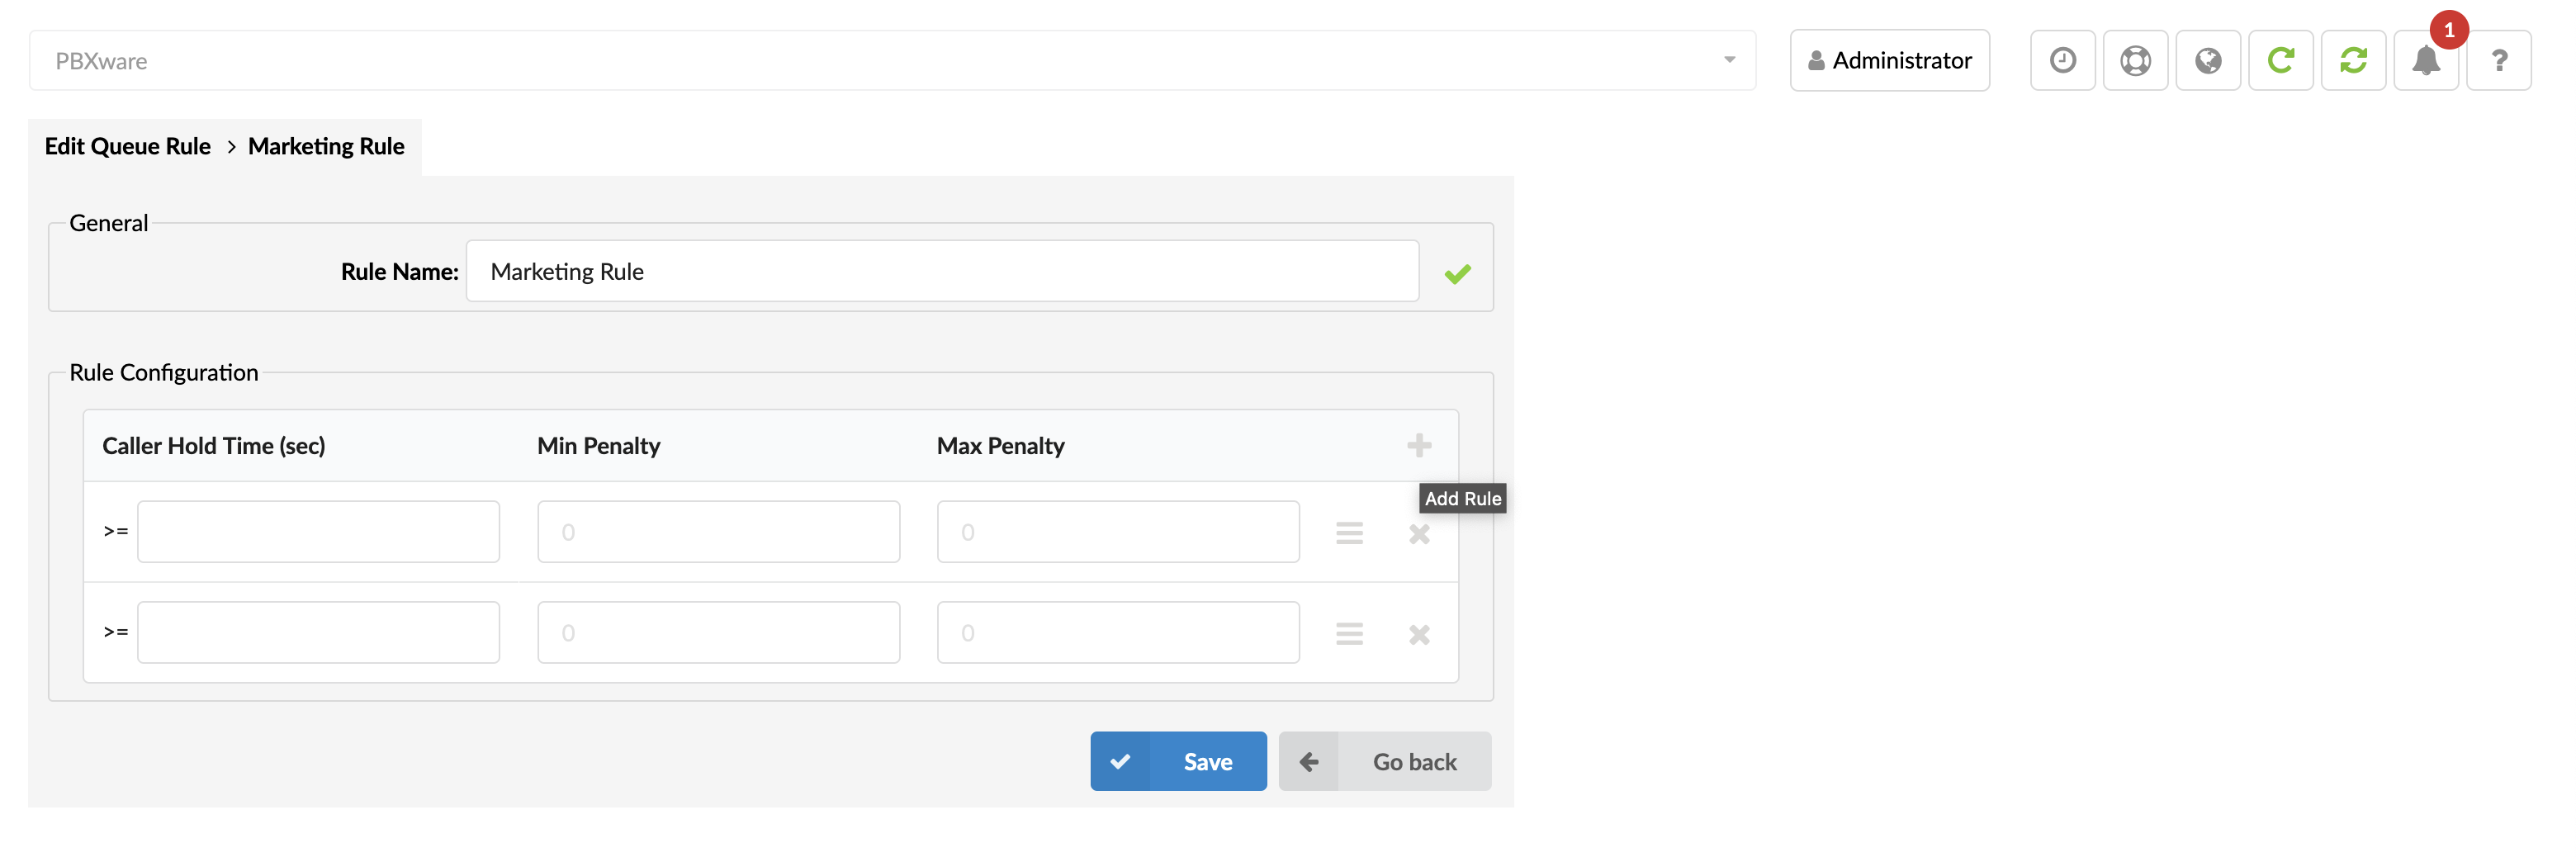
General
- Rule Name:
Name that can be set as rule name.
Rule Name
(E.g., Support Rule)
([a-z][0-9])
- Rule Configuration
Caller Hold Time (sec):
Caller hold time in the queue when a rule configuration change occurs.
(E.g., >= 60)
([0-9])
Min Penalty:
Agents with penalties smaller than this value can’t answer the call.
(E.g., 3)
([0-9])
Max Penalty:
Agents with penalties larger than this value can’t answer the call.
(E.g., 10)
([0-9])
Add button icon
 This button is used to add a new row into the Rule Configuration table.
(button)
Drag to reorder icon
 Click on this button on the move to reorder Rule Configuration table.
(button)
Remove icon
 Remove row from the Rule Configuration table.
(button)
TIP:
Default values for Min and Max Penalties are 0, which means that when a call comes in queue only agents with penalties 0 can answer a call.
CDR
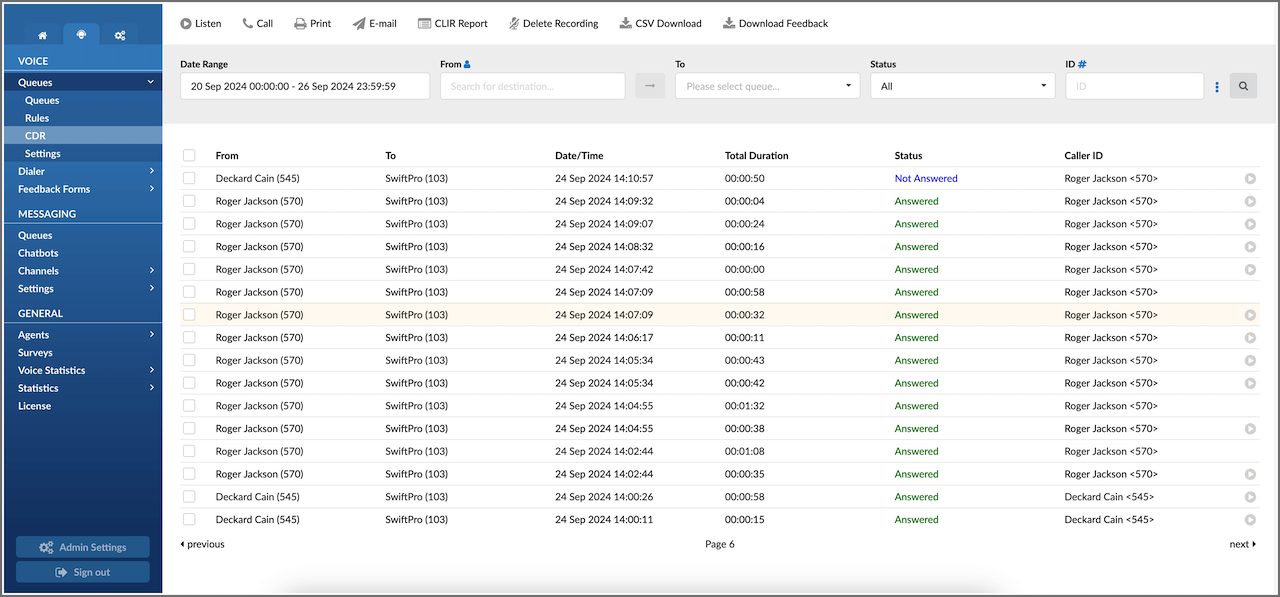
Queues CDR
- Listen
Once the ‘Listen’ icon is displayed next to a call record, it means that the specific queue call was recorded.
There’s also an integrated recordings player, enabling users to listen to PBXware queue call recordings directly from their browser and navigate through the recording with a simple mouse click.
Also, the Download recordings option is available if you want to store it on your hard drive.
- Call
PBXware extension that will make the call.
(E.g., Provide any PBXware extension number here, 101, 205, 501 )
([0-9])
- Destination
A destination that the ‘Caller’ extension will dial.
(E.g., To select a destination, check the box next to a CDR record first. This field will display two destinations listed under the ‘From’ and ‘Destination’ selected records)
(Select button)
TIP
After setting the ‘Caller’ and ‘Destination’ extensions, click the call icon.
Check the box next to a call record and click the ‘Print’ button. This action will open a new pop-up window with the printing interface.
Click on the ‘Email’ button to send all of the reports listed on the page or select a box next to a report and click on the ‘Email’ button to send only the selected ones.
Furthermore, provide an e-mail address where the report will be sent and click the ‘OK’ button to proceed or ‘Cancel’ to abort the email action.
- CLIR Reports
CLIR (Command Line Interface Record) details
(E.g., Select the desired call record and click this button to view more technical details about the call. A small pop-up window will open with the data).
NOTE: When experiencing any kind of unexplained problems, this is the data you need to send to the technical support team
(Command Button)
CLIR report has been improved to show when the channels limit defined in the license is exceeded, the CLIR will show the exact numbers ( current > max ).
- Delete Recording
Deletes the recorded calls.
NOTE: For this command to be displayed, the record queue calls option needs to be set in the settings.
(E.g., Select a recorded call and click this button to delete it from the system)
- CSV Download
Download data as a .csv (Comma Separated Value) file.
(E.g., Click this button to download the .csv file to your desktop)
- Date Range
Select the date range that you wish to see the CDRs. You can use a few predefined ranges or freely use the Custom range per your needs.
- From
Enter the specific caller destination that you wish to see CDRs for.
- To
Please choose the queue from the drop-down menu for which you wish to see CDRs.
- Status
Choose the status of the call (e.g., Answered, Unanswered, Busy, or select ALL) to filter the CDRs based on the status.
- ID#
Two different types of IDs can now filter CDRs. First is Unique ID, and by filtering with this one you get the same functionality as before (set by default).
By clicking the blue “#” sign right to the “ID” label you change the type of ID to Linked ID. Filtering CDRs with this type of ID will list all CDRs that are “linked” to the selected one and you will be able to see the call flow where the selected CDR is included.
- Additional search options:
Show rated calls only
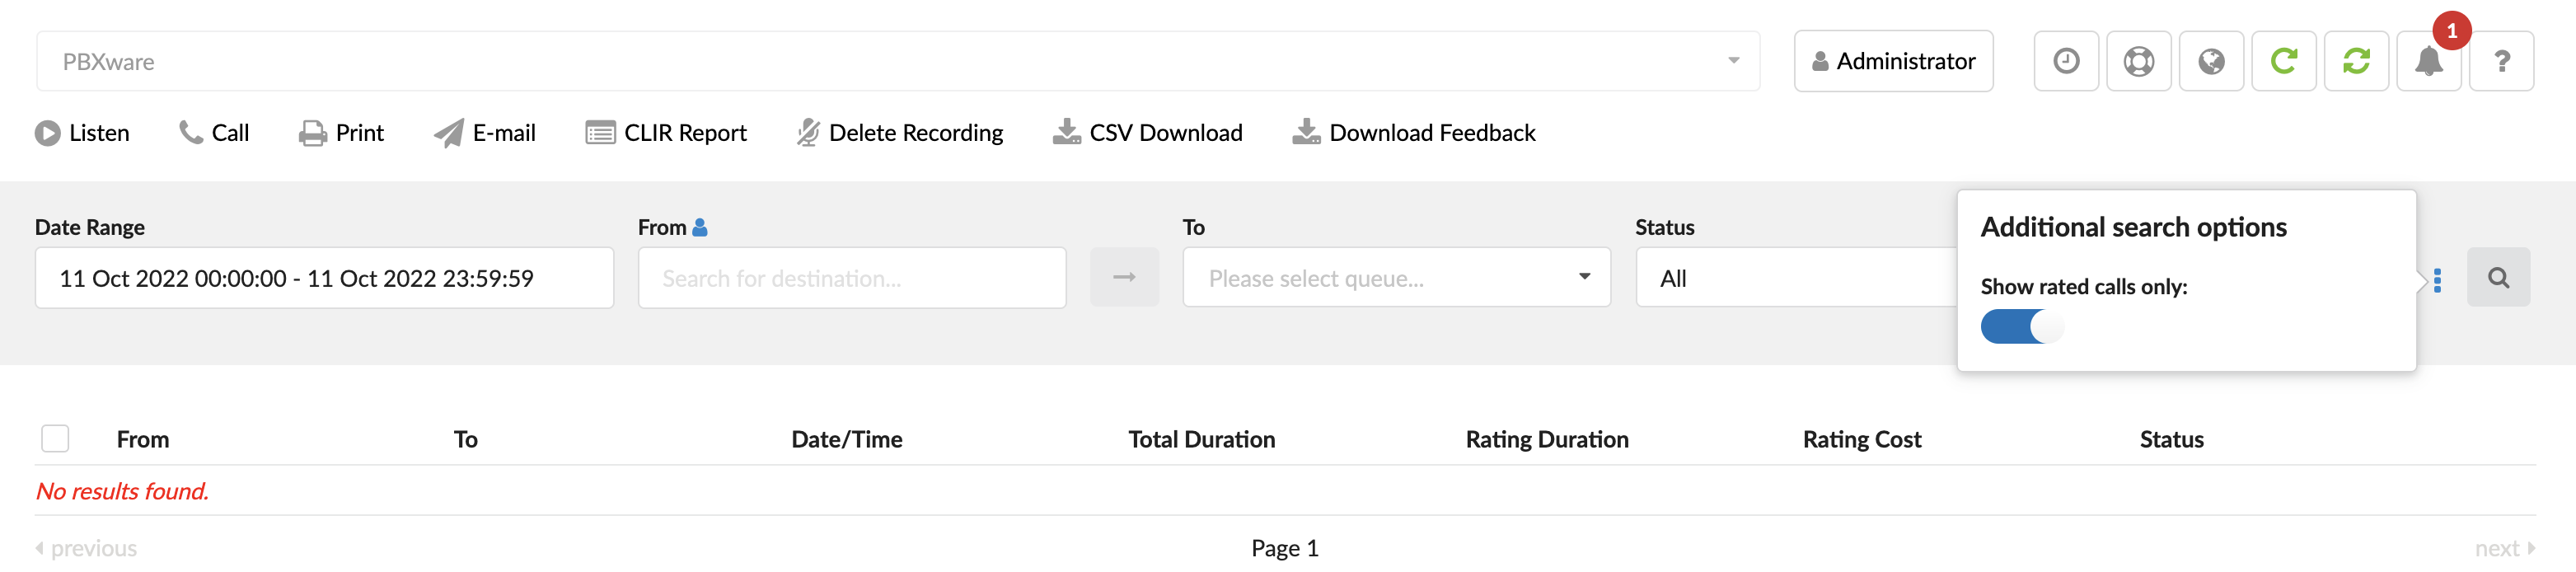
(toggle button ON or OFF)
Users can choose to display only those calls with a cost in the report. The report will feature ALL calls if this option is not selected.
NOTE: The above can be done in Online Self Care with the same options.
TIP: After making changes to the search filter, click the search icon.
Settings
The “Queues Settings” section in your general settings is focused on configuring various aspects of call queues, optimizing how calls are managed and enhancing overall efficiency in handling customer interactions.
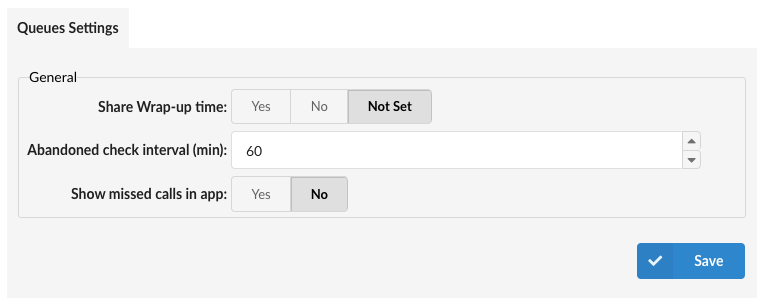
Queues Settings
General
NOTE: In version 7.5 of PBXware, the “Persistent Members” section has been removed. If this setting was previously enabled (set to ‘Yes’), it will remain as ‘Yes’ in the queues.conf file after the update, but will automatically change to ‘No’ after the first save of the Voice Queues settings. Starting from version 7.5, the “Persistent Members” option will no longer be visible in the GUI and will default to “No” in the queues.conf configuration file.
- Share Wrap-up time
If one agent is a member of more queues, for example, Q1 and Q2, and for Q1, the wrap-up time is set to 5s, but in Q2, the wrap-up time is not set. By turning on this option, Q1 and Q2 will share the same wrap-up time for the common agent.
(E.g., Yes, No, Not Set)
(Option buttons)
- Abandoned check interval (min)
How often to check for abandoned calls.
(E.g., 60, 80, 90)
([0-9])
- Show Missed Calls in App
The “Show Missed Calls in App” option allows administrators to control whether missed calls originating from Queues are displayed in client applications. This setting addresses the need to reduce missed call notifications when multiple agents are alerted but do not answer, which can lead to an overwhelming number of missed call entries.
When set to Yes, agents will receive missed call notifications for Queue calls they did not answer, which can help them track missed interactions from Queue calls.
When set to No, the app will only show missed calls originating from sources outside the Queue, reducing notification clutter for users who prefer to avoid missed call entries for each missed Queue call.
(E.g., Yes, No)
(Option buttons)