Requirements
Before users start using gloCOM for Microsoft Teams, they have to make sure that they have these applications installed:
- Microsoft Teams desktop or web app.
- gloCOM for Teams embedded app.
- gloCOM for Teams desktop plugin.
License for gloCOM for Teams:
- Desktop and web require the gloCOM business license.
- Mobile requires the gloCOM GO license.
Supported operating systems:
- Windows 10 or later.
- macOS 13.7 (Ventura) or later.
- Ubuntu 22.04 (gloCOM for Teams web application only).
Supported browsers:
- Google Chrome
- Microsoft Edge
- Mozilla Firefox
Supported Microsoft 365 licenses for the gloCOM for Teams desktop and web versions:
- For Organizations Using Teams:
- Enterprise E3 and E5.
- Business Standard and Business Premium.
- If your organization already uses Microsoft 365 with Teams, you can use it for app deployment.
The gloCOM for Teams application must be deployed and published by your IT administrator. For more details, please visit the Create and Publish App to Your Organization guide.
Installing the gloCOM for Teams Embedded App (Desktop & Web)
If your IT administrator has already installed the app for you:
- Open Microsoft Teams and click on the Apps icon (three dots) in the left-hand navigation.
- Search for and select gloCOM to launch the app.
- Right-click on the gloCOM icon and select Pin to add it to your main sidebar for quick access.
Install the app by yourself:
- Open Microsoft Teams and click on the Apps icon (three dots) in the left-hand navigation.
- Click Added by your org, find the app, and then click Add.
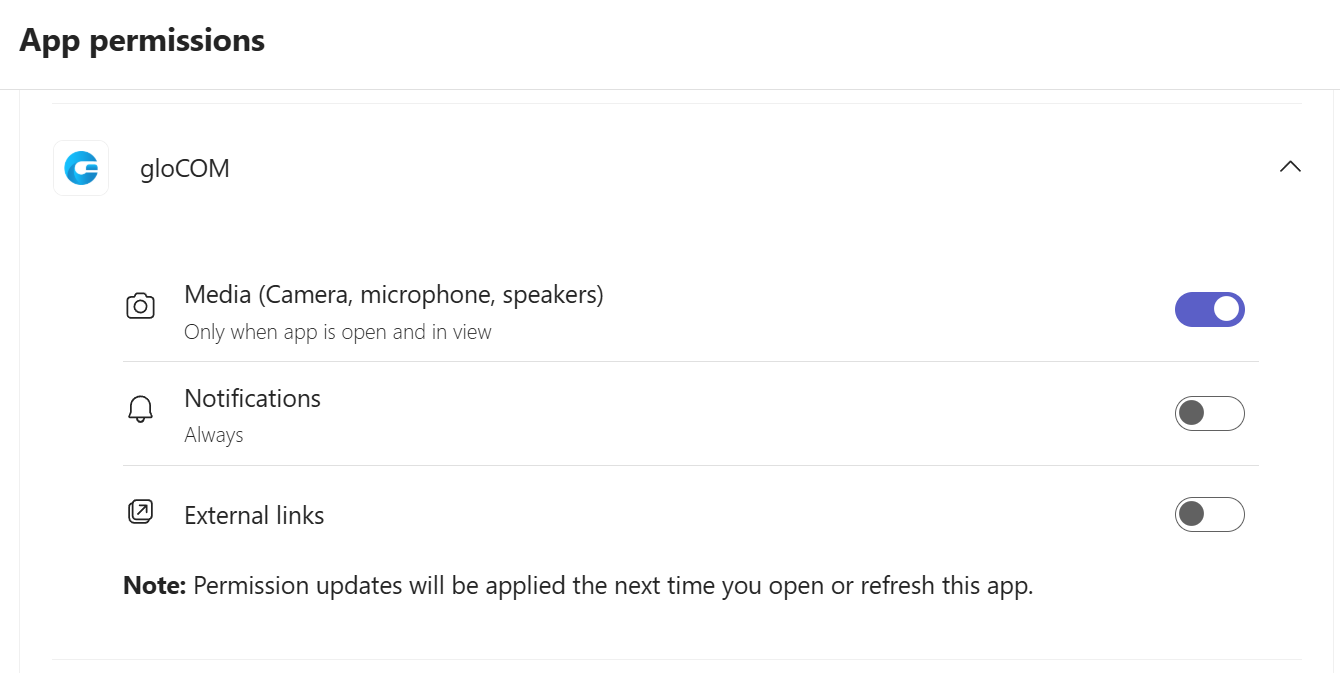
Granting Microphone Access
- On the app settings page, scroll down to locate the App permissions section.
- Under permissions, locate gloCOM and enable microphone access.
gloCOM for Teams Desktop Plugin
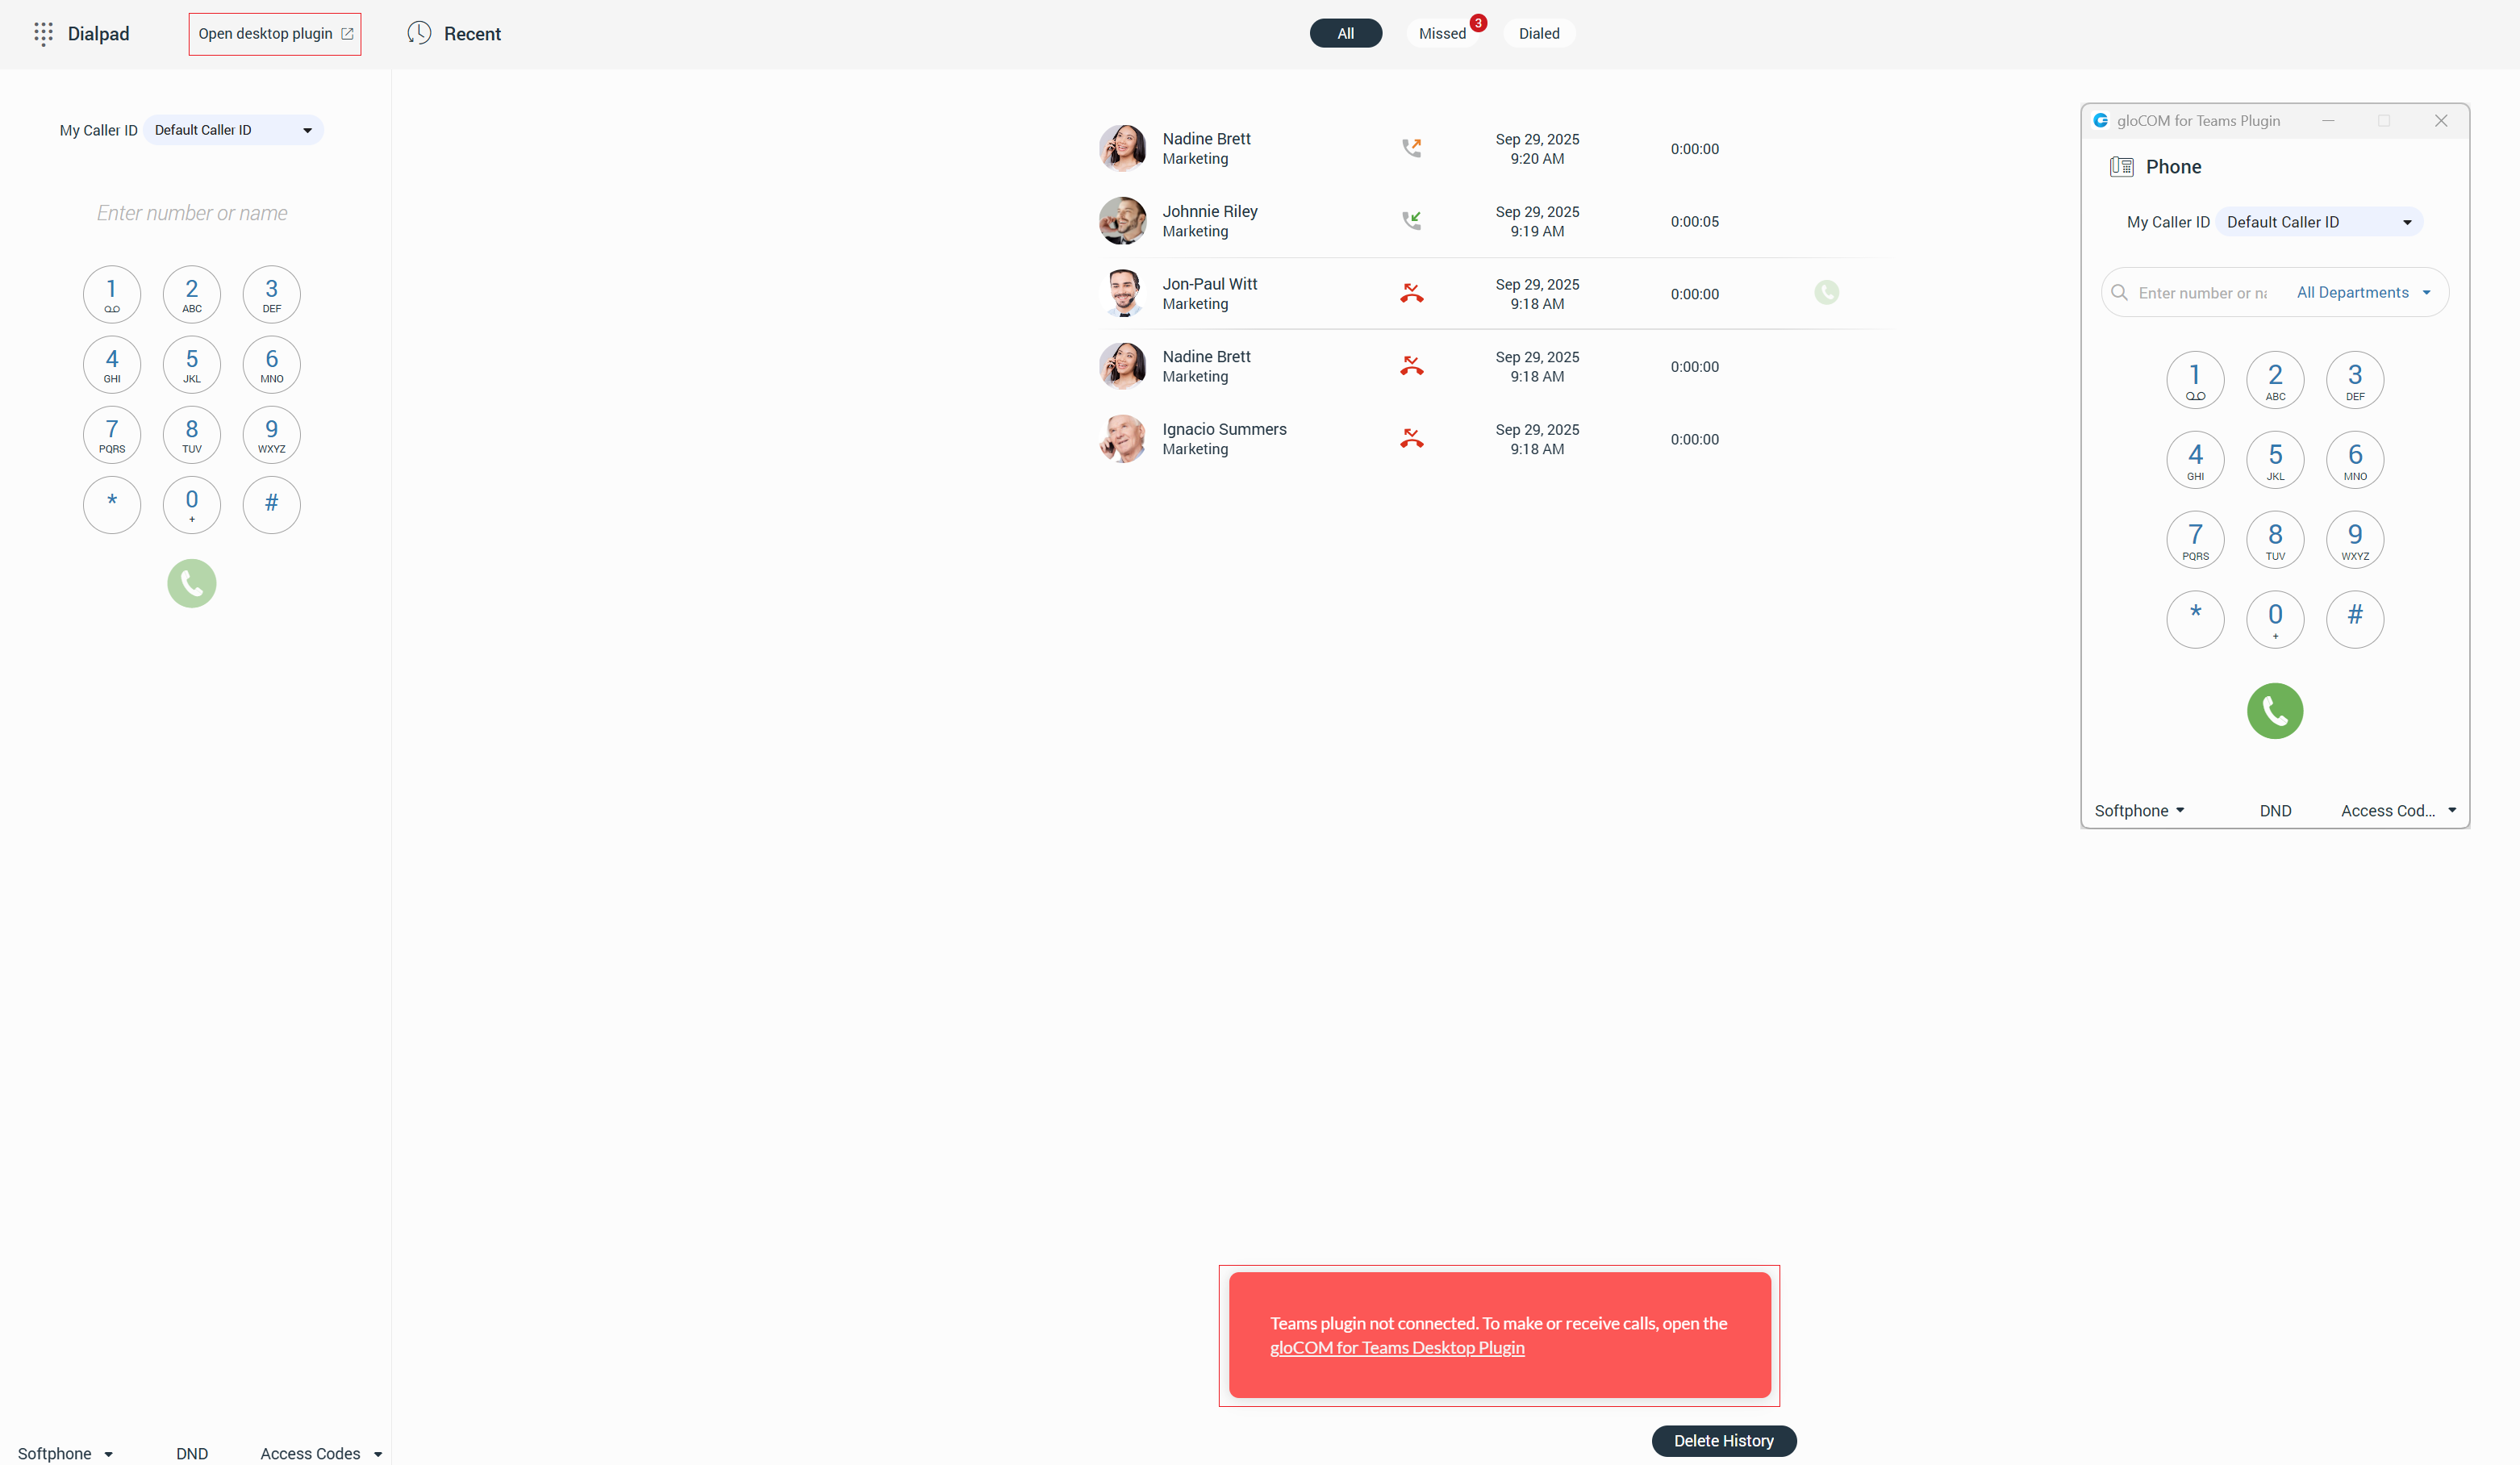
The gloCOM for Teams desktop plugin must be downloaded and installed to make and receive calls. To do this, click on the gloCOM for Teams Desktop Plugin link or the Open desktop plugin link to download or launch the Desktop plugin. Once opened, calls can be made or received.
The gloCOM for Teams plugin will automatically connect to the gloCOM for Teams.
To place or receive calls using gloCOM for Teams, the user’s extension must have WebRTC enabled on their PBXware system. Additionally, TLS settings must be activated on the PBXware system. If the user attempts to start a call without these options enabled, the following pop-up message will appear: Calls unavailable. WebRTC is disabled for your extension. Please contact your system administrator to enable it.
Once these conditions are met, a call can be placed or received without issues.
Only one gloCOM for Teams client can connect to the plugin at a time. This prevents conflicts, such as multiple users or different PBXware instances attempting to connect simultaneously.
Desktop Plugin Features
Once the desktop plugin has been installed, users can access these features in gloCOM for Teams plugin by right-clicking the tray icon:
- Phone: Displays the phone dialpad window, allowing users to make and receive calls.
- Preferences:
- Enable autorun: Allows users to turn auto-launch on or off, which enables the plugin to launch automatically when their computer boots up. To do this, they need to select the Enable autorun option. Auto-launch is enabled by default.
- Notifications: Displays notifications for calls, voicemails, and SMS messages. Clicking on a notification opens the Temas app, showing the specific notification view.
- About: Displays the About section, which provides users with information about the application and the PBXware system to which it is connected. Users can easily access it by selecting the About option from the drop-down menu and copying the content to the clipboard by clicking the Copy info button.
- Quit: Allows users to quit the gloCOM for Teams plugin application. Before quitting, a confirmation dialog will appear informing users that closing it will disable call functionality.
For more information on using the gloCOM for Teams plugin, refer to the Phone section.
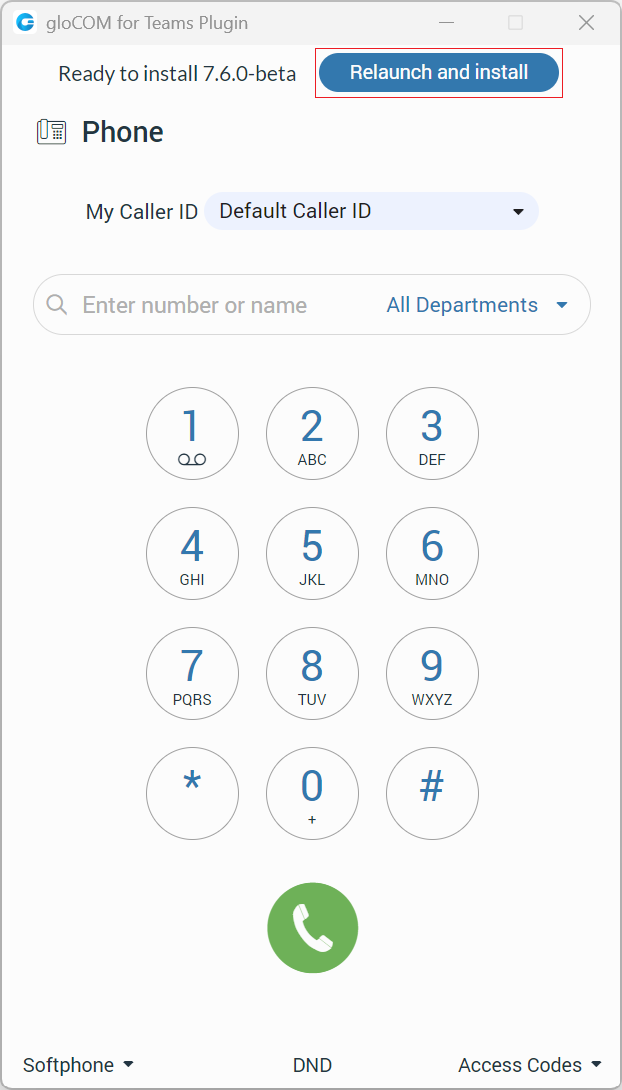
Check for Updates
If an online official product update is available, the plugin will automatically check and download it. To install the updates, the user needs to click the Relaunch and install button.
Introduction
Nowadays, VoIP technology is developing more than ever to achieve the best possible quality of long-distance communication and reduce the costs of telecommunication services. Therefore, more straightforward and more user-friendly communication tools are needed. The gloCOM for Teams application represents a solution to meet these needs.
It allows users to communicate and collaborate with their colleagues by making phone calls and conference calls, exchanging SMS messages, searching contacts, receiving voicemails, and more.
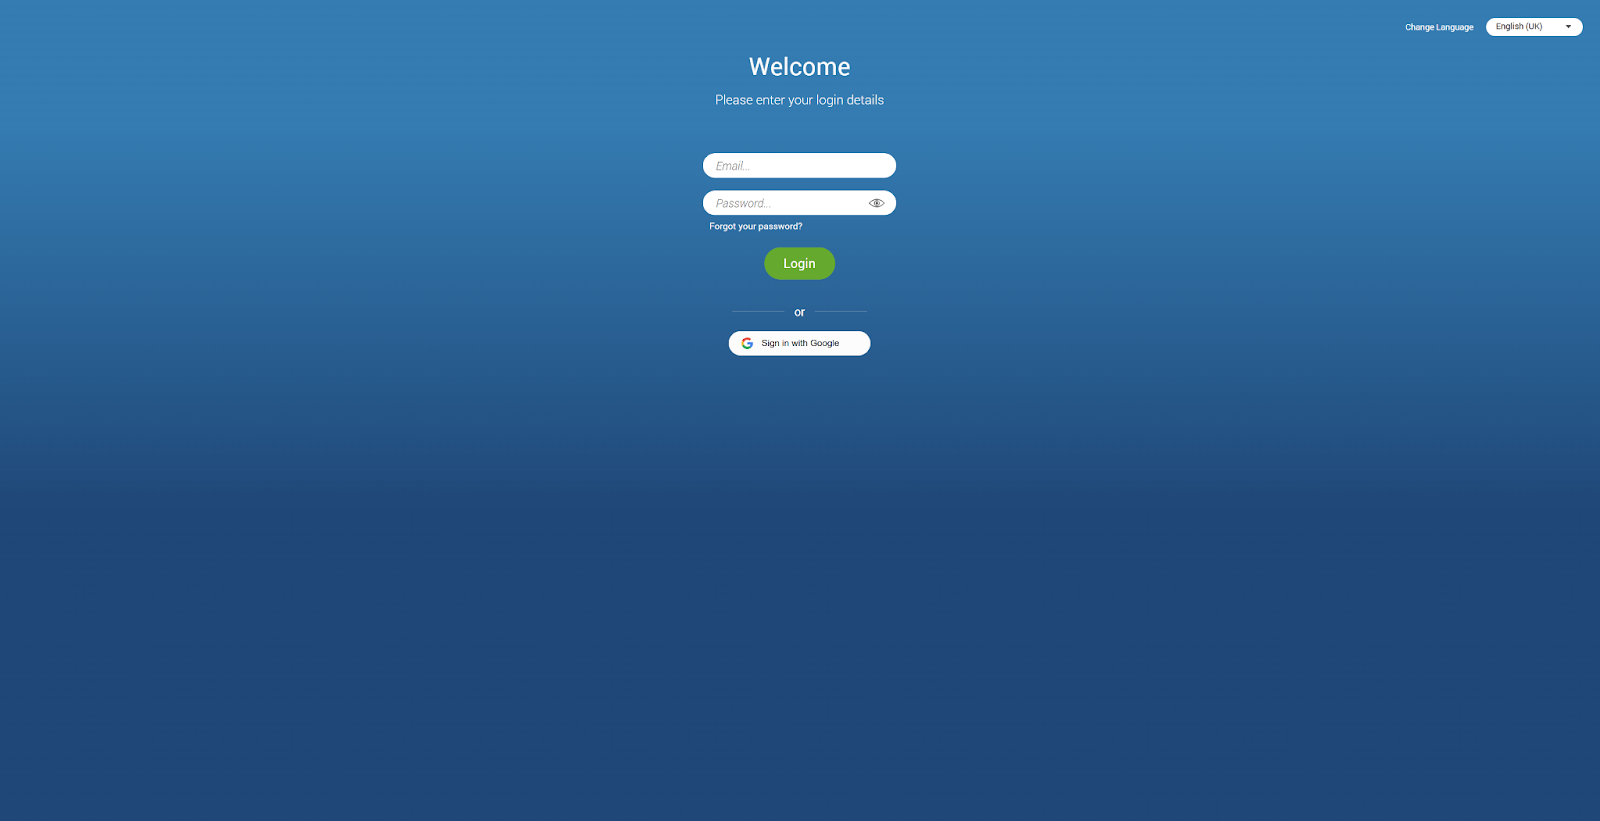
Login
To use gloCOM within Teams, users must first log in to Teams using their Microsoft account. Once logged in, click on the gloCOM icon in the navigation bar, which will open the gloCOM login screen, where users can choose between two login methods: Password Login or Single Sign-On (SSO) Login.
Password Login
When using the Password Login method, users are required to enter their email address and password to log in.
Account details:
- Email: Please provide the email address associated with the user’s Extension (e.g., test@testmail.com).
- Password: Enter the password created during the first-time login to gloCOM (e.g., 93sU2e_2%).
Additional options:
- Forgot your password: If users forget their password, they can recover it by clicking the Forgot Your Password link. After doing so, they will receive a password recovery link via email. If they have multiple gloCOM accounts associated with that email, they will need to specify the extension number of the account that they wish to recover.
- Show Password: Allows users to show or hide their password.
- Change Language: Enables users to switch the language used throughout the app.
After entering the email address and password, click the Login button. gloCOM will then attempt to connect to the specified server using the provided account details.
If the user’s account details are incorrect, an orange warning message will appear:
Login Failed: Username or Password is incorrect.
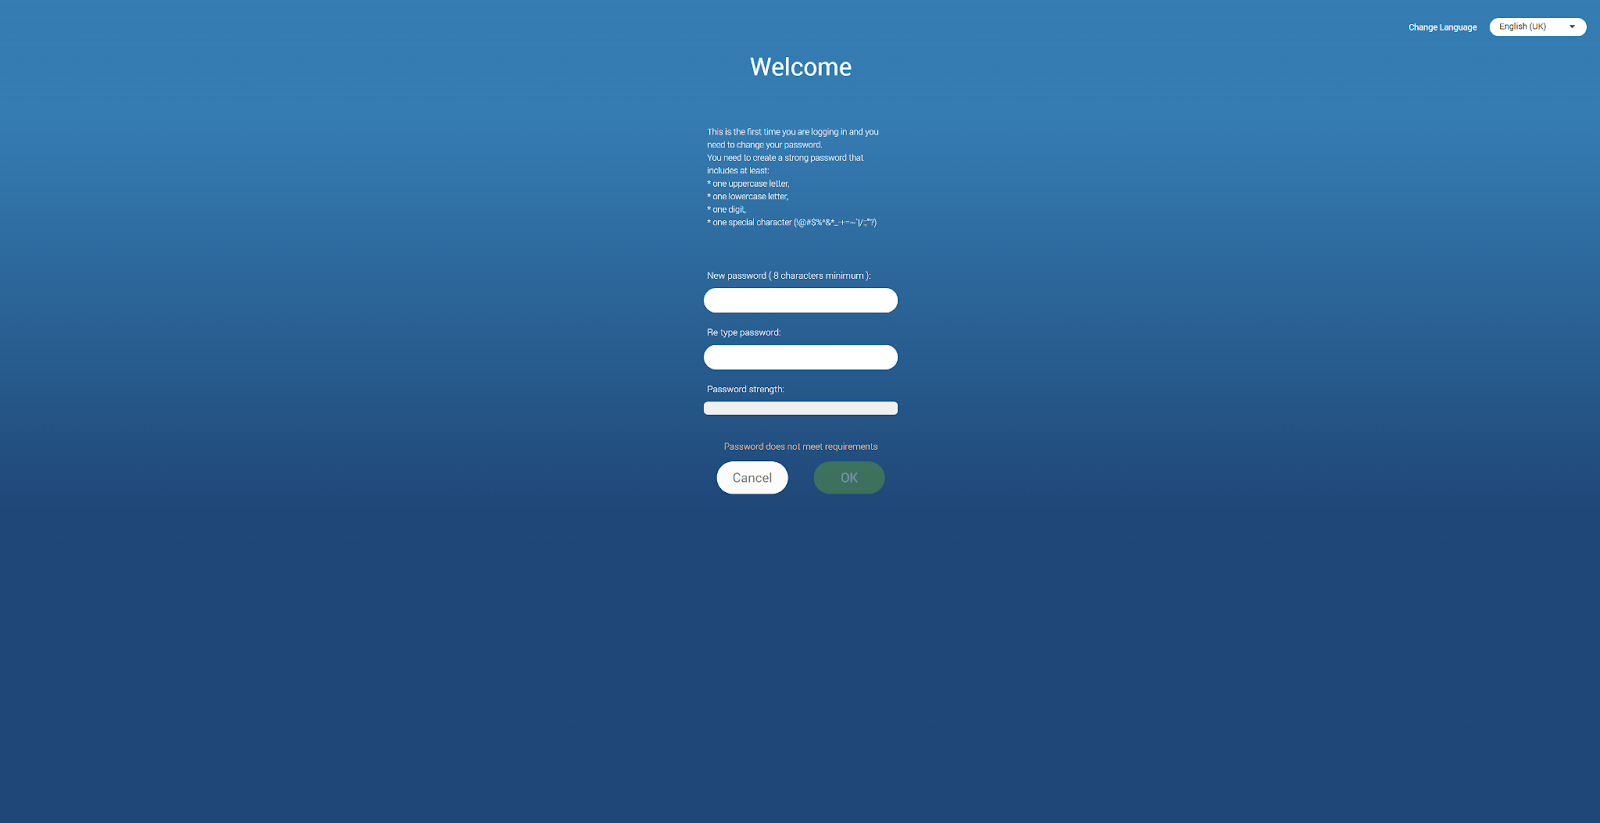
If the details are correct, users will be redirected to the first-time login screen, where they will be prompted to change their password, as this is their first time using the gloCOM account.
The new password must contain at least eight characters and meet the required criteria. Users are required to change their passwords upon logging in, and once changed, this information is not known to any system administrator.
The allowed special characters for password creation include: !@#$%^&*_-+=~`|/:;”‘?.
If users already use one of the gloCOM products, clicking the Login button will redirect to the gloCOM home screen.
Multiple gloCOM accounts may share the same email address.
Two-Factor Authentication (2FA) on Login
Two-factor authentication (2FA) is an additional layer of security designed to verify that users attempting to access an online account are who they claim to be. First, users enter their username and password. Instead of gaining immediate access, they will be prompted to provide a code generated by an authenticator app to proceed with the login.
To set up 2FA, log in to the app, navigate to Online Self-Care, click the 2-Step Verification button, and follow the provided instructions.
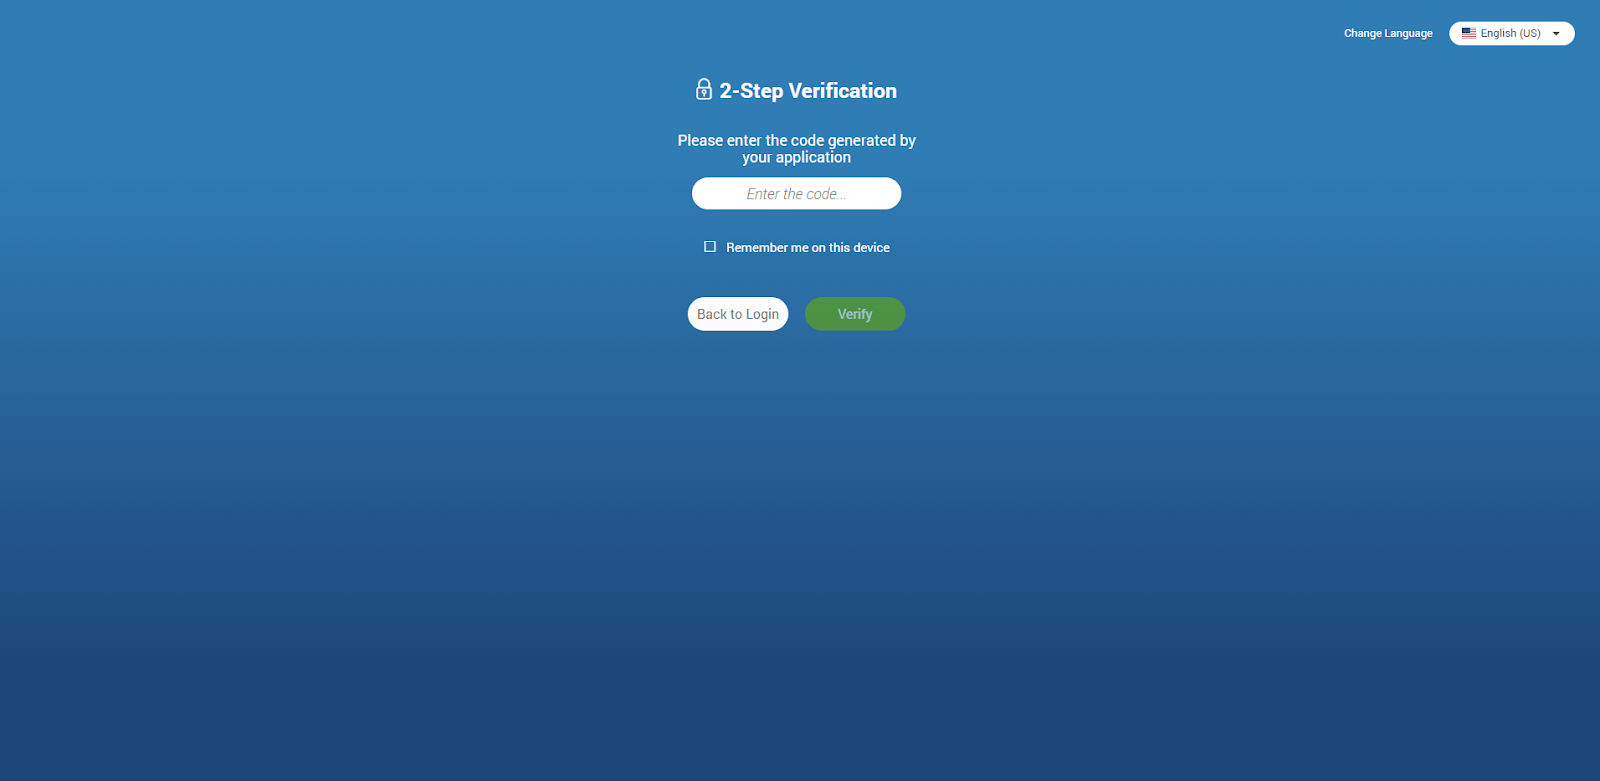
If the user has not set up 2FA and 2FA has been enforced on the server side, the following message will be displayed after clicking the Login button: 2-Step Verification needs to be configured on Online self-care to proceed with login. Configure it now. Otherwise, the user can access the app by entering their username and password.
After setting up 2FA, users will be asked to provide the code generated by the authenticator app to proceed with the login process on the next attempt. Additionally, users can select the Remember me on this device option, allowing them to skip entering the 2FA code each time they attempt to log in.
Upon logging out of the app, a confirmation dialog will appear with the message: You are about to log out. Please be aware that your 2FA token will be removed, and you will need to enter a new 2FA code the next time you log in.
Clicking the Remembered devices button within Online Self Care displays a list of the user’s currently logged-in devices. Clicking the Logout button will log the user out of the desired device.

Two-factor authentication (2FA) verification can be reset through Online Self-Care or by the server administrator.
Single Sign-On (SSO) Authentication
Single Sign-On (SSO) allows users to access multiple websites and applications using a single set of credentials.
This feature must be enabled in a license and configured on PBXware before it can be used.
While using gloCOM, users can choose whether to log in to the app using their Google or Microsoft account.
The SSO feature cannot be combined with two-factor authentication (2FA).
Home Screen
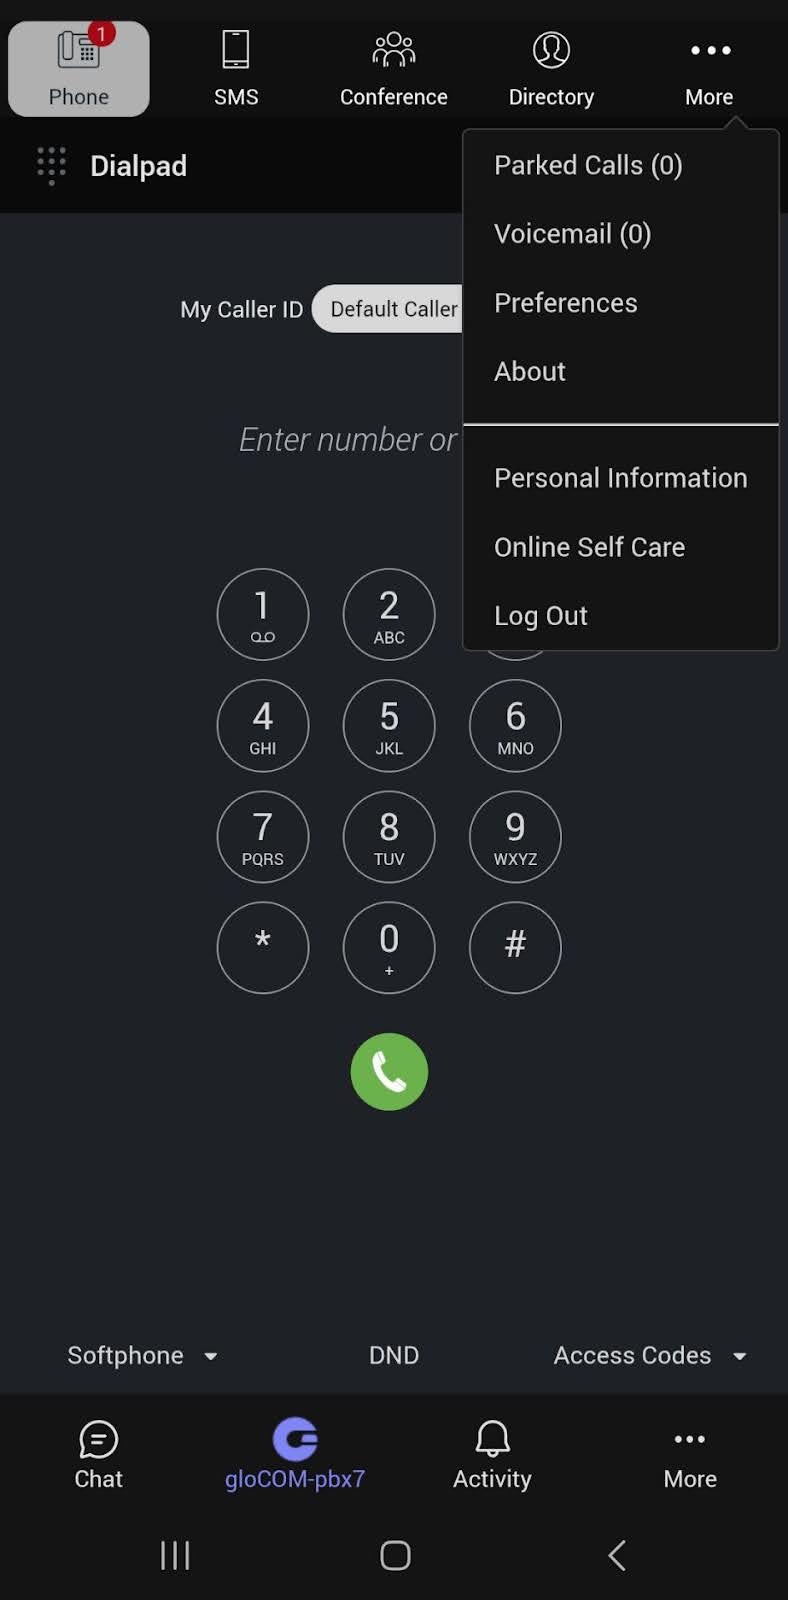
After successfully logging into gloCOM for Teams, users will see the home screen. This home screen provides easy access to various options, including Phone, SMS, Conference, Parked Calls, Voicemail, and More.
Navigation Bar
The navigation bar at the top of the screen includes Phone, SMS, Conference, Parked Calls, Voicemail, and More options.

The following list shows the meaning of these options:
- Phone: This option opens a Dialpad and a Recent Calls section. The phone allows users to place and receive calls, as well as view their recent call history.
- SMS: This option opens the SMS conversation list and automatically selects either the first conversation or the last selected conversation. If no previous conversation has been selected, the first one in the list will be chosen.
- Conference: This option opens a Conference screen, where users can start static and dynamic conferences.
- Parked Calls: This opens a screen displaying parked calls, allowing users to pick up any call from the list.
- Voicemail: This option opens a Voicemail screen, where users can listen to their voicemail messages.
- More: This menu includes several options:
- Preferences: Users can set their audio devices, customize appearance and turn on/off plugin settings.
- About: Users can view information about the application and provide feedback.
- Personal Information: This option enables users to view and update their personal details.
- Online Self-Care: This opens the Online Self-Care portal.
- Log Out: This option logs the user out of gloCOM.
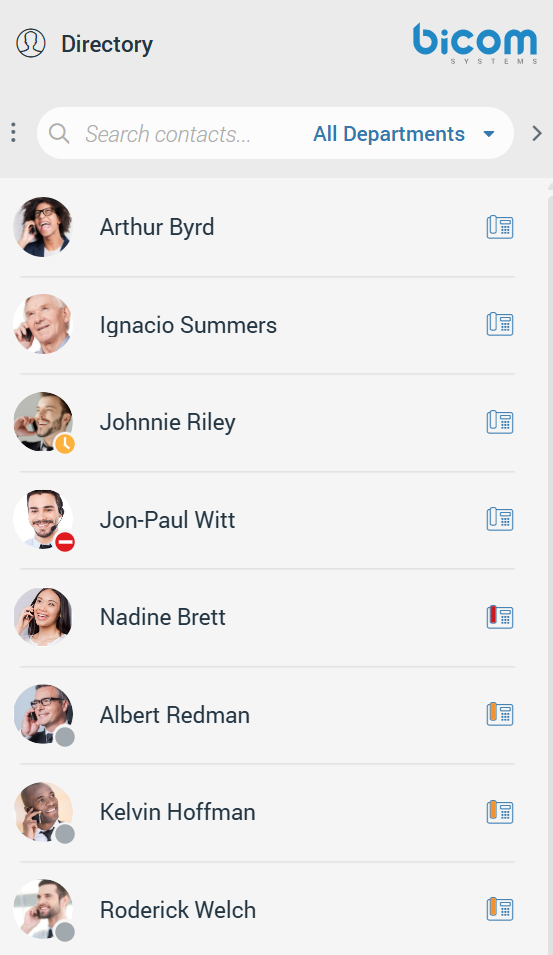
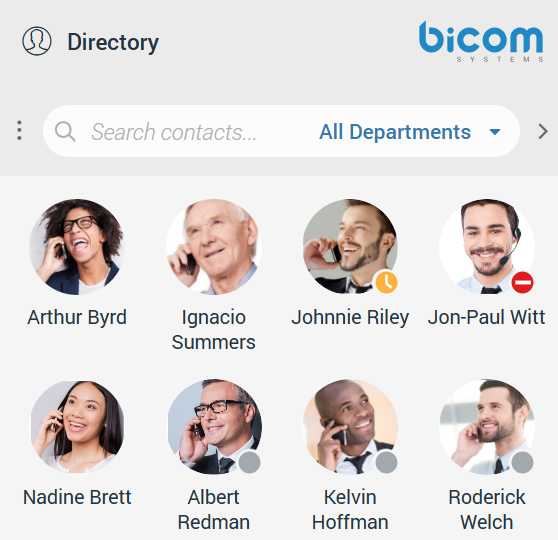
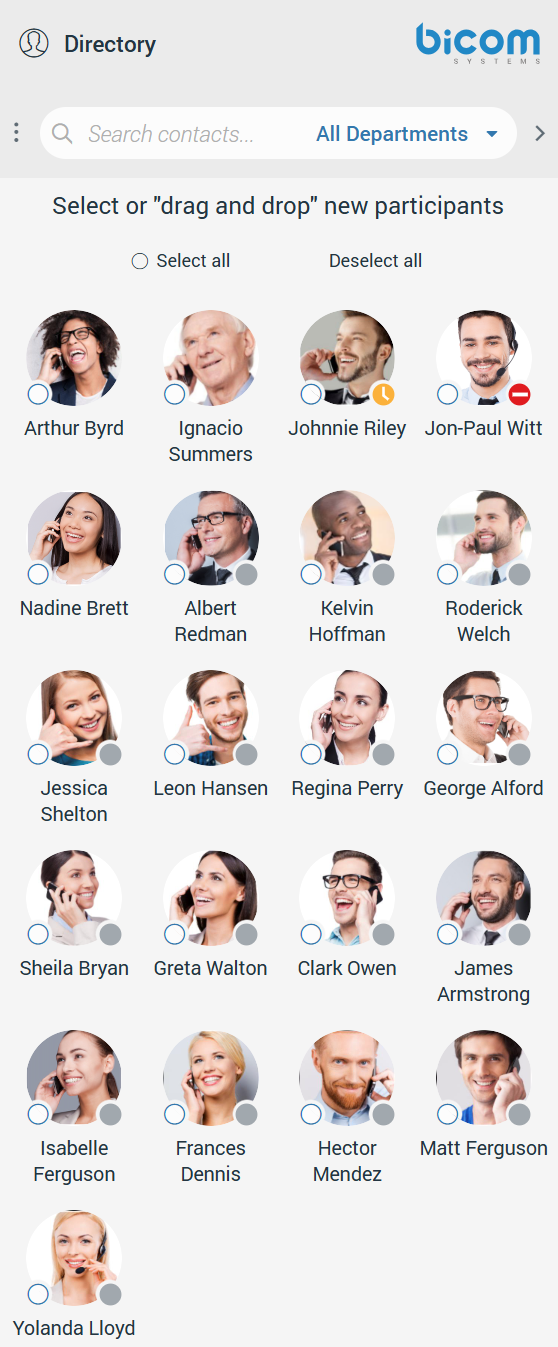
Contact List
The contact list is located on the right side of the screen. It lets users see which colleagues are available, busy, or away from their desks. The contact list can be displayed in either List View or Grid View.
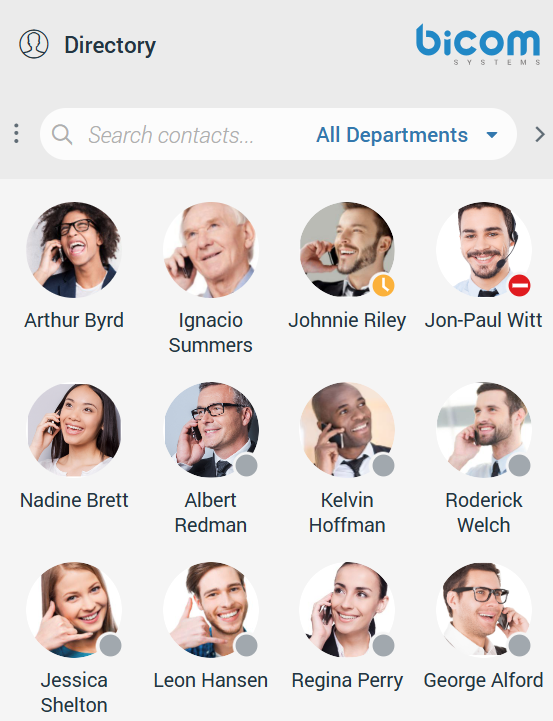
Extensions with an Inactive or Suspended status in PBXware will not be displayed in the contact list.
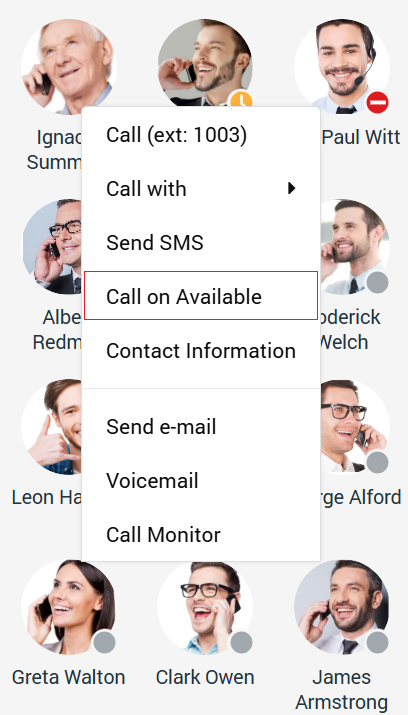
While hovering over a contact, users can start a call (only in Grid View), see the status message, phone status, and which devices the contact uses. Right-clicking on the contact brings up a drop-down menu with additional options.
Extensions with the Show in Desktop/Mobile App option set to No or Not Set on PBXware will not be displayed in the contact list. They cannot be searched through the contact or conversation list, but users can still receive calls and SMS messages from these extensions.
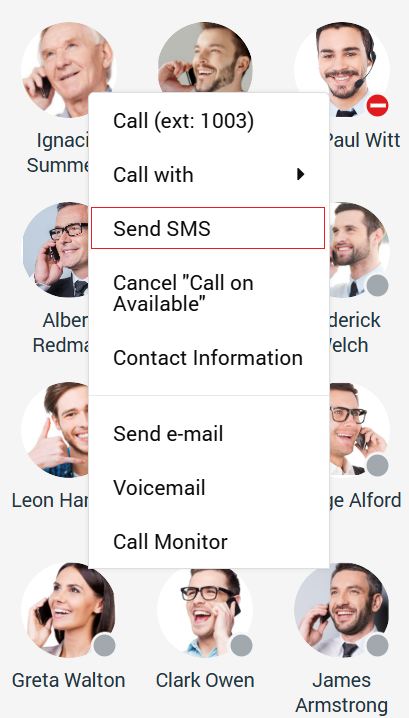
The following list explains the meanings of the available options:
- Call (ext: extension number): Call the contact.
- Call: Allows users to place a phone call.
- Call with: Allows users to select which device they want to use for a call (Softphone/Deskphone).
- Send SMS: Allows users to start an SMS conversation or open an existing one.
- Contact Information: Allows users to view information about the contact.
- Send e-mail: Allows users to send an email.
- Voicemail: Allows users to leave a voicemail for the selected contact.
- Call Monitor: Enables users to monitor calls in real-time for any contact listed in the Call Monitor list within the PBXware Enhanced Services. Right-click on the contact during a call and select Call Monitor from the drop-down menu.
Your administrator must enable Call Monitor within the PBXware Enhanced Services.
The search field above the contact list allows users to search for a specific contact by entering the contact’s name or extension number. It is also possible to filter contacts by department. Filtering contacts by department allows users to search through departments using the keyboard’s up and down arrow keys or by entering the department’s name inside the search field above the department list.
Clicking the Bicom Systems logo redirects to the Bicom Systems official page.
The Backspace key on the keyboard deletes one character at a time, while the ESC key clears the entire term entered in the search field.
If the user mistypes inside the search field, they receive the message: No results found.
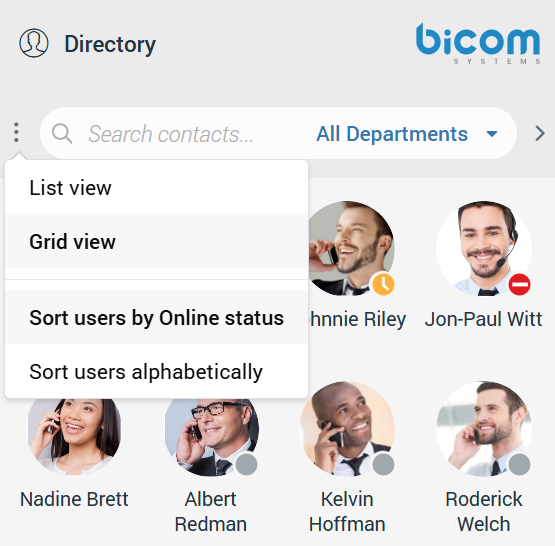
Next to the search field are three dots (⋮). Clicking on these dots opens a drop-down menu that allows users to select either Grid View or List View. Users can also choose to sort contacts by their online status or alphabetically. Additionally, to the right of the search field is an arrow that enables users to collapse or expand the contact list. Users can also resize the contact list without collapsing it, allowing them to keep their contacts visible while creating extra space in the middle of the screen.
Central Phone Book
The Central Phone Book is a centralized list of contacts managed by the PBXware administrator. It is shared among all gloCOM users. To view your Central Phone Book contacts, select the Central Phone Book option from the drop-down menu above the contact list.
Users can search for a contact by name or number. To initiate a phone call, click the phone icon next to the contact’s number. Additionally, right-clicking on a contact opens a context menu with more options.

In addition to the contacts managed by the administrator, each user can manage their own personal list of contacts. This list is private and visible only to the user. Users can manage their contacts through Online Self-Care by clicking on the Central Phone Book tab. Here, they can view all their Personal Phone Book contacts, add new contacts, import or export contacts, and download a CSV template of their Personal Phone Book. Click the X button to remove a contact.
After closing the Online Self Care window, users should click the Sync button to refresh the contact list if necessary. This action ensures that any modifications made in the Online Self-Care are synced in gloCOM.
Presence
gloCOM provides a unified presence synced across all user devices, including desktop, mobile, web, and gloCOM for Teams. For online contacts, users can see if they are connected through any of these devices. For offline contacts, users can see when their last activity was to understand their availability better. For example, if a contact was last seen a few minutes ago, they will likely respond to calls or messages shortly. Contrarily, if a contact has not been seen for several days, it may indicate they have limited availability or are out of the office. A user’s presence and availability are displayed with an icon at the bottom right of their avatar.
When hovering over a contact in Grid View or List View, a tooltip displaying details about their presence will appear. The tooltip includes information such as their device, last activity, status message, and phone status (e.g., idle, on call, do not disturb, etc.).
Status icon indicators can represent the following states:
 If there is no icon in the bottom right of the user’s avatar, it means that they are currently online and available.
 This icon defines the Ringing status of the extensions. It will be displayed when the user is being called, except when the user is already on a call, in which case the status will be On Call.
 The user is currently on a phone call.
 The user is currently online, and they’ve set their status to Busy.
 The user is currently online, and they’ve set their status to Do not Disturb.
 This icon has multiple meanings:
- The user is currently online, and they’ve set their status to Away.
- The user is currently connected via Desktop, but they are Away from Desktop.
- The user is not currently connected, but they were last active less than N hours, where the N represents the value that depends on the settings set on the server (For example, 8 hours, 15 minutes, etc.)..
 The user was not active in the last N hours, where the N represents the value that depends on the settings set on the server (For example, 8 hours, 15 minutes, etc.).
Phone
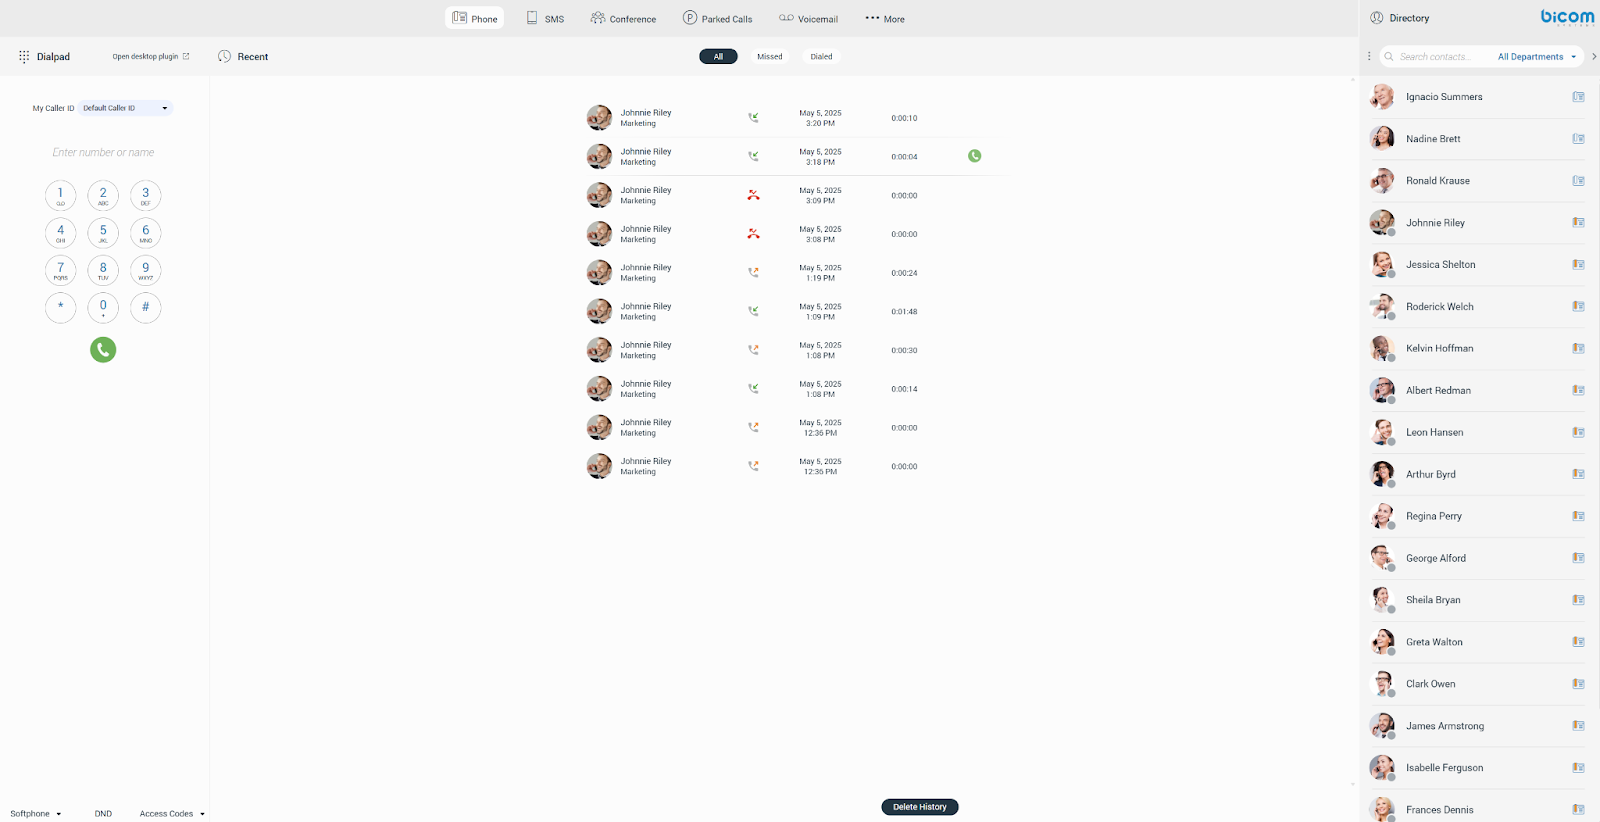
Upon successfully logging in, the first thing that catches the user’s attention is the Phone, located in the center of the screen. The Phone consists of two main sections: the Dialpad and the Recent Calls section. It enables users to make and receive calls, as well as view their recent call history.
gloCOM provides a unified call history across gloCOM Desktop, gloCOM GO, gloCOM Web, and gloCOM for Teams. Call history is stored on the server for up to one month and is synchronized across all devices. This ensures that users are always up to date with their recent calls. The application automatically syncs the call history each time a user logs in, allowing them to access their recent calls on any device. During synchronization, an indicator within the Recent Calls list informs users that the sync is currently in progress.
Calls can be made by entering the number using a dialpad, keyboard, or by dragging a contact into the designated area.

Upon entering numbers, a back arrow appears on the right side of the dialpad input, allowing users to delete the entered number. Users can also delete the number using the keyboard’s Backspace key.
If the input field is focused and no number is entered (gloCOM for Teams Plugin), pressing the Enter key twice in a row will call the last dialed number. Double-clicking the green handset will give the same result.
The corresponding number or symbol will be displayed when a user presses and holds any key in the Phone dialpad. However, if the user presses and holds the 0 key, a + (plus) sign will appear instead.
The default Caller ID feature allows users to hide their Caller ID for all calls or just the next call.
The Caller ID option is turned off by default. To use this feature, please contact your administrator for assistance.
The second part of the Phone is the Recent Calls section. It allows users to view all their missed and dialed calls, as well as their conference calls.
In the Recent Calls section, users will find the following information:
- The Caller’s Avatar (if available)
- The Caller’s Name
- The Type of Call (Inbound/Outbound)
- The Date and Time of the Call
- The Duration of the Call
When users hover over a call, an option to start a call will appear.
Missed call notifications will appear as a red badge displaying the total number of missed calls, as shown in the picture below.

Bottom Bar
The bottom bar lets users select their preferred phone device type (softphone, deskphone, or mobile app). They can also turn Do Not Disturb (DND) on or off and access the Access Codes.

The Access Codes provide users with easy access to commonly used codes.
The DND option is turned off by default. To use this option, please contact your administrator.
Placing a Phone Call
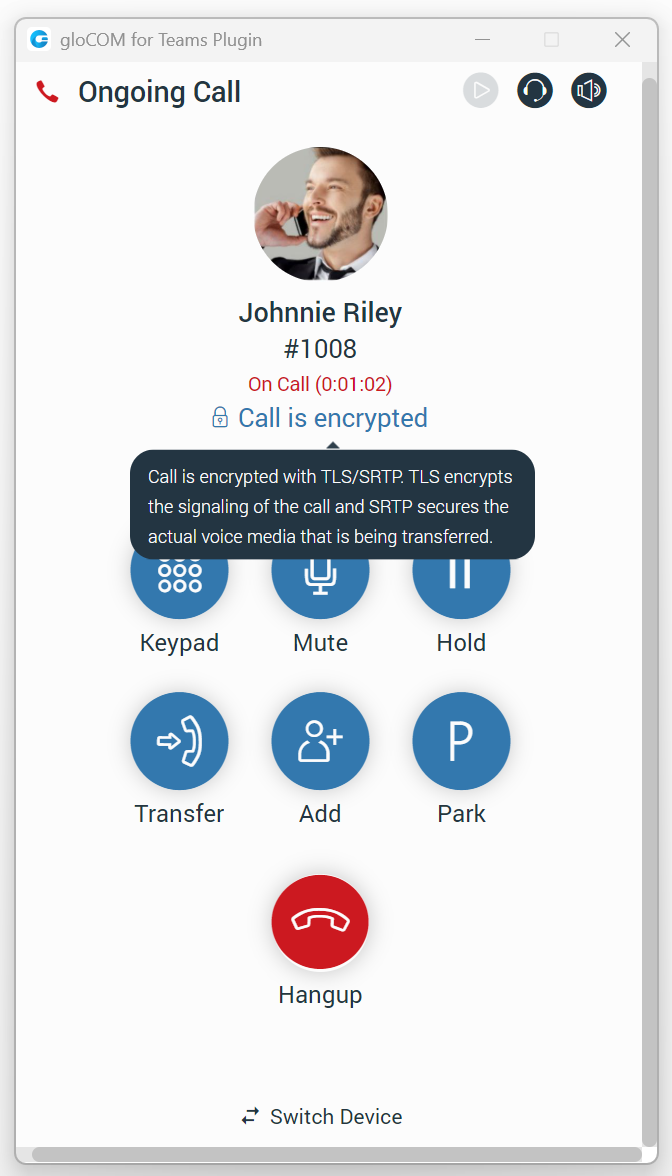
All calls are encrypted, and an indicator during an ongoing call notifies the user that encryption is in use. Hovering over the indicator, a tooltip appears with the following message: Call is encrypted with TLS/SRTP. TLS encrypts the signaling of the call, and SRTP secures the actual voice media being transferred.
The rule above does not apply to calls made from other devices, as it is impossible to determine whether the device used for the call uses TLS encryption.
Dialing Phone Numbers
Using the Phone keypad:
- To enter a phone number, use the Phone keypad or the keys on the keyboard.
- Once the number is entered, click the Dial button to place the call.
Dial with Drag and Drop:
- Drag and drop the contact from the contact list to the phone area.
- Click the Dial button to place a call.
Calls can be placed from the contact list in several ways:
- Grid View: Hover over the contact and click on the phone icon.
- List View: Click on the phone icon next to the contact’s name.
- Right-click: Right-click on the contact and select Call or Call with.
Call on Available
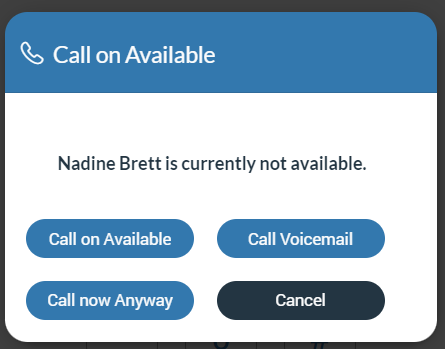
The Call on Available feature serves as a reminder for users to call their colleagues after they become free. For example, if a user attempts to reach a colleague while they are on a call (whether it’s a one-on-one, conference, or meeting call) or if their presence status is set to Do Not Disturb after pressing the Call button, a modal dialog will appear with four options:
- Call on Available: This option reminds the user to initiate the call once the other party is available.
- Call now Anyway: This option allows users to proceed with the call regardless of the other party’s availability.
- Call Voicemail: This option directly connects to the other party’s voicemail.
- Cancel: This option will cancel the Call when Available procedure.
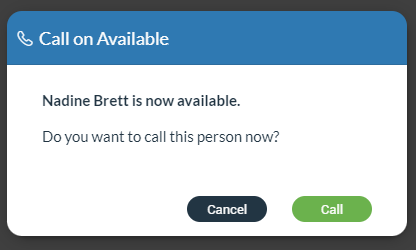
Once the Call on Available procedure is activated, a modal dialog will appear after the other party becomes available, asking the user if they want to place a call.
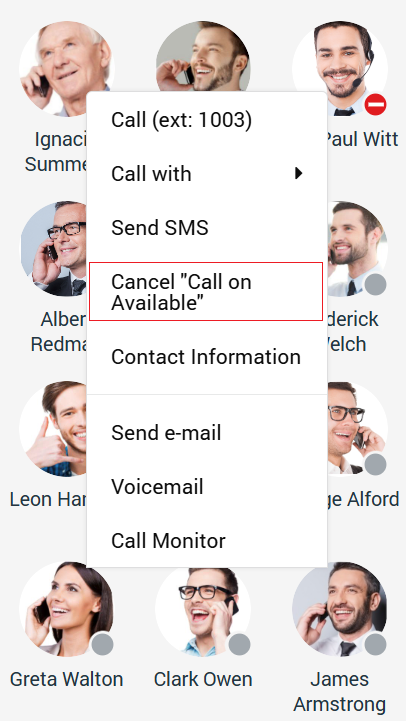
The Call on Available procedure can be canceled at any time. To do this, right-click on the contact in the contact list for whom the Call on Available procedure is active, and then select the Cancel Call on Available option from the drop-down menu.
A Call on Available modal dialog will be displayed only within the gloCOM for Desktop plugin.
Receiving a Call
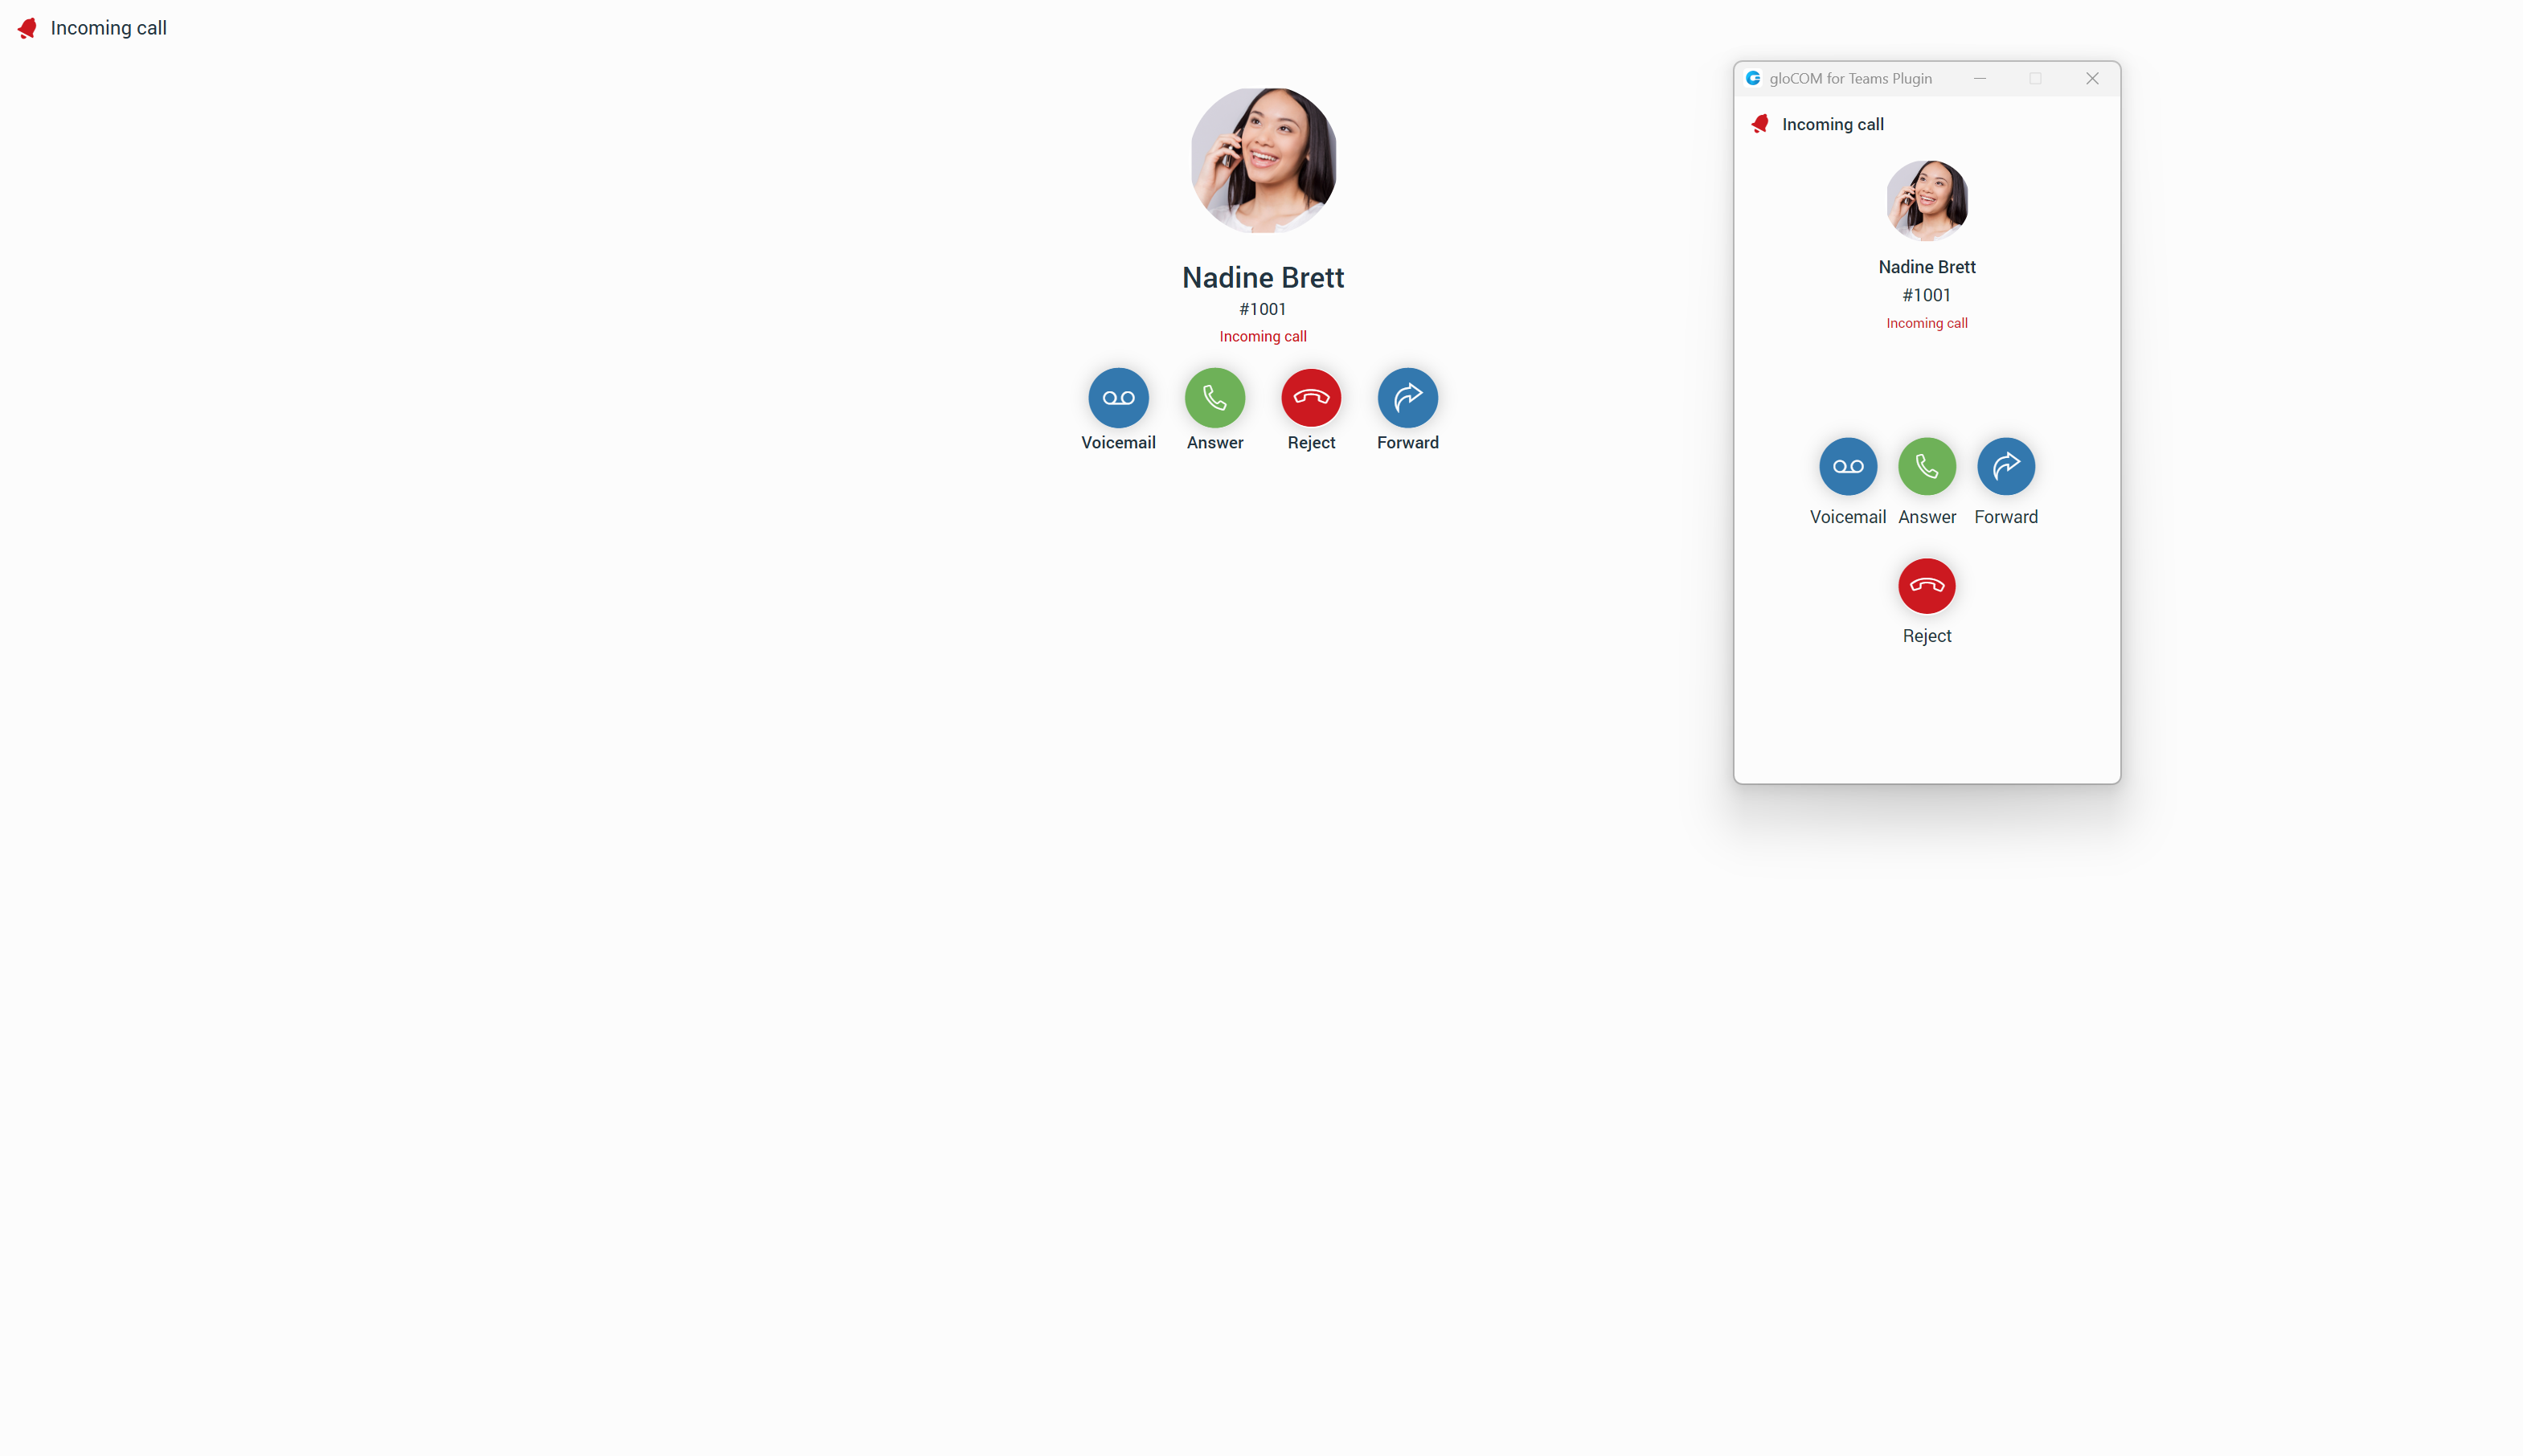
There are several ways to answer an incoming call:
- To answer or reject a call, click on either the Answer button or Reject button inside the call toast in the screen’s bottom left corner.

- Alternatively, click on the call toast to display the ringing phone screen with the following options at the front of the application:
- Voicemail: Allows the user to transfer a call to voicemail.
- Answer: Allows the user to accept the call.
- Reject: Allows the user to reject an incoming call, which will automatically be forwarded to voicemail.
- Forward: Allows the user to forward the call to someone else.
If the user does not take action within 32 seconds, the call will be transferred to the user’s voicemail.
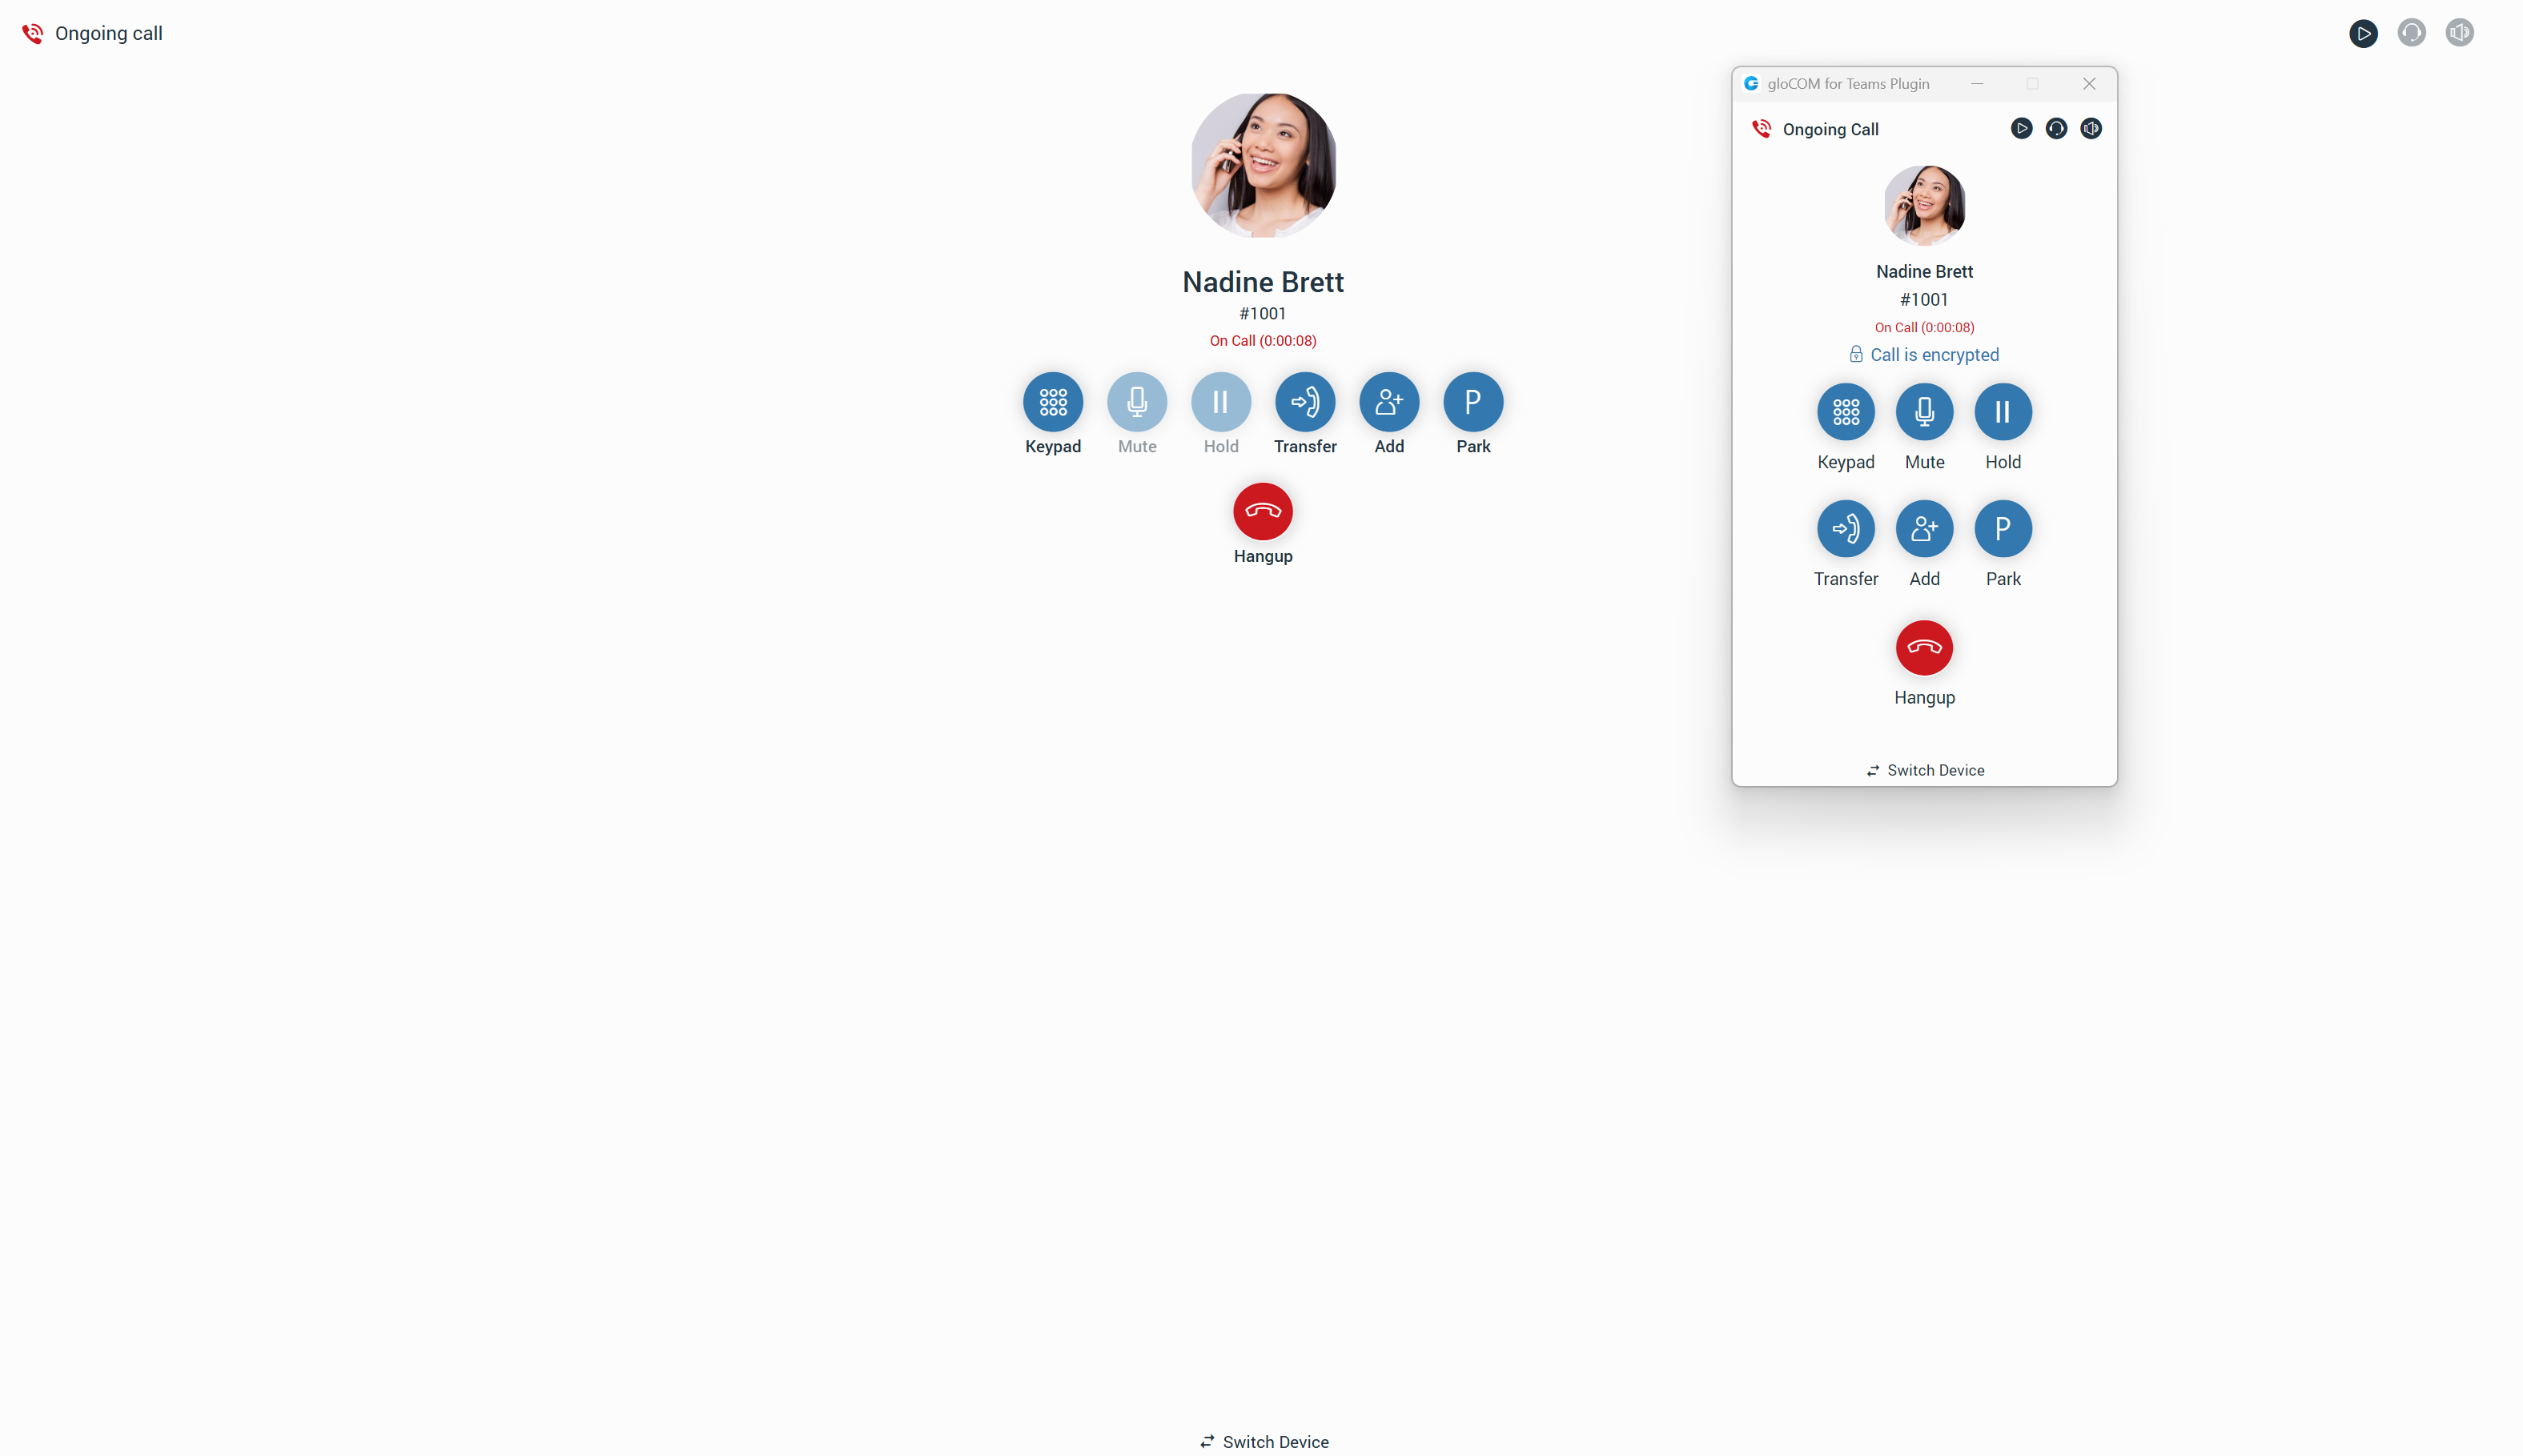
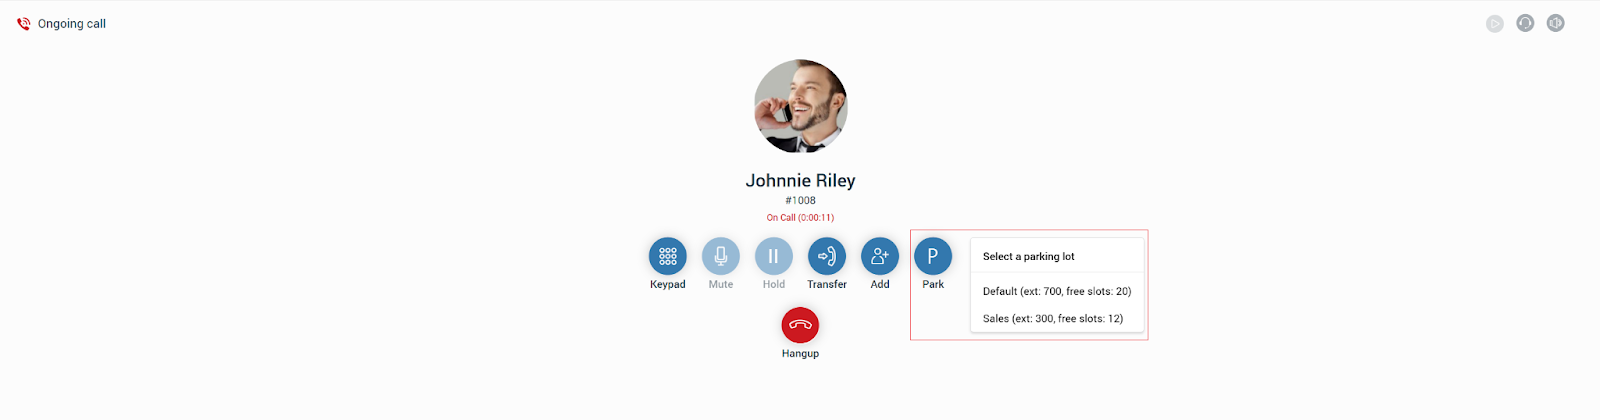
Live Call Screen
Users can access various options to enhance their calling experience during a live call.
Here is a list of available live call options:
- Keypad: Opens a keypad for dialing.
- Mute/Unmute: Allows the user to Mute/Unmute themselves. (only inside the gloCOM for Teams plugin)
- Hold: Allows the user to put the other side on hold if they have another call. (only inside the gloCOM for Teams plugin)
- Transfer: Users can transfer a call in three different ways:
- Regular transfer: Transfers the call without announcing it.
- Supervised transfer: Transfers the call with an announcement.
- Voicemail transfer: Transfers the call directly to voicemail.
- Add: This option allows users to make a conference call from a regular call by adding more participants to the existing call.
- Park: Allows users to park a call so someone else can pick it up.
- Hangup: Allows the user to terminate a call.
- Switch Device: During a live call, the user can use the Switch Phone button to initiate ringing on all their registered devices or a specific device (softphone, desk phone, or mobile app), allowing them to continue the call on another device. A perfect example is switching from a desk to a mobile phone when users need to leave the office but would like to continue the call. The same applies to conference calls.
- Transfer a call using drag-and-drop: Users can transfer the call by selecting the other party’s avatar and dropping it to a desired contact in their contact list. A transfer indicator will appear while dragging. Both transfer types, Blind and Supervised, can be used while hovering over the contact. Note that the drag-and-drop transfer option does not apply to conference calls.
Users can add contacts to a call using drag-and-drop, which automatically initiates a dynamic conference call.
SMS
Introduction
An SMS feature allows users to send/receive SMS/MMS messages. The MMS message is an enhancement to the standard SMS message.
The MMS feature can be turned on/off depending on the server settings.
The main difference between SMS and MMS messages is that MMS allows users to send multimedia and other files along with their messages. This includes video, pictures, audio clips, and GIFs. The maximum file size for uploads is 500 KB, or up to ten (10) files per message. Additionally, MMS supports messages containing up to 1,000 characters of text.
gloCOM allows users to synchronize their SMS conversations and messages across multiple devices, ensuring they can access their messages from any device.
SMS Number
If a user has associated an SMS number with their extension, they can see it by opening the Personal Information screen.

To find the SMS number of a contact, open the Contact Information screen.

Shared SMS Number
An SMS number can be shared among multiple extensions. If a user receives a message from a number used by several extensions, the SMS conversation will be displayed, as shown in the picture.
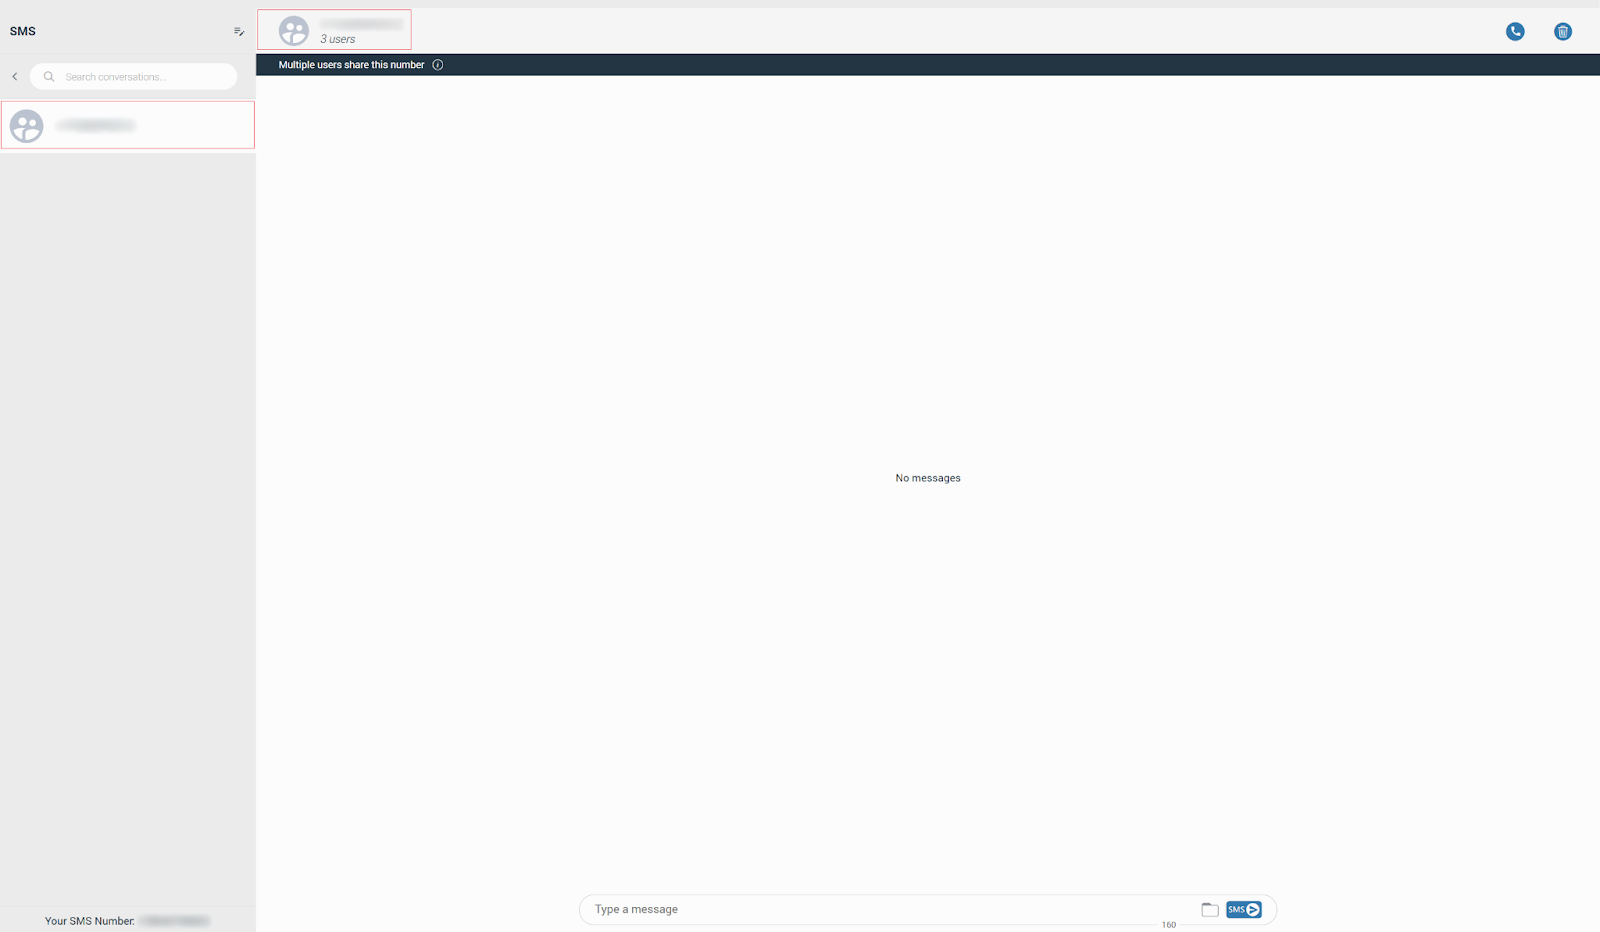
All extensions using this number can see all messages sent/received.
Furthermore, inside the conversation, click the label below the context bar to find out who is using this SMS number.
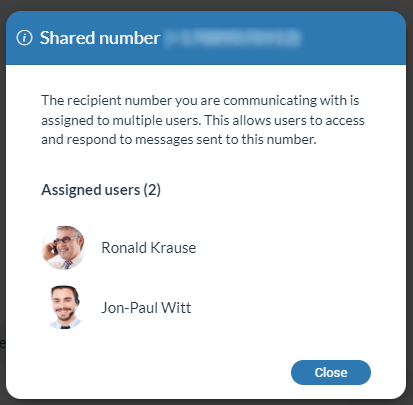
Your messages and messages of the other users you share the number with will have a header with their name and avatar, as seen in the picture.
Start an SMS Conversation
To start an SMS conversation, right-click on the contact in the contact list and select the Send SMS option from the drop-down menu. Alternatively, click on the SMS tab.
Clicking on the Create new SMS button opens a list of contacts to whom the SMS message can be sent to.
The list includes only the extensions associated with the SMS number and contacts from the local and central phone book.
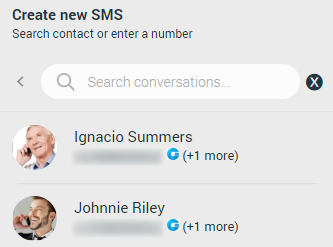
After selecting the desired contact, an SMS conversation will be created and displayed in the middle of the screen, as well as within the conversation list. However, if the contact has multiple phone numbers, a modal dialog will appear, asking the user to select the number to which they want to send an SMS message to.
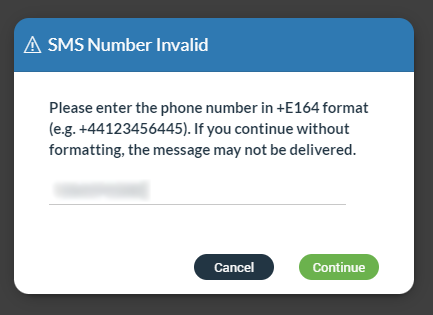
If the number is not in +E164 format, a modal dialog will pop up, asking the user to correct the number format.
Alternatively, users can enter the number to send an SMS message instead of choosing a contact from a list.
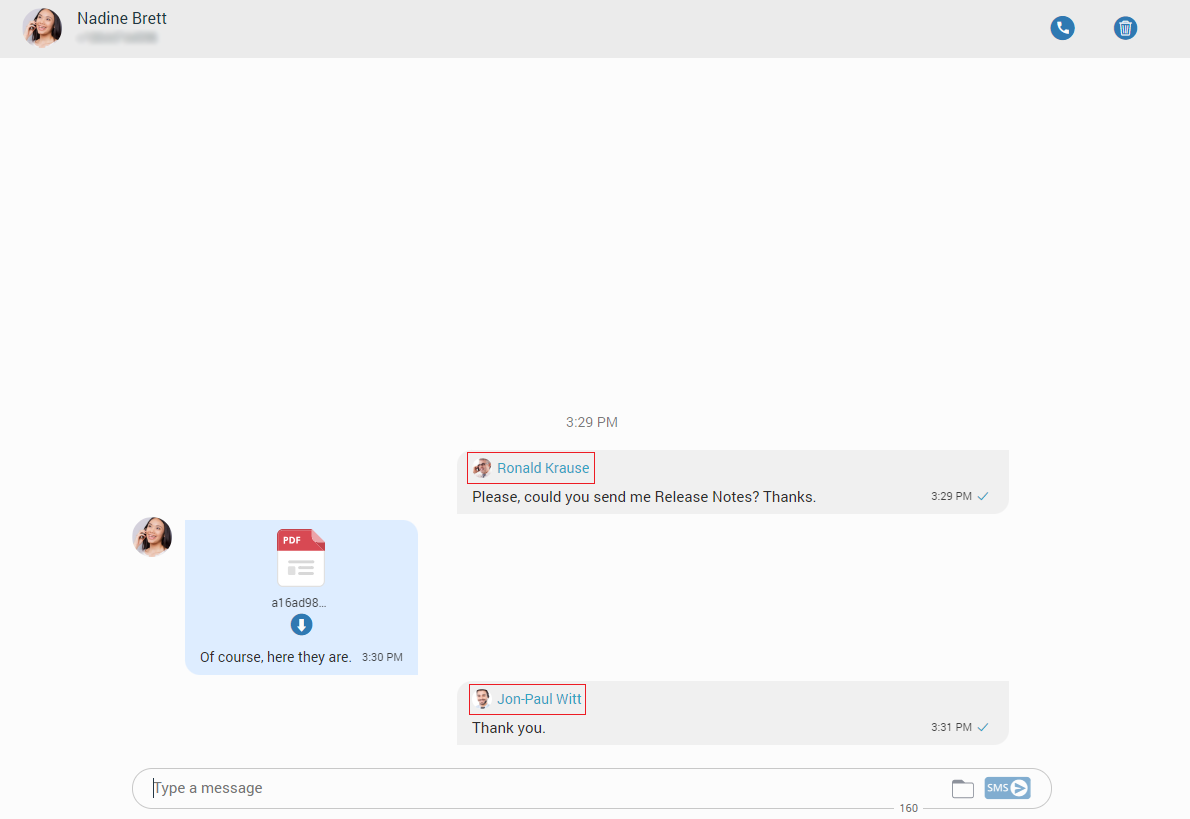
SMS Messages View
The SMS messages view is positioned in the middle of the screen.
At the top of the view is a context bar with two options:
- Call the currently selected user.
- Delete the current conversation.
All exchanged SMS/MMS messages will be displayed within the area below the context bar.
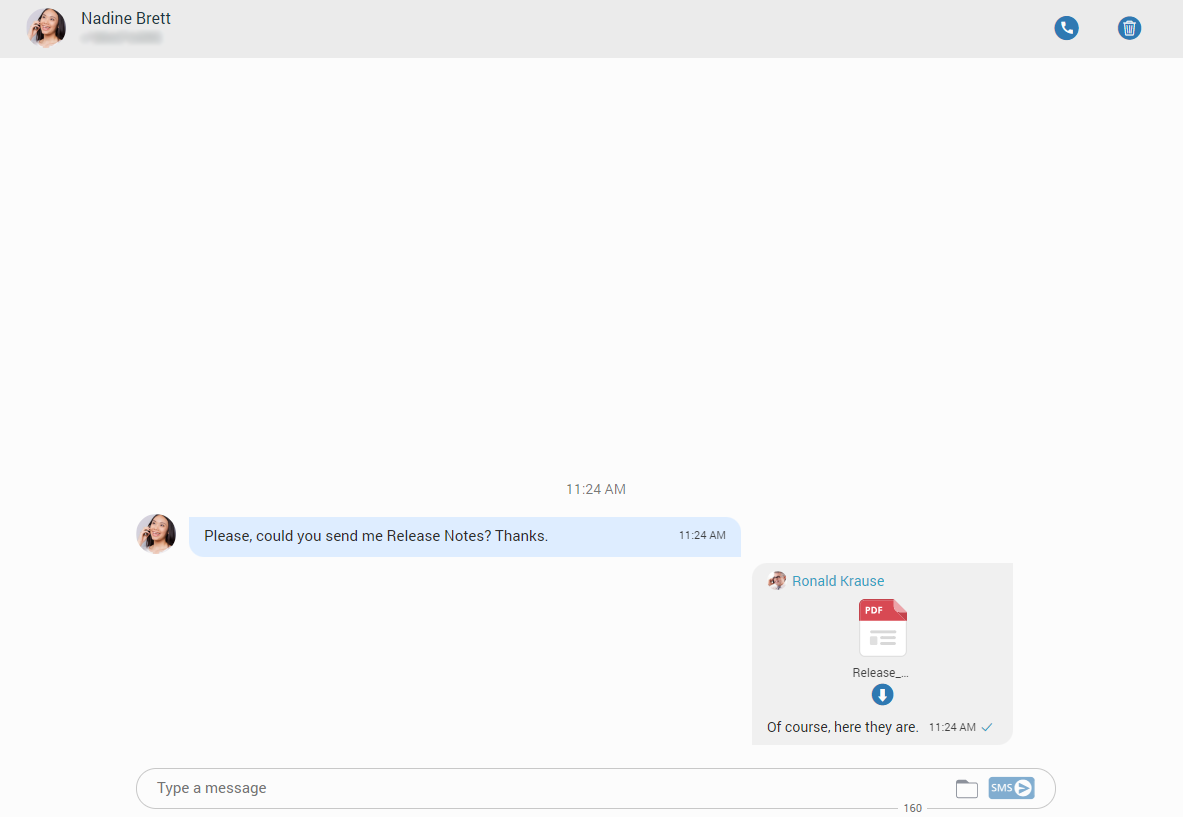
The gray rectangle represents outgoing messages, while the blue rectangle represents incoming messages.
Right-clicking within the gray or blue rectangle brings up the delete options, which can be used to delete messages. Additionally, clicking on the three dots on the right side of the rectangle gives the same result.
To send SMS/MMS messages, use the input field at the bottom of the SMS conversation. After entering the text message or uploading media files, click the SMS/MMS button on the right side of the input field. Pressing the Enter key on the keyboard will make a new line. While writing the SMS message, the counter at the bottom of the input shows the remaining number of characters that can be entered.
It is not possible to send more than four (4) messages at once.
Next to the Send SMS button is a folder icon for sending files. Clicking this icon opens a dialog box where the user can select up to ten (10) files to send to the currently selected conversation.
The maximum upload size for multimedia data is 500 KB.
Users can send files by dragging them from File Explorer (Finder on macOS) to the message area. If the selected data exceeds 500 KB or more than ten (10) files are selected, a pop-up message will appear: N file(s) were not added since they exceeded the maximum size. The maximum size for MMS attachment is 500KB.
Please note that the following file types are supported for MMS:
- Image Files: jpeg, png, gif
- Audio Files: MP3, OGG, AMR
- Text Files: PDF, Vcard, txt
- Video Files: mp4
The application compresses images (JPEG and PNG) before sending them, allowing the user to send images larger than 500 KB. The application preserves the quality as much as possible and adjusts the resolution as needed.
If a file is selected, the SMS message turns into an MMS message, and the remaining kilobyte counter is displayed instead of the character counter.

After selecting files, a thumbnail with the name of each selected file will be displayed above the text area within the input field. To remove a chosen file from the MMS message, hover over the thumbnail and click the blue circle with a white dash in the top right corner.

Clicking the thumbnail will download the file.
SMS Messages States
The SMS/MMS message can be in one of three states:
- Sending
- Sent (This does not confirm delivery)
- Failed (If the message fails, click the Retry button to resend it.)
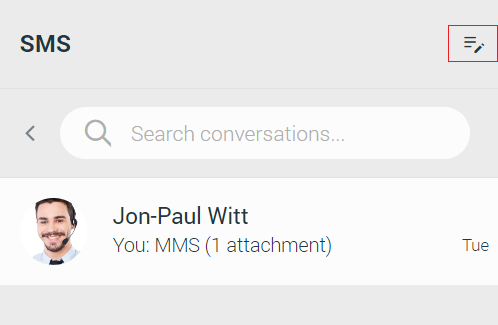
SMS/MMS Notifications
When an SMS/MMS message is received, a notification appears.
The app will display the number of unread SMS messages.

Conference
The conference is part of gloCOM for Teams, where the user can place conference calls with more than one participant (external or internal).
There are two types of conference calls:
- Instant conference (Dynamic conference): Users can initiate a conference call by adding one or more participants to an ongoing call or using the conference section. This allows users to select contacts from their contact list or add any number directly. If a user misses a conference call, they can still join it from the Recent Calls section, as long as the conference call is still active, by clicking the Dial button.
- Static conference: Users can join predefined conference rooms and invite other participants. The conference number is displayed next to the conference name in the conference list.
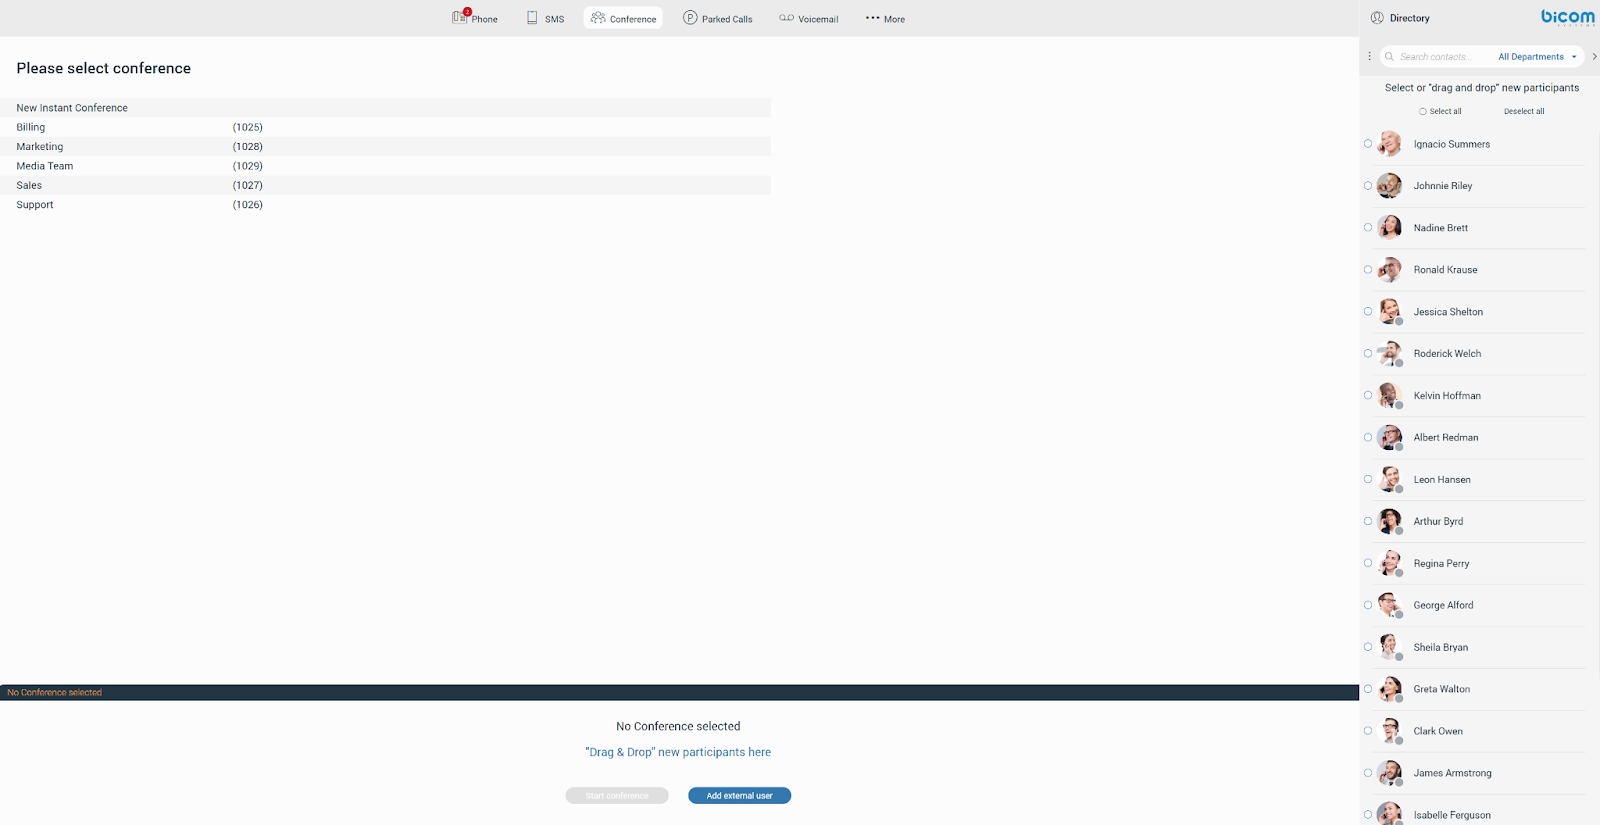
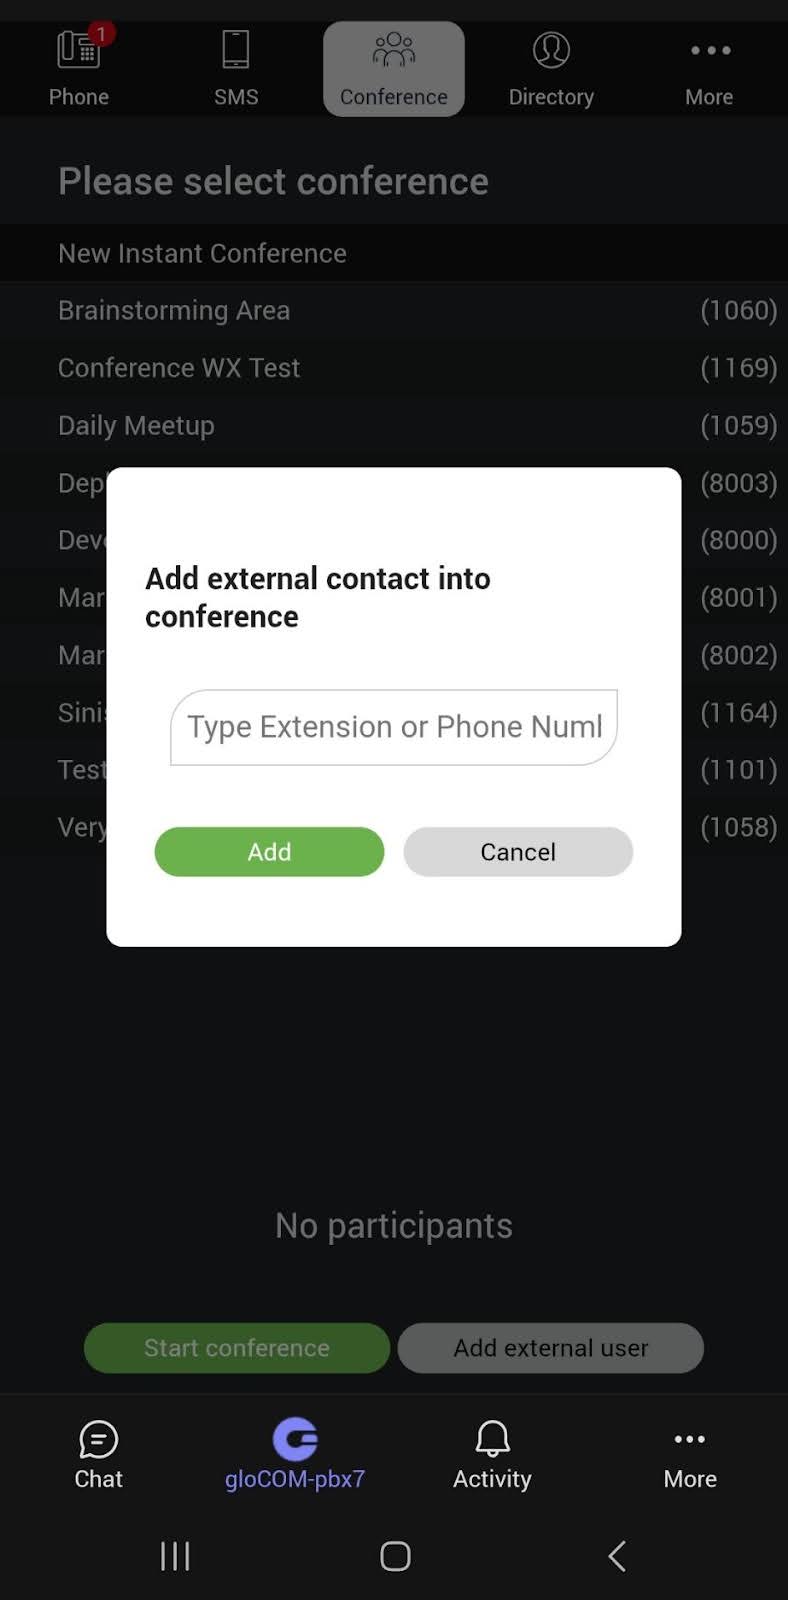
Placing a Conference Call
Clicking on the Conference button in the navigation bar will open the conference section. To initiate a conference call, the user needs to select participants from the contact list. Participants can be chosen by either clicking on their names or by dragging and dropping them into the participant list.
A conference call can also be initiated without pre-selected participants, who can be added later.
Users can also select all participants using the Select All radio button above the contact list. They can also invite external participants by entering an external number. The user can filter contacts using the search field or sort them by department.
Next, select a conference from the conference list next to the contact list. Below the conference list, the participant list is displayed, showing all selected participants. To remove a participant, hover over their name, and a blue cross will appear. Click the cross to remove the desired participant from the list. Press the Deselect All button to remove all participants simultaneously.
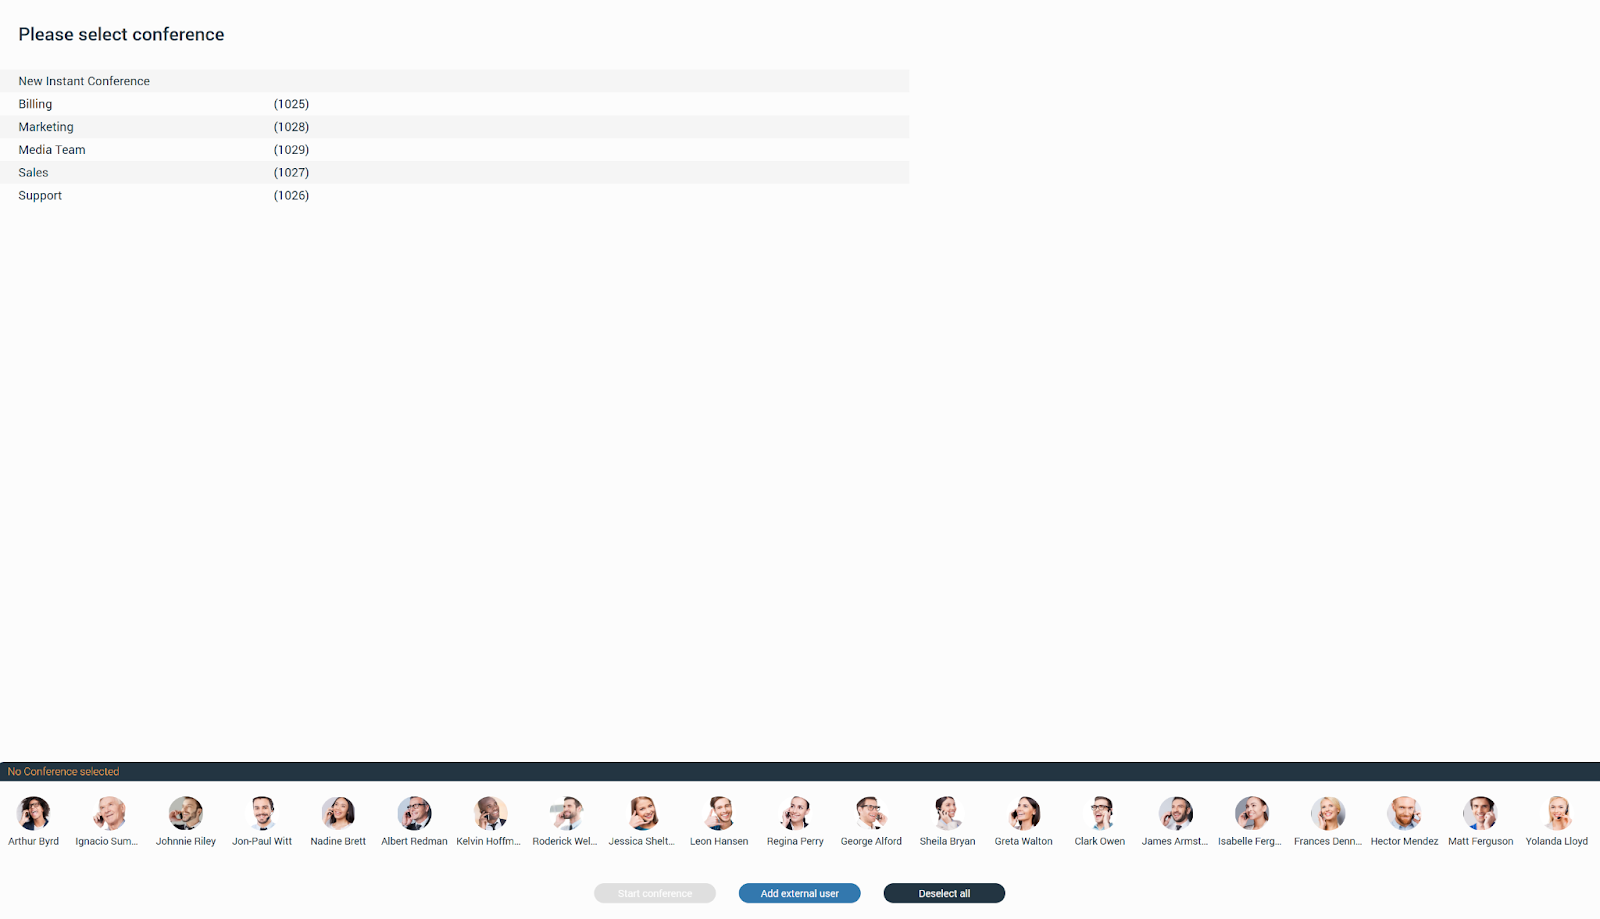
To start the conference, click the Start Conference button. This button will be disabled if no conference has been selected.
Call Parking
Call Parking
Call Parking allows users to park a call so that someone else can pick it up. The user should click the Park button to park a call and choose a parking lot from the available lists.
After the parking lot is selected, a confirmation dialog will appear. To prevent it from appearing again, check the Do not show this message again option.
Parked Calls
Once a call is parked, it can be picked up by clicking on the Parked Calls button in the navigation bar or by dialing the parked extension.
The app will display the number of parked calls.
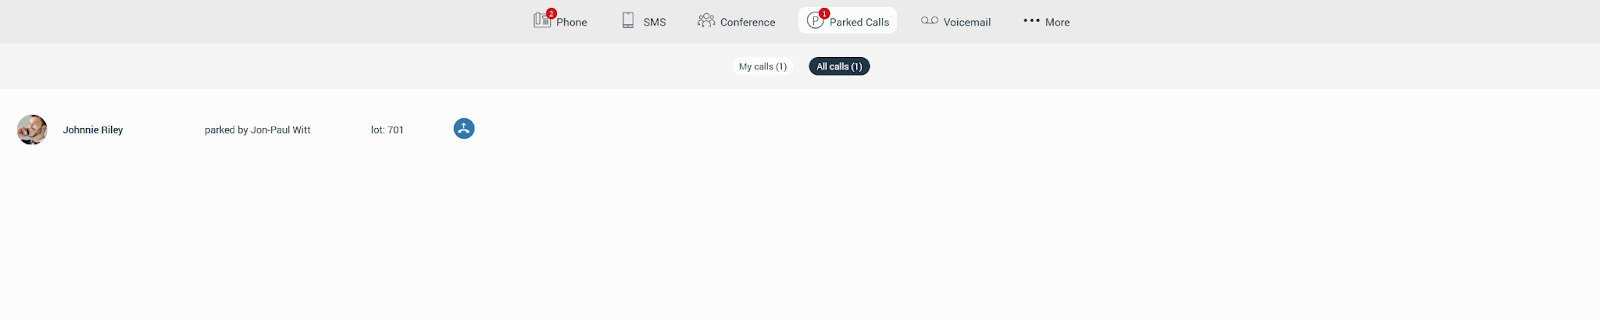
Users can filter calls in the Parked Calls section by clicking either the My Calls or All Calls buttons.
Parked Calls Notifications
Notifications for all parked calls will appear as a red badge displaying the total number of parked calls, as shown in the picture below.

Voicemail
The voicemail section allows users to listen to their voicemail messages. To access it, click on the Voicemail button in the navigation bar, which opens the voicemail screen.
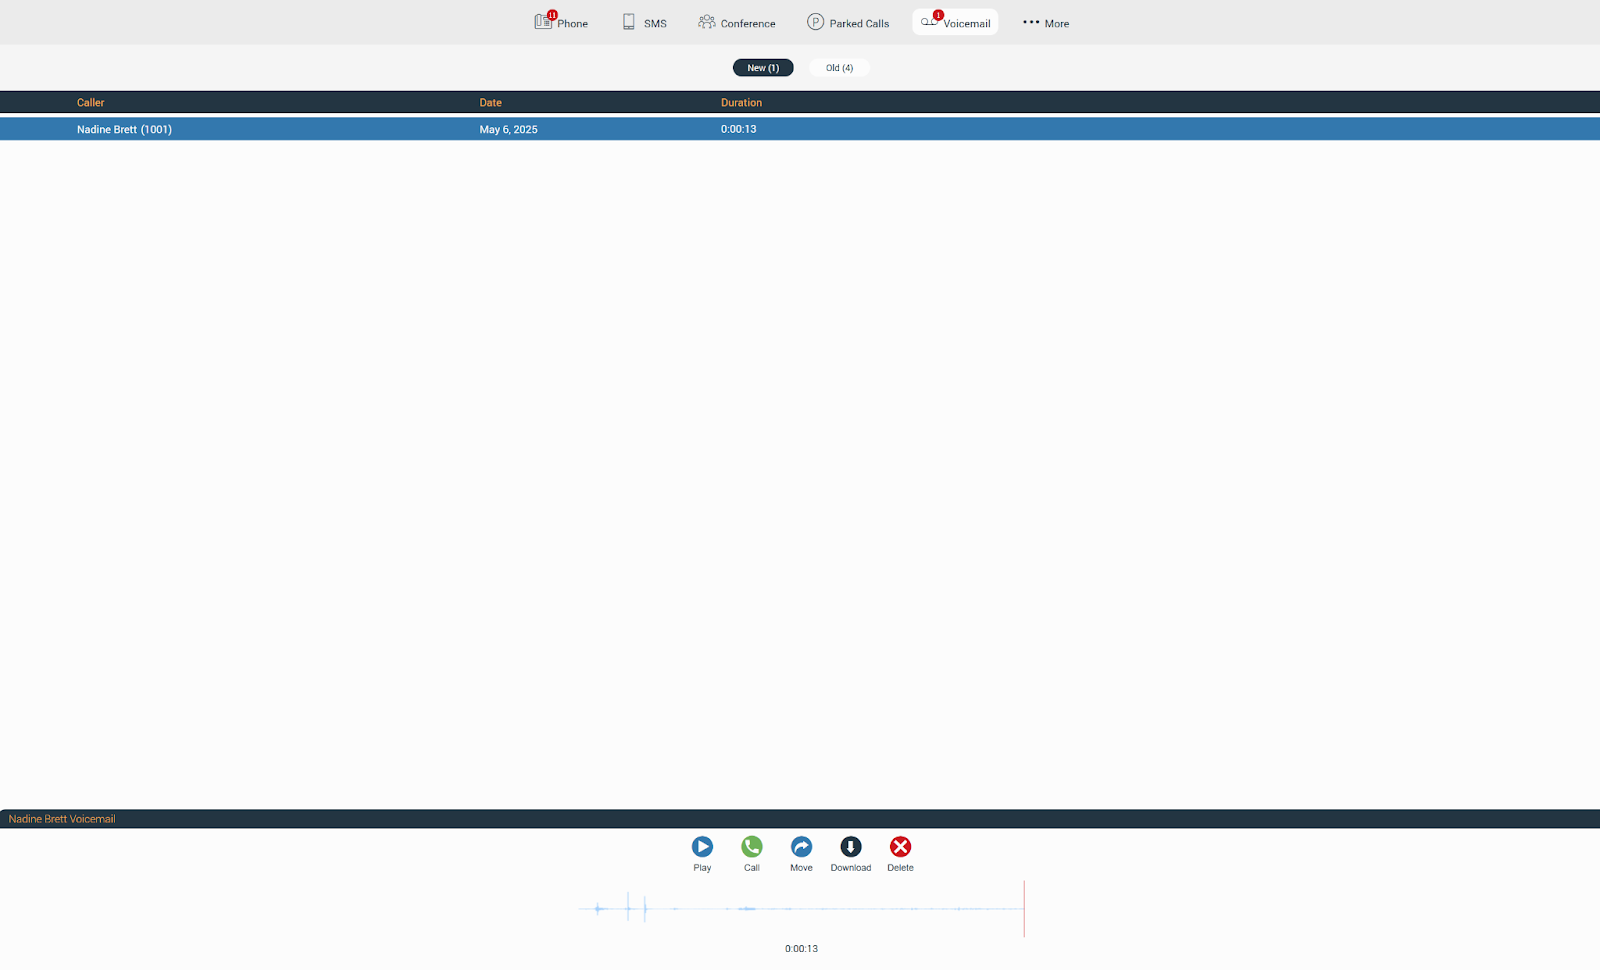
At the top of the voicemail screen is the context bar with two tabs:
- New: Contains new voicemails.
- Old: Contains old voicemails.
Below the context bar is the voicemail list, which includes the following information:
- Caller: Displays the caller’s name.
- Date: Displays the date when the voicemail was received.
- Duration: Displays the duration of the voicemail.
By clicking on a desired voicemail message, users can access additional options:
- Play: Allows the user to play the voicemail message.
- Call: Allows the user to call the person who left the voicemail.
- Move: Allows the user to move voicemail messages from the New folder to the Old folder and vice versa.
- Download: Allows the user to download the voicemail message to their computer.
- Delete: Allows the user to delete the voicemail message.
gloCOM only supports the .wav audio format.
Voicemail Notifications
Notifications for all received voicemail messages will appear as a red badge displaying the total number of received messages, as shown in the picture below.

More Options
Preferences
Any changes made within these tabs will be automatically saved.
Audio
Users can set their microphone, speakers, and ringing devices.

Appearance
Users can customize the language used throughout the app, enabling them to use it in their native language.

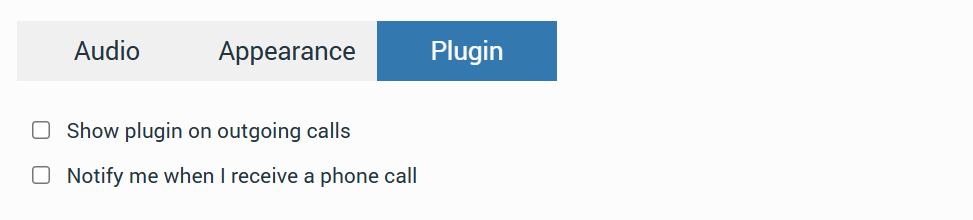
Plugin
Inside this tab users can turn on/off two options:
- Show plugin on outgoing calls:
By default, the plugin window is minimized during outgoing calls.
Checking the Show plugin on outgoing calls option automatically brings the plugin window to the foreground.
- Notify me when I receive a phone call:
A Windows toast notification will appear for every incoming call. The notification will display two action buttons: Answer and Reject, along with the caller’s name and a brand logo.
By default, it is turned on. To turn it off, navigate to Preferences -> Plugin and uncheck the checkbox following the Notify me when I receive a phone call option.
The notification remains visible for a maximum of 25 seconds (the default value defined by Windows) or until the call is answered, rejected, or the call ends.
About
About
The About section provides users with information about gloCOM and the PBX system to which it is connected.
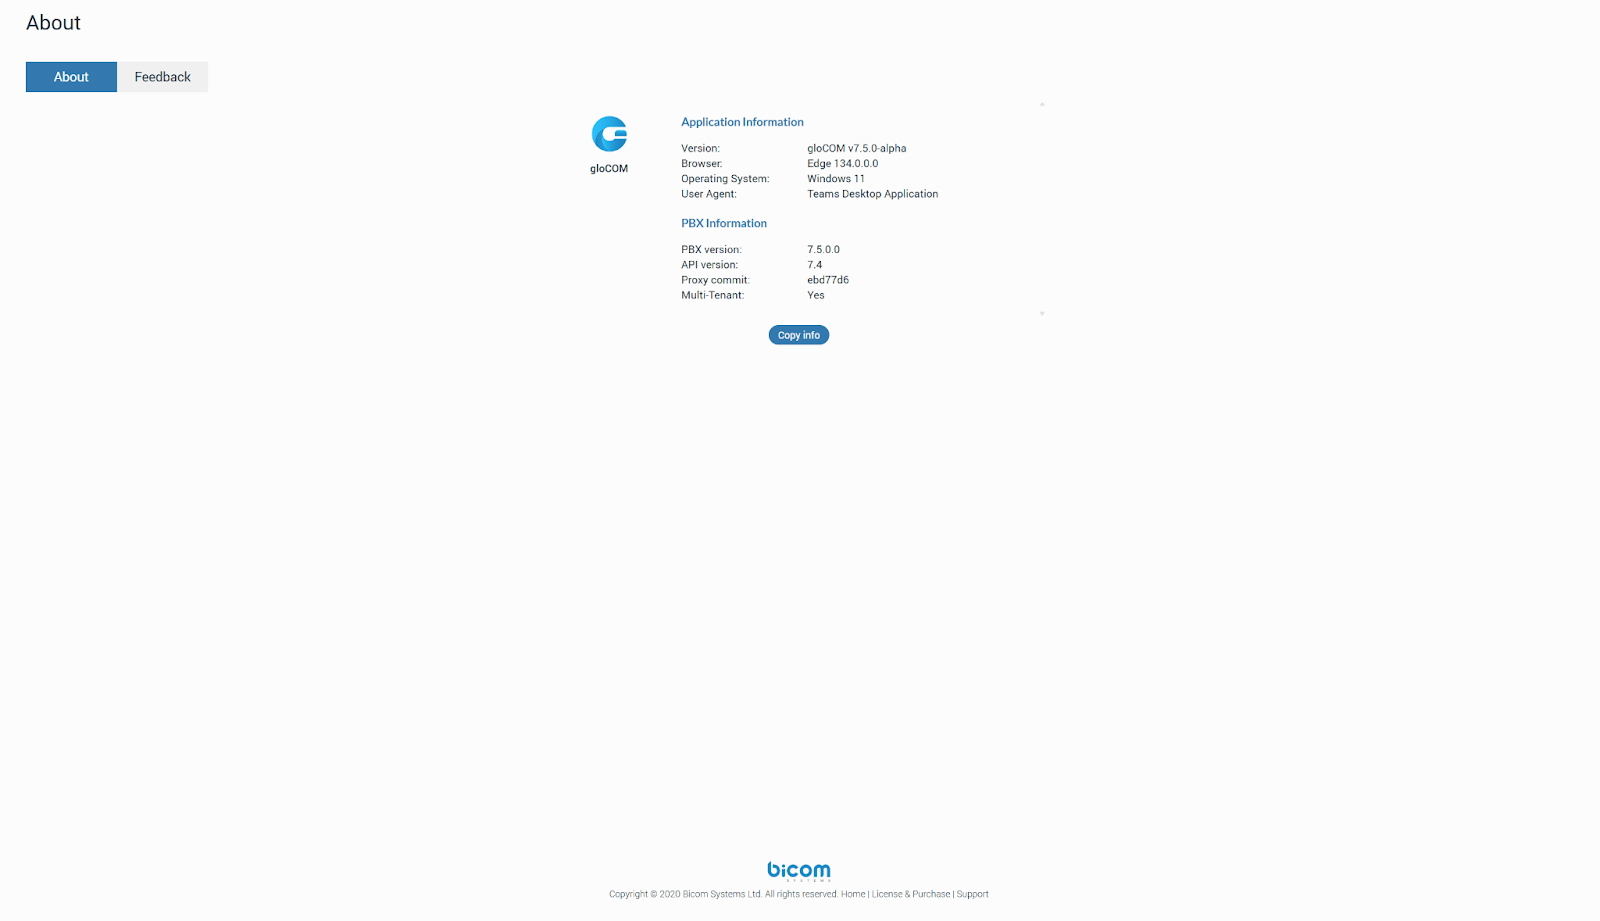
Clicking the Copy button copies all information from the screen to the clipboard.
Feedback
Users can easily send feedback about gloCOM. Just navigate to About -> Feedback.

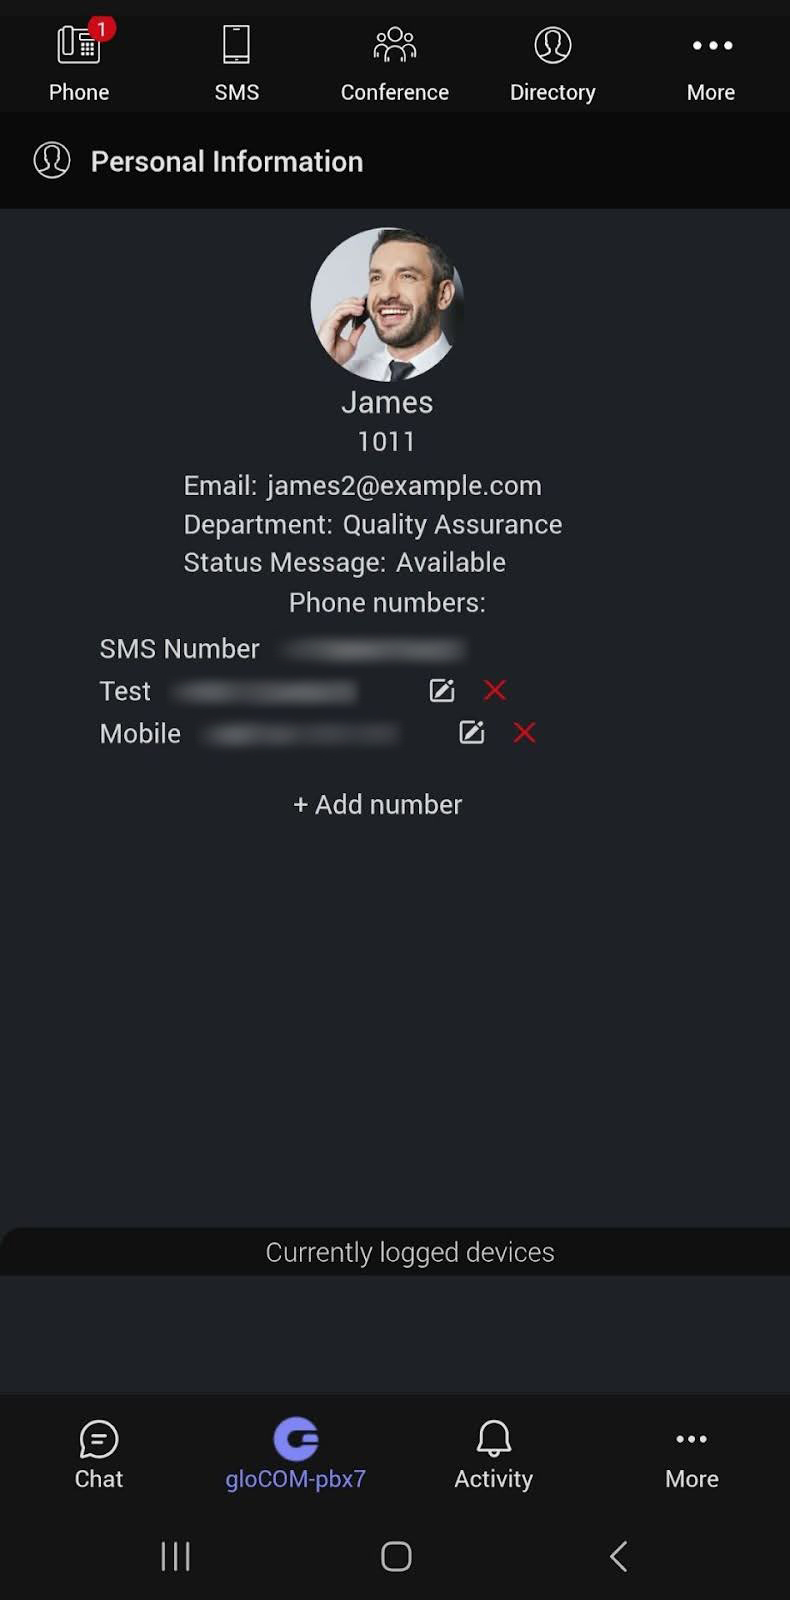
Personal Information
To access Personal Information, the user needs to click on the More button in the navigation bar and select Personal Information from the drop-down menu.

It brings up a Personal Information screen where the user can see their:
- Avatar picture: Clicking on it allows users to change their picture.
- Extension name
- Extension number
- Department
- Status Message
- Phone numbers: Users can edit and delete their phone numbers as needed.
- Add number: Users can add multiple phone numbers.
- Currently logged devices: This section provides a list of devices to which the user is currently connected.
Reset User Avatar
Clicking on the avatar picture within the Personal Information screen opens a drop-down menu with two options:
- Change avatar: This option allows users to update their avatar picture.
- Reset to default avatar: This option resets the avatar picture to its default value.
Online Self-Care
To log in to Online Self Care, the user needs to point their browser to http://$IPADDRESS/ (for example, http://192.168.1.1/). To access OSC via gloCOM for Teams, users should click the More button and select Online Self-Care from the drop-down menu.
- Email: The email address assigned to the extension. The provided email address (e.g., email@example.com) is a username for logging into Online Self Care.
- Password/PIN: The user password assigned to the extension. This field accepts the gloCOM password (e.g., n9hCaq1Icr).

gloCOM for Teams Mobile
gloCOM for Teams works together with gloCOM GO to provide a complete communication experience on mobile devices.
For incoming and outgoing calls, including conferences, gloCOM GO is required. Users must be logged into both gloCOM GO and Microsoft Teams with the same extension, on the same PBXware. The companion app, available on iOS and Android, ensures reliable call handling even when the Teams app is not running in the background.

When a user makes an outgoing call or starts a conference in gloCOM for Teams, the request is routed through gloCOM GO, which handles the actual call setup and manages the call. Incoming calls are also received through gloCOM GO, ensuring they are always accepted.
Voicemail and MMS messages cannot be downloaded because of Microsoft Teams’ limitations.