Monitor
The ‘Monitor’ section allows the administrator to monitor all Extensions, Apps, Trunks, Conferences, and Live Calls in real-time.
Extensions
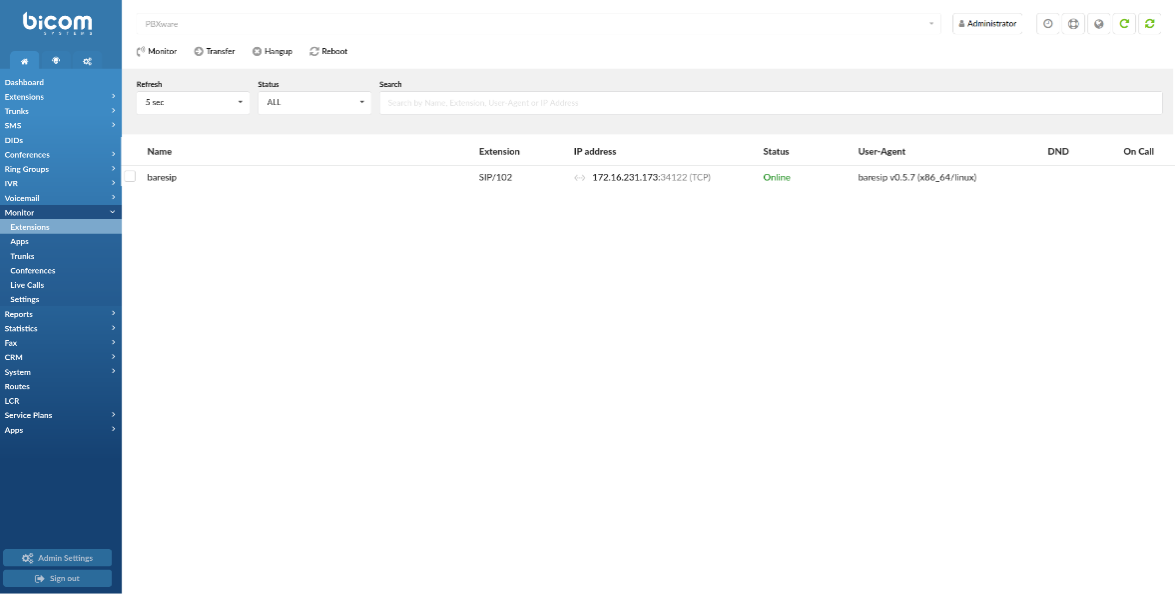
Monitored Extensions are displayed in real-time with the following details:
- Select all (6.7.5)
Select All checkbox was added for more convenient management of all of the devices registering to the same system/tenant. Clicking the checkbox will automatically select all devices that are currently online.
- Name
Displays the name of the Extension
(E.g. Peter Doyle)
- Extension
Displays the protocol used by the Extension and Extension number
(E.g. SIP/2002)
- IP address
Displays the IP address port that a UAD/Phone is registered to and additionally shows which transport is used (TLS, UDP, TCP, WS, or WSS)
(E.g. 192.168.1.1:5060 (UDP))
(Display)
NOTE: If you click an IP address, it will open up a new window showing the phone’s web interface, if there is one enabled.
- Status
Displays the status of UAD/Phone network
(E.g. Online/Offline)
(Display)
- User Agent
Displays the UAD/Phone Brand/Version
(E.g. Yealink SIP-T41S)
(Display)
- DND
Displays whether DND is applied
(Display)
- On Call
Displays whether the user is participating in a call at this moment
If the user is on call picture of a headset will be shown, otherwise, this field will be blank.
(Display)
TIP: Certain call actions (such as transferring calls, hanging up, etc.) can be performed on active calls as well.
Search

- Refresh
Select the time interval in seconds at which data should be refreshed
(E.g. To refresh every ten seconds, select ‘10 sec’ from the drop-down list.)
(Select box)
- Status
Sort Extensions based on their network status (ALL, Online, Offline)
(E.g. Select ‘Online’/’Offline’ to see only online or offline Extensions. Select ‘ALL’ to list all the Extensions.)
(Select box)
- Search
Type a specific Extension name, Extension number, User-Agent, or IP address and have the data filtered accordingly
(E.g. Test)
(Select box)
Actions

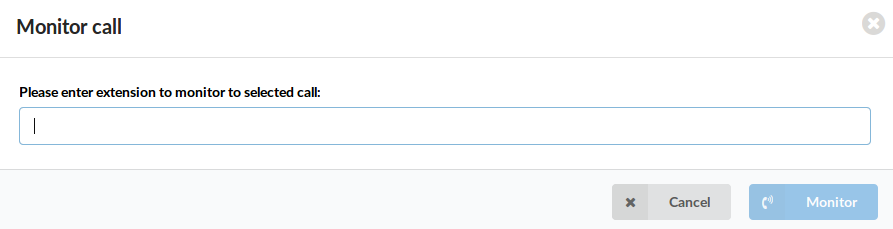
- Monitor
Select one of the active conversations
(E.g. Users can one of the active conversations by clicking the checkbox next to the Extension, and providing the Extension number that should listen to the active conversation.)
(Button)
NOTE: Users may listen to active conversations by dialing *199 + $EXTENSION number as well. Please note that regardless of which method is used to listen to calls, the listening service has to be enabled in Enhanced Services of the Extension that listens to the call. To enable this option, please navigate to ‘Enhanced Services’ -> ‘Call Monitoring’.
In case there is a following voice message: “The vertical service dialed is not enabled. Please contact your administrator.”, it means that this enhanced service is not enabled.
(E.g. Extensions ‘1000’ and ‘1001’ are in a conversation. Select this button and type ‘1005’ into the pop-up window. Extension ‘1005’ will ring and once the handset is picked up, the active conversation will be heard.)
- Transfer
Transfer a party from the active conversation to a different Destination
(E.g. Extensions ‘1000’ and ‘1001’ are in a conversation. Select one Extension (e.g. ‘1000’) under ‘Channels’ and click this button. Type ‘1005’ in the pop-up window. Extension ‘1001’ will be transferred to the Extension ‘1005’)
(Button)
- Hangup
Hang up the active conversation
(E.g. Extensions ‘1000’ and ‘1001’ are in a conversation. Select one Extension (e.g. ‘1000’) under ‘Channels’ and click this button. The conversation between these two Extensions will be terminated.)
(Button)
- Reboot
By selecting Extension and clicking ‘Reboot’, the phone on which the selected extension is registered will reboot.
NOTE: This doesn’t work for all types of phones. Some phones need to be provisioned in order for this to work.
(Button)
Apps

The ‘Apps’ page displays all currently registered apps. The page behaves similarly to ‘Monitor’ -> ‘Extensions’ with the exception of no rows being displayed for Extensions that do not have any apps present. This option is useful because it gives the opportunity to preview how many gloCOM editions are online.
Monitored Apps are displayed in real-time with the following details:
- Name
Displays the name of the Extension
(E.g. TestApp)
(Display)
- Extension
Displays the protocol used by the app and Extension number
(E.g. SIP/2002)
(Display)
- IP address
Displays the IP address:port that a UAD/Phone is registered to
(E.g. 192.168.1.1:5060)
(Display)
- App
Displays the application name and version
(Display)
- Edition
Displays the app edition
(Display)
- On Call
Displays whether the user is participating in a call at this moment
(E.g. If the user is on a call, the picture of a headset will be shown, otherwise, this field will be blank.)
(Display)
NOTE: Certain call actions (such as transferring calls, hanging up, etc.) can be performed on active calls as well.
Search

- Refresh
Select the time interval in seconds at which data should be refreshed
(E.g. To refresh every ten seconds, select ‘10 sec’ from the drop-down list.)
(Select box)
- Edition
Sort Extensions based on their edition
(E.g. ‘Office’, ‘Business’, ‘Agent’, ‘Supervisor’)
(Select box)
- Search
Type a specific Name, Extension, or App and have the data filtered accordingly
(E.g. Test)
(Select box)
Actions
- Monitor
Select one of the active conversations
(E.g. Users can one of the active conversations by clicking the checkbox next to the Extension, and providing the Extension number that should listen to the active conversation.)
(Button)
NOTE: Users may listen to active conversations by dialing *199 + $EXTENSION number as well. Please note that regardless of which method is used to listen to calls, the listening service has to be enabled in Enhanced Services of the Extension that listens to the call. To enable this option, please navigate to ‘Enhanced Services’ -> ‘Call Monitoring’.
In case there is a following voice message: “The vertical service dialed is not enabled. Please contact your administrator.”, it means that this enhanced service is not enabled.
(E.g. Extensions ‘1000’ and ‘1001’ are in a conversation. Select this button and type ‘1005’ into the pop-up window. Extension ‘1005’ will ring and once the handset is picked up, the active conversation will be heard.)
- Transfer
Transfer a party from the active conversation to a different Destination
(E.g. Extensions ‘1000’ and ‘1001’ are in a conversation. Select one Extension (e.g. ‘1000’) under ‘Channels’ and click this button. Type ‘1005’ in the pop-up window. Extension ‘1001’ will be transferred to the Extension ‘1005’)
(Button)
- Hangup
Hang up the active conversation
(E.g. Extensions ‘1000’ and ‘1001’ are in a conversation. Select one Extension (e.g. ‘1000’) under ‘Channels’ and click this button. The conversation between these two Extensions will be terminated.)
(Button)
Trunks
Trunks
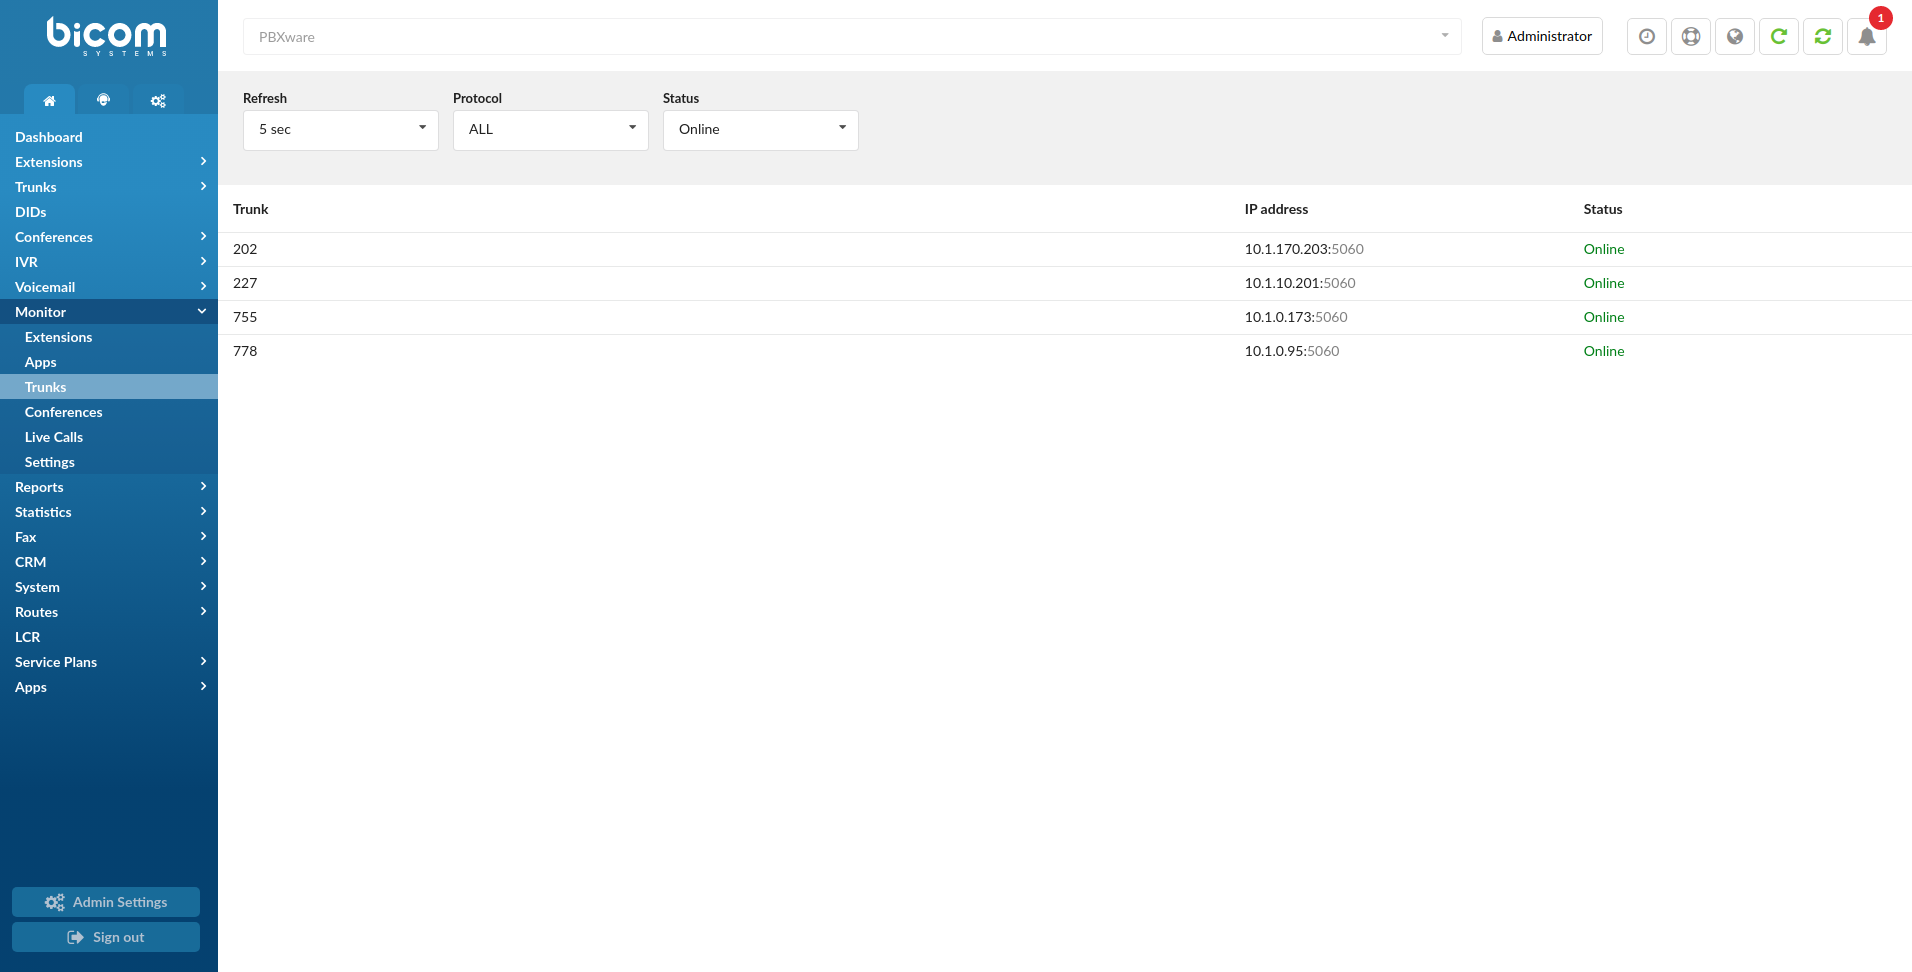
Monitored Trunks are displayed in real-time with the following details:
- Trunk:
Displays the Trunk name
(Display)
- IP address:
Displays the provider’s IP address
(E.g. 203.196.128.5)
(Display)
- Status:
Displays the Trunk status (‘Online’/’Offline’)
(E.g. If the ‘Qualify’ Trunk option is empty, ‘Unmonitored’ is displayed here. Otherwise, ‘(e) ok (159ms)’ is displayed.)
(Display)
NOTE: Please set the ‘Qualify’ = ‘2500’ in the Trunk settings to see its status.
Search

- Refresh
Select the time interval in seconds at which data should be refreshed
(E.g. To refresh every ten seconds, select ‘10 sec’ from the drop-down list.)
(Select box)
- Protocol
Select a Trunk from the drop-down list based on the protocol
(E.g. SIP)
(Select box)
- Status
Sort Trunks based on their network status (ALL, Online, Offline)
(E.g. Select ‘Online’/’Offline’ to see only online or offline Extensions. Select ‘ALL’ to list all the Extensions.)
(Select box)
Conferences

Monitored Conferences are displayed in real-time with the following details:
- Conference
Displays the Conference Name and Number
(E.g. Conference #1 (1003))
(Display)
- Activity
Displays the time of how long the Conference has been active
(E.g. 00:00:15)
(Display)
- Members
Displays the list of participants in a Conference
(E.g. Accounting (1005))
(Display)
Search
- Refresh
Select the time interval in seconds at which data should be refreshed
(E.g. To refresh every ten seconds, select ‘10 sec’ from the drop-down list.)
(Select box)
Live Calls
Monitored Live Calls are displayed in real-time with the following details:

- From
Displays the caller’s Extension Name (or CallerID) and Extension number
(E.g. TestExtension (101))
(Display)
- To
Displays the call receiver’s Extension name (or CallerID) and Extension number
(E.g. TestExtension (102))
(Display)
- Call Duration
Displays the duration of the call
(Display)
Search
- Refresh
Select the time interval in seconds at which data should be refreshed
(E.g. To refresh every ten seconds, select ‘10 sec’ from the drop-down list.)
(Select box)
Actions
- Hangup
Hang up the active conversation
(E.g. Extensions ‘1000’ and ‘1001’ are in a conversation. Select one Extension (e.g. ‘1000’) under ‘Channels’ and click this button. The conversation between these two Extensions will be terminated.)
(Button)
Settings
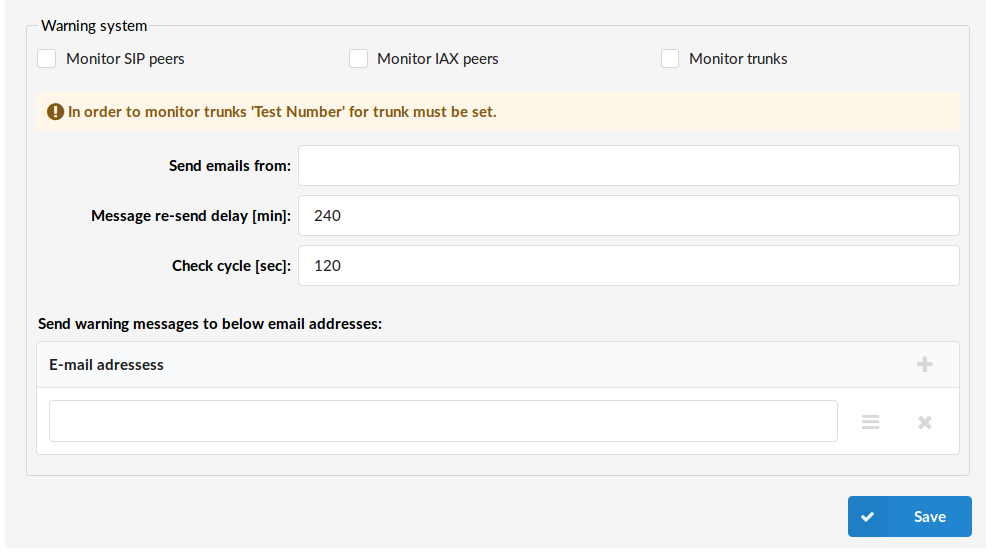
User can here modify Monitor Settings. The warning system monitors all SIP/IAX peers (Extensions and Trunks) on a PBXware system. If that peer is unreachable, an email notification is sent to the administrator(s).
- Monitor SIP peers
The PBXware warning system needs to know which of its peers are to be monitored, and when this option is checked, the system will monitor SIP Extensions.
(E.g. Click the checkbox to monitor SIP Extensions)
(Check box)
- Monitor IAX peers
If this option is checked, the system will monitor IAX extensions.
(E.g. Click the checkbox to monitor IAX Extensions)
(Checkbox)
- Monitor Trunks
When this option is checked, the system will monitor Trunks.
(E.g. Check on the checkbox to monitor Trunks)
(Checkbox)
NOTE: When monitoring Trunks, PBXware will try to dial a test number provided in the Test number field under the Trunk. If the received signal does not match the ‘ANSWER’, ‘BUSY’, ‘CANCEL’, or ‘NOANSWER’ reply, the test call is considered non-functional and it will trigger the warning system to send a notification email. For example, a number that can be used for this instance is an automated time service which many telephone service providers offer for free.
- Send emails from:
In order to customize the email address from which the notification email will appear to be sent, set the preferred email address in this field. When the administrator receives a warning email, it will look like it has been sent from the email address provided here.
(E.g. warning@example.com)
([a-z][0-9], @)
NOTE: This email address does not have to be a valid email account, but if the SMTP server used for sending e-mails from PBXware does not support this, the email will be sent from the email address associated with the account used for the PBXware registration on the server. In some cases, the server will not even send e-mails if the “from:” address is set to a non-existing value.
- Message re-send delay [min]:
To prevent PBXware from sending too many notification emails about every peer that is unavailable, a time frame t which notifications are sent can be set. Once a notification email is sent and another Extension becomes unavailable, the notification about the latter unavailable Extension will be sent only after the given amount of time.
(E.g. 15)
([0-9])
- Check cycle [sec]
Set how many seconds pass between checks
(E.g. 120)
([0-9])
- Send warning messages to the below email addresses:
Notification emails can be sent to as many email addresses as needed. In order to add a new Destination, click the ‘Add’ button and type the email address into the appropriate field
(E.g. johndoe@somemail.com)
([a-z][0-9], @)
TIP: After all steps have been completed, users should restart PBXware.