Reports page displays detailed records of all PBXware calls, system action logs, CLI messages, and SMTP logs.
CDR
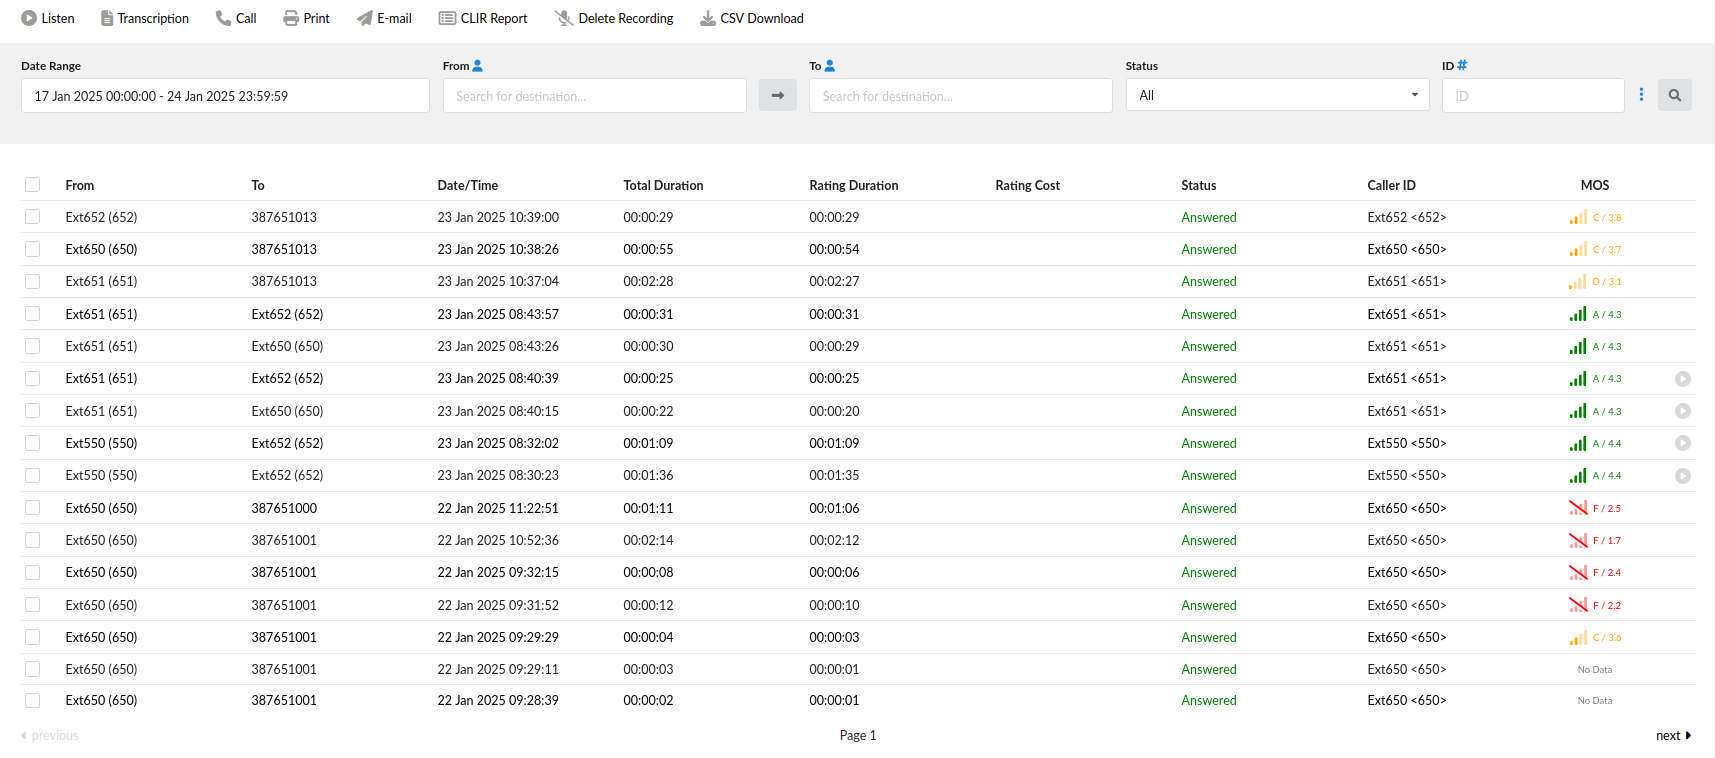
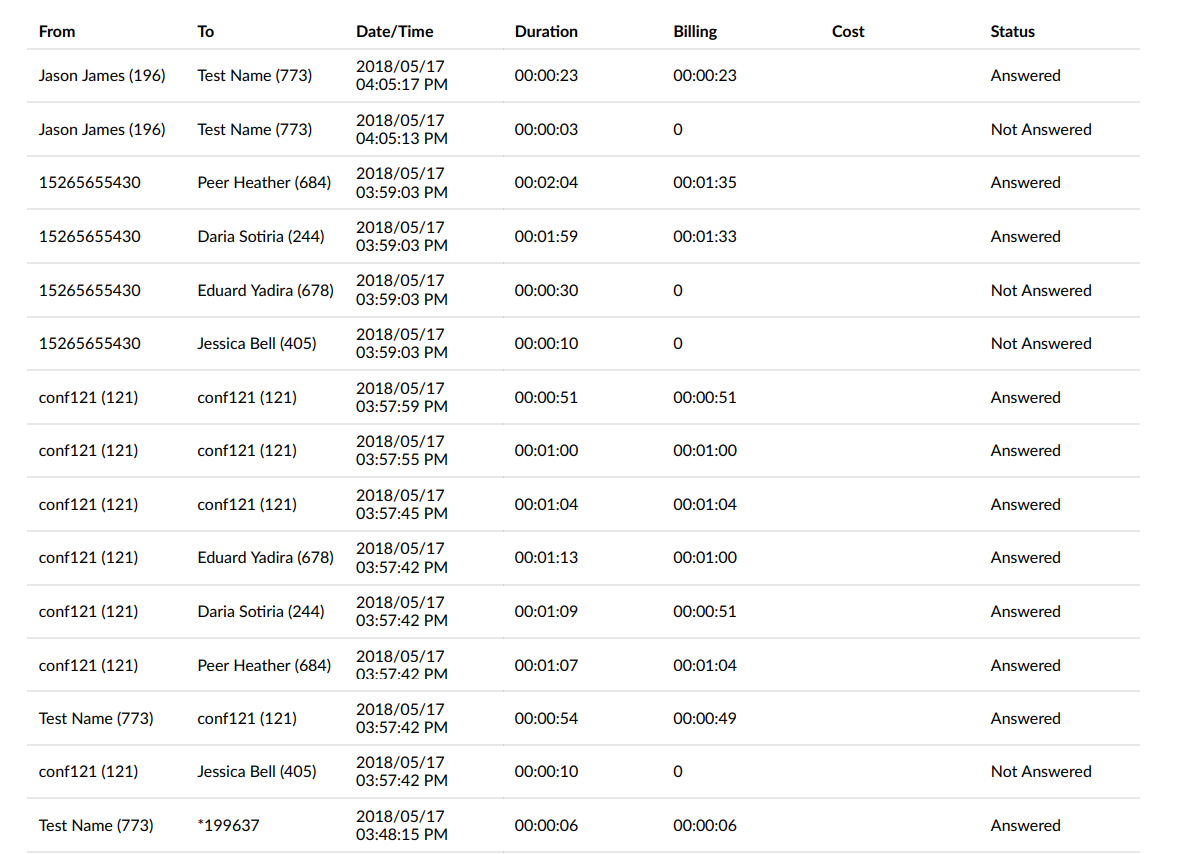
CDR displays detailed records of all PBXware calls with the following details
- From:
The extension number from which the call was made
(E.g. If the call was made from extension 1001 to extension 1004, ‘1001’ is displayed here).
(Display)
NOTE: Users can now search anonymous calls simply by entering ‘anonymous’ in the From field and then the query will display anonymous results only.
- To:
The extension number to which the call was made
(E.g. If the call was made from extension 1001 to extension 1004, ‘1004’ is displayed here).
(Display)
- Date/Time:
Date and Time when the call was made
(04 Oct 2006 10:44:10)
(Display)
- Total Duration:
Call duration time in hh:mm:ss format
(E.g. 00:12:45)
(Display)
- Rating Duration:
Time billed by the system
(E.g. 00:12:45)
(Display)
- Rating Cost:
Cost of the call
(E.g. 2.3)
(Display)
- Status:
Displays the call status
Example:
Depending on whether a call was answered or not, this field value may have the following content:
- Answered
- Not Answered
- Busy
- Error
. - Caller ID (6.7.4)
This column provides the information on Caller ID used on outbound calls. Although this information was already available in CLIR log files, we decided to expose it in the CDR reports page as well to make it more convenient for users when they need to find the Caller ID used on specific outbound call.
- MOS (7.5)
This column displays information about the call quality (MOS) for a specific CDR report. The value in this column represents the average score for all the channels included in the call, denoted by a number and its corresponding grade. This score estimates call quality by taking into account the Round Trip Time (RTT), Jitter, and Packet Loss.
By clicking on the MOS score, a pop-up window will appear, providing further details, including the Average MOS, Minimum MOS, and Maximum MOS for each channel sharing the same Linked ID.

The grading scale matches the following table:
| MOS Score | Grade | Color |
|---|---|---|
| >= 4.3 | A | Green |
| >= 4.0 | B | Green |
| >= 3.6 | C | Orange |
| >= 3.1 | D | Orange |
| < 3.1 | F | Red |
NOTE: If a site user has limited access to CDR reports, the MOS pop-up will be disabled for them. The pop-up is also disabled in OSC.
If MOS score logging is disabled and metrics are not hidden, the MOS score number will not show up in this column. Instead, a grayed out signal icon will appear in its place. Hovering over this icon will trigger a popup to appear, informing the user that MOS logging is disabled.

NOTE: If the current user has access to the server’s edit page, in addition to informing them that MOS logging is disabled, the user will also be provided with a clickable link that will take them to the edit page where they can enable logging.
 This icon is displayed once a call is recorded and ‘Delete’ or ‘Listen’ enhanced service is active
 This is a box used with the CDR commands to select a desired call
Remote Recording Playback
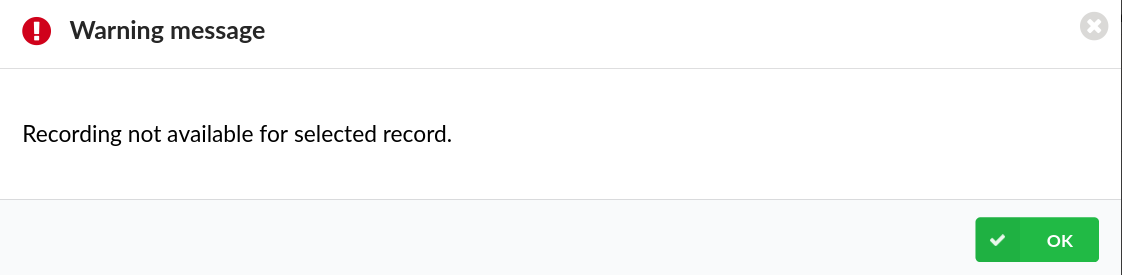
Users can download or listen to recordings offloaded to certain services using Archiving while on this page. Such recordings are similar to regular call recordings but the ones that are offloaded cannot be deleted.
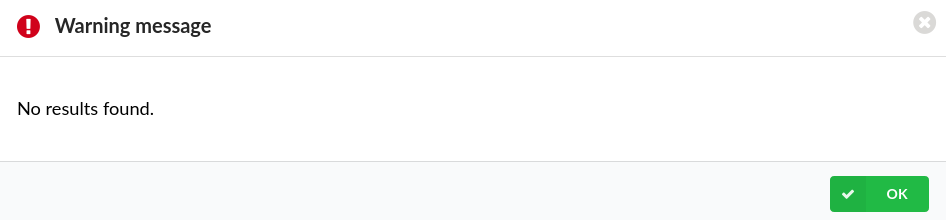
If such an entry is selected and ‘Delete Recording’ is clicked, the following warning message will appear: “Recording not available for selected record.” Please refer to the screenshot.
Based on which case scenario it is, one of the two icons will be displayed:
- Standard play icon – A recording is available both locally and remotely. Such a recording can be downloaded or listened to on this page, and it can be deleted from the system as well. The deletion action will be performed locally, but the recording will stay stored remotely.
- Service icon – A recording is available only remotely. Such a recording can be downloaded or listened to on this page, but it cannot be deleted from the system.
The system displays different icons depending on which service was used.
The list is as follows:
 Amazon S3
 FTP
FTP- SFTP
 Google Drive
 – Microsoft OneDrive
 Dropbox
NOTE: If there is no recording on the system, no icon will be displayed.
NOTE: For this feature to work properly, a user needs to update the license. Please note that if this feature is not enabled in the license, the icons will be displayed but recordings cannot be downloaded or listened to.
Search/Filter
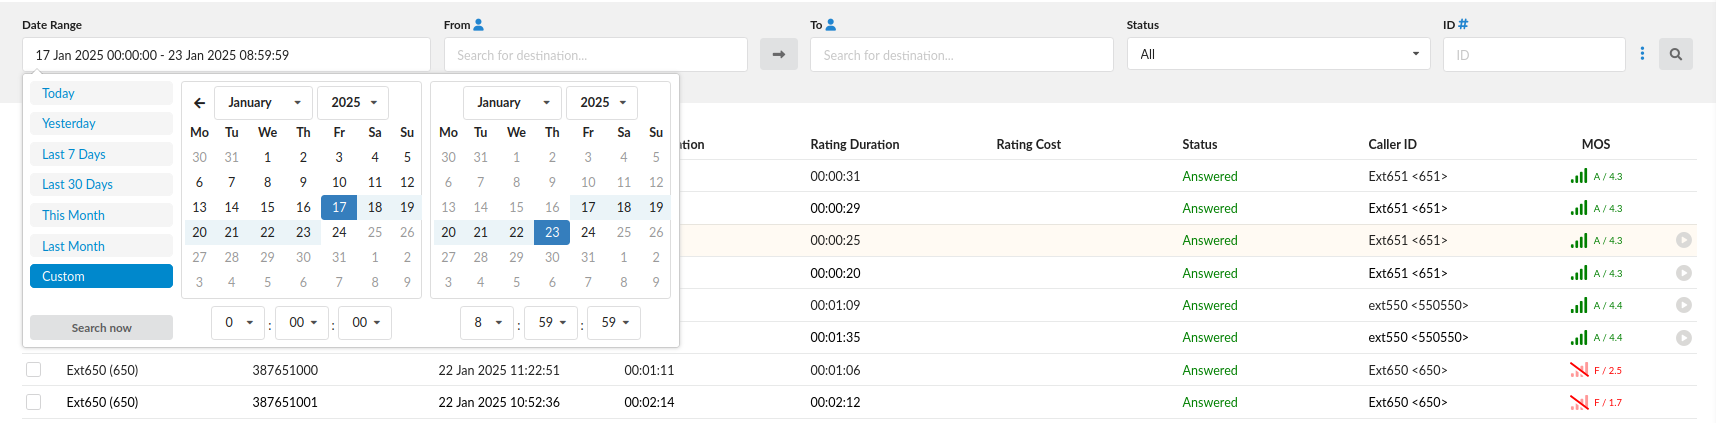
- Date Range:
Select a Search/Filter start date
(E.g. Click on the small ‘Calendar’ icon next to a field and select the desired date)
(Option button)
- From:
Select whether you want to search the CDRs by Destination(s) or by Trunk from which the call came in
(E.g. Destination(s) or Trunks)
(Select box)
- To:
This field points to the Destination(s) or Trunk for which you are searching
(E.g. Trunk)
(Select box)
- Status:
Search calls by selecting the desired call status
Example:
Click on the ‘Please Select’ button and select one of the available fields:
- All
- Answered
- Not Answered
- Busy
- Error
(Select box)
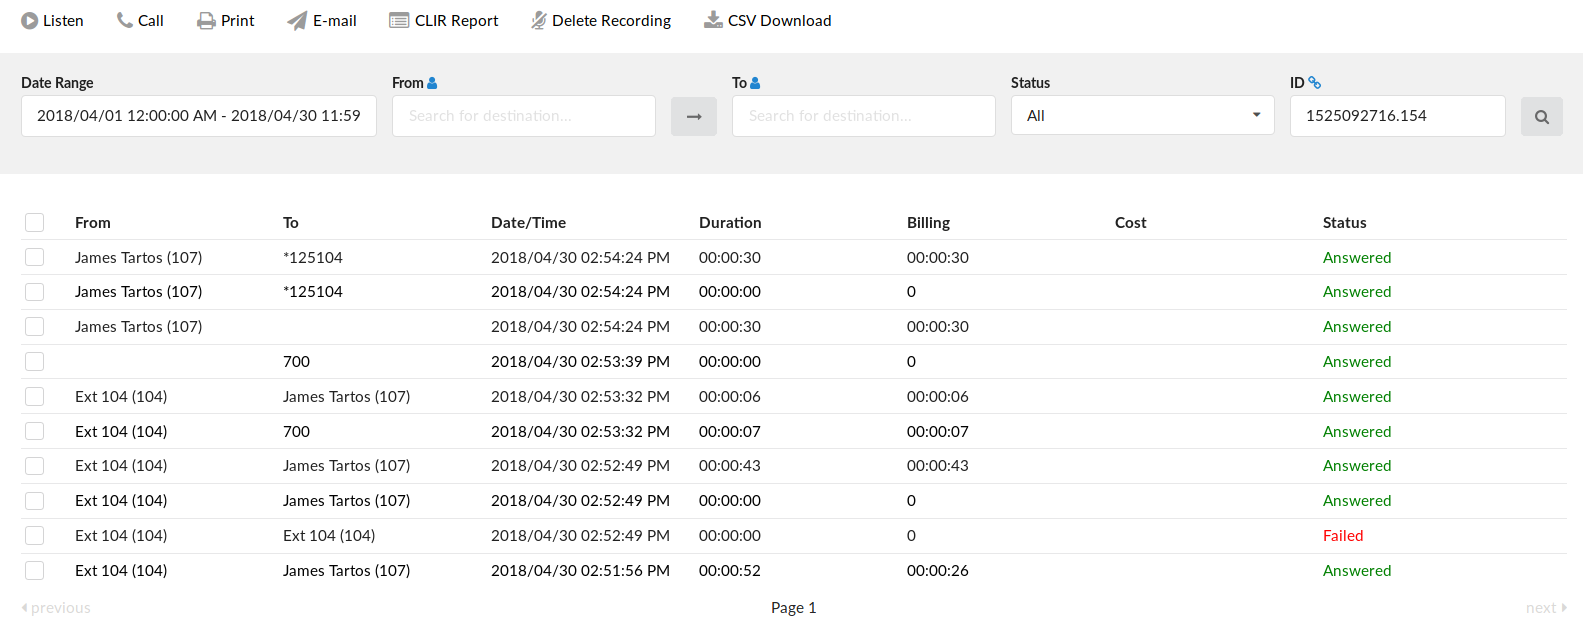
- ID:
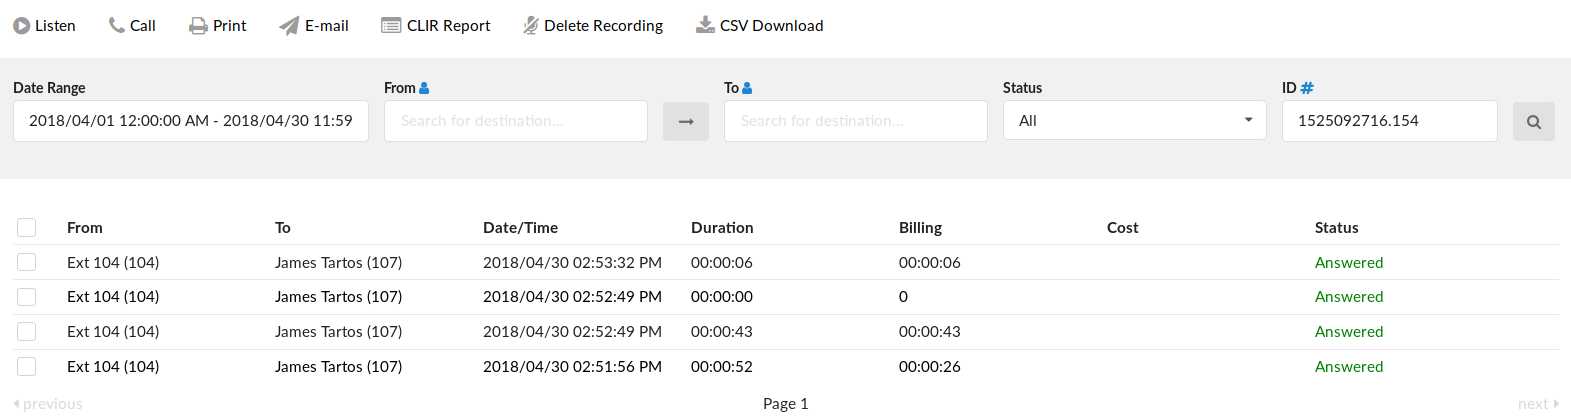
CDRs can now be filtered by 2 different types of IDs. First is Unique ID, and by filtering with this one you get the same functionality as before (set by default).By clicking the blue “#” sign right to the “ID” label you change the type of ID to Linked ID. Filtering CDRs with this type of ID will get you all CDRs that are “linked” to the selected one and you will be able a call flow where the selected CDR is included.
- Additional search options

- Show rated calls only
Users can choose to have only those calls with a cost displayed in the report. If this option is not selected, then the report will feature ALL calls.
(Toggle button ON or OFF)
NOTE: The above can be done in Online Self Care as well with the same options.
- Show recorded calls only (6.7.5)
Clicking on the “Show recorded calls only” toggle button will only include CDRs with the call recordings attached in the search results.
(Toggle button ON or OFF)
TIP: After making any changes to the search filter, be sure to click the search icon.
Actions


- Listen:
Once the ‘Listen’ icon is displayed next to a call record, it means that the specific call was recorded.
New interface now also have integrated recordings player, enabling users to listen PBXware call recordings directly from their browser and navigate through the recording with a simple click of a mouse. This prevents the issue users might experienced with earlier versions, as they had to find a media player that supports formats in which recordings were being downloaded.
Download recordings option is still available, in case you would like to store it on your hard drive.
Most of the modern browsers are supported (Google Chrome, Mozilla Firefox, Safari, Microsoft Edge).
TIP
By default, the sound format is available as a .gsm file. To change the recording format, go to: ‘Settings: Servers: Edit: Recordings format’ and select one of the available sound formats:
- gsm
- wav
- wav49
- ogg
Call
To establish a call between two PBXware extensions, all you need to provide is the caller $EXTENSION number and the $DESTINATION extension
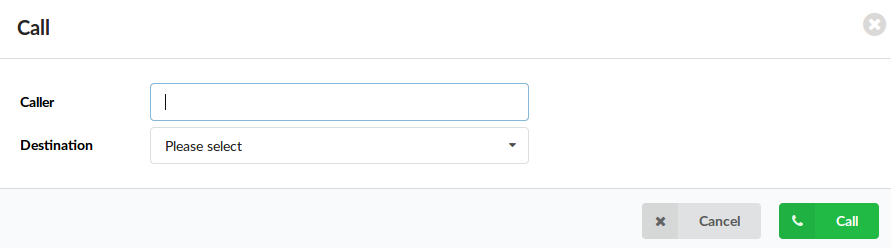
- Caller
PBXware extension that will make a call
Example:
Provide any PBXware extension number here, 1001 for example
([0-9])
- Destination:
Destination extension that will be dialed by the ‘Caller’ extension
(E.g. To select a destination extension, first check the box next to a CDR record. This field will display two extensions listed under the ‘From’ and ‘Destination’ selected records)
(Select button)
TIP
After setting the ‘Caller’ and ‘Destination’ extensions, click the call icon.
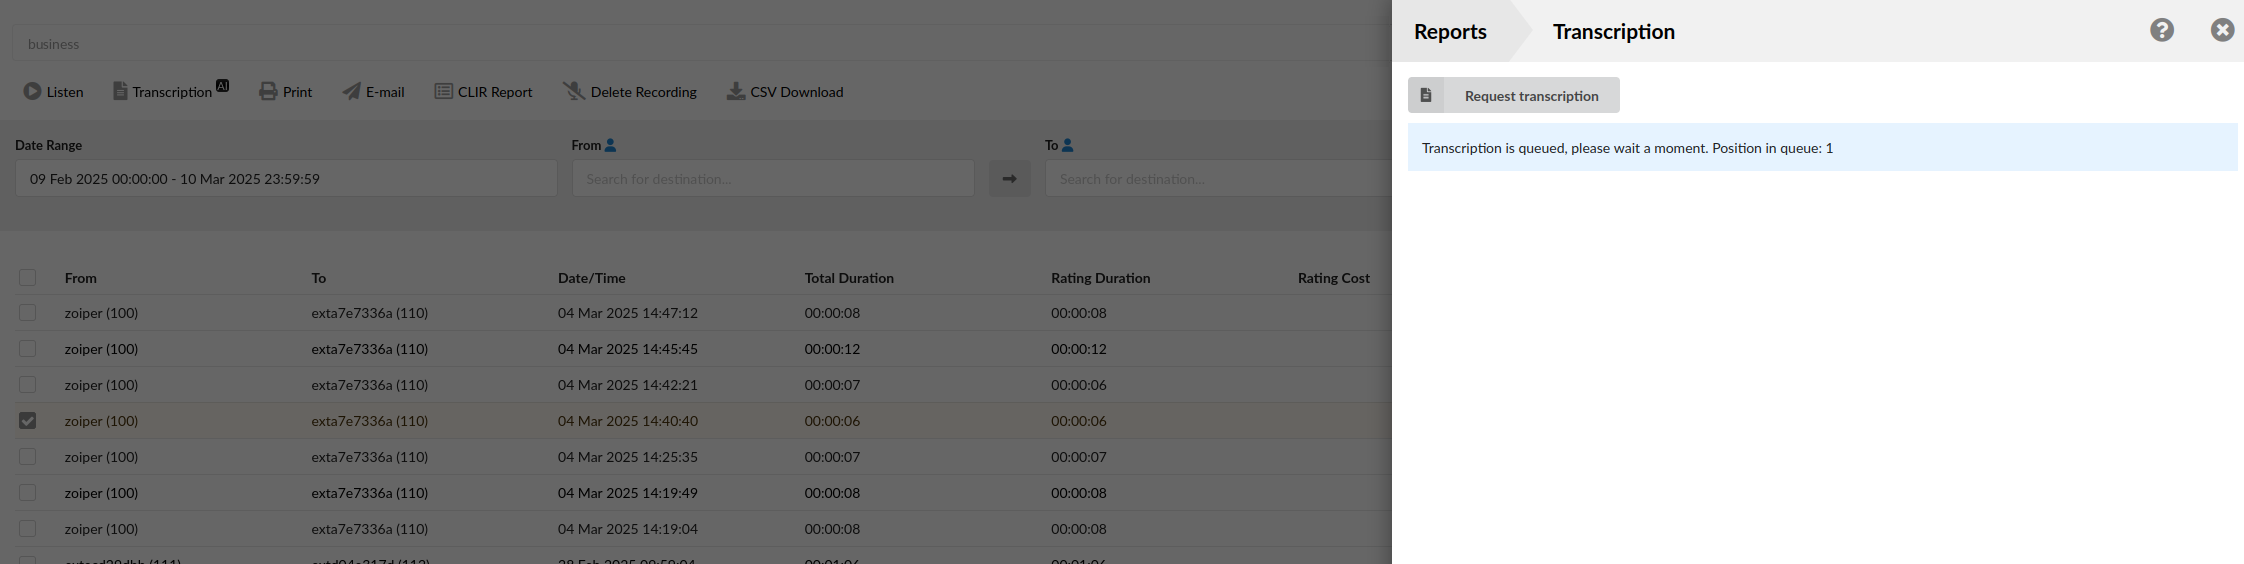
Transcription
To view the transcription of a call, select the checkbox next to the call record and click the ‘Transcription’ button. This will open a tab on the right-hand side. If transcription was enabled and properly configured with a supported provider, the transcribed call will be displayed in this tab.
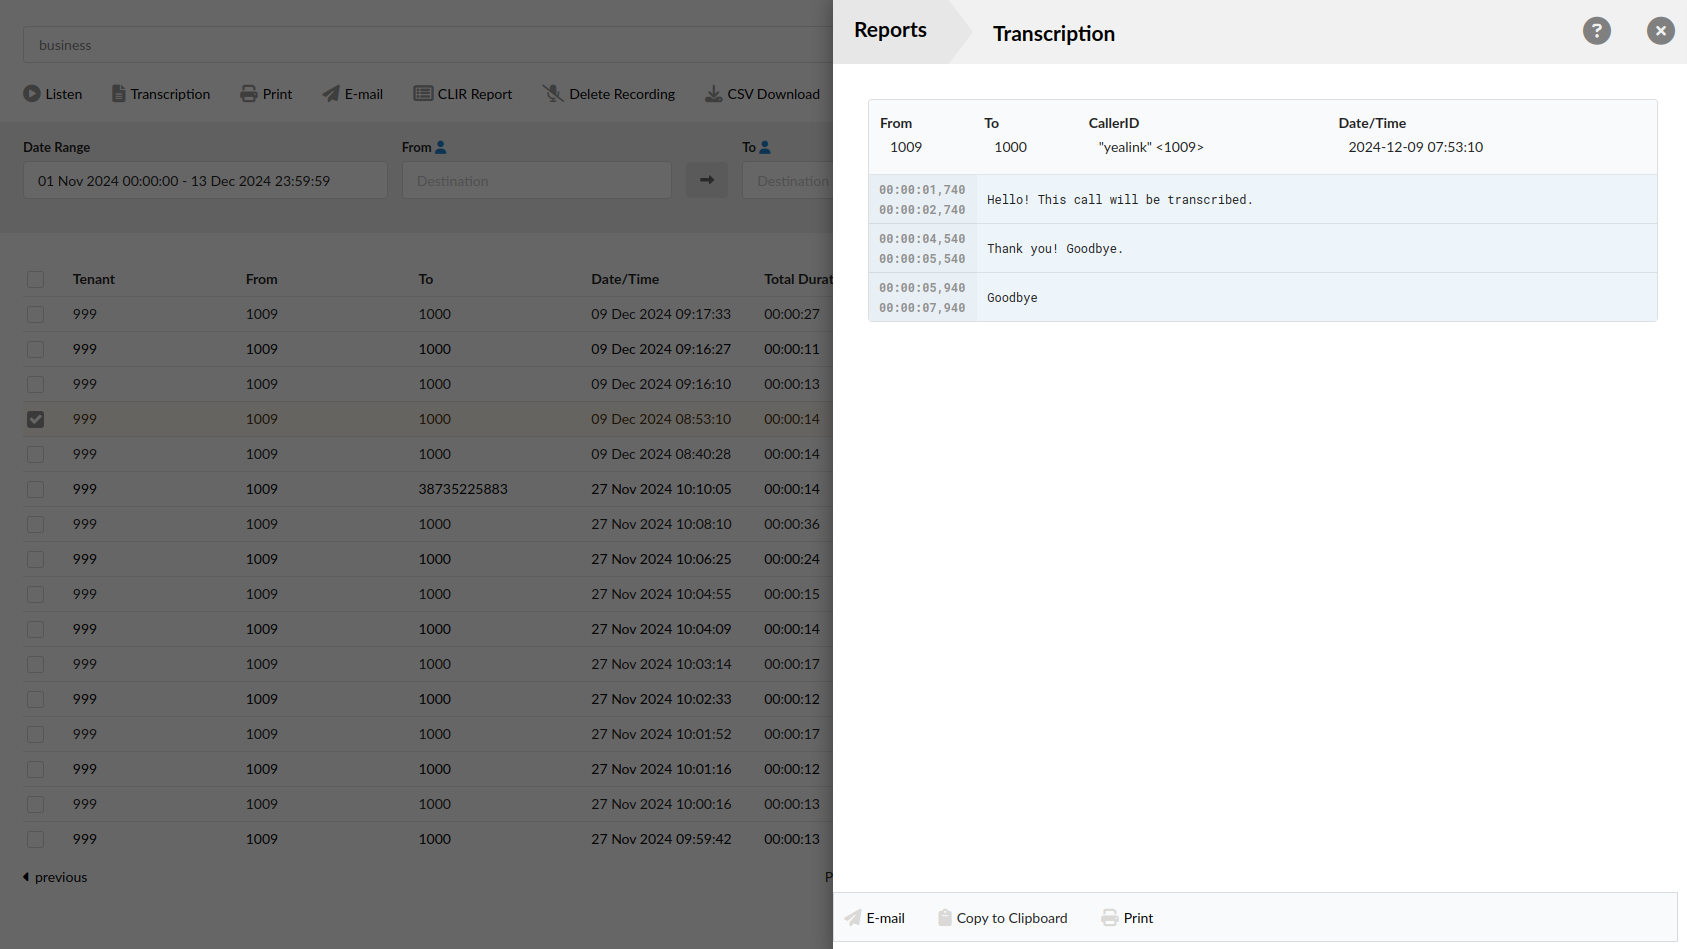
PBXware supports on-demand transcription of recordings. When a manual transcription request is submitted, the recording is assigned the highest priority in the queue, ensuring the fastest possible processing time.
Check the box next to a call record and click the ‘Print’ button. This action will open a new pop-up window with the printing interface.
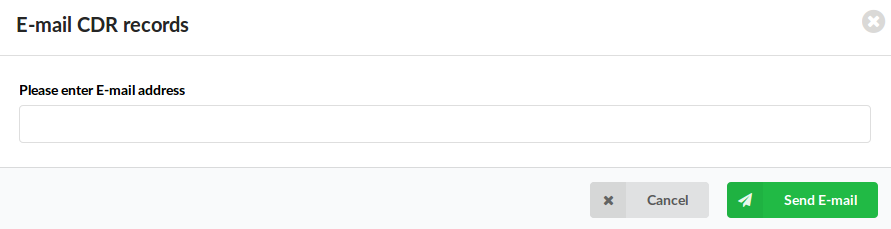
Click on the ‘Email’ button to send all of the reports listed on the page or select a box next to a report and click on the ‘Email’ button to send only the selected ones
Provide an e-mail address where the report is to be sent and click the ‘OK’ button to proceed or ‘Cancel’ to abort the email action
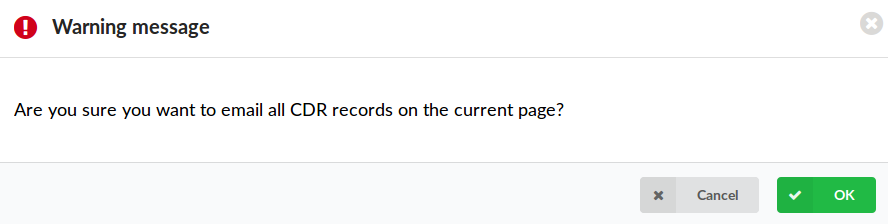
Press ‘OK’ to email all the CDR records on the current page (even if they are not selected), or click ‘Cancel’ to print only the selected records
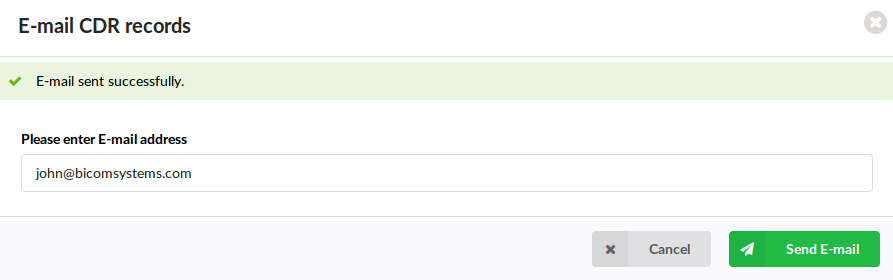
Finally, press the ‘OK’ button to confirm the email action or ‘Cancel’ to abort the email action
CLIR
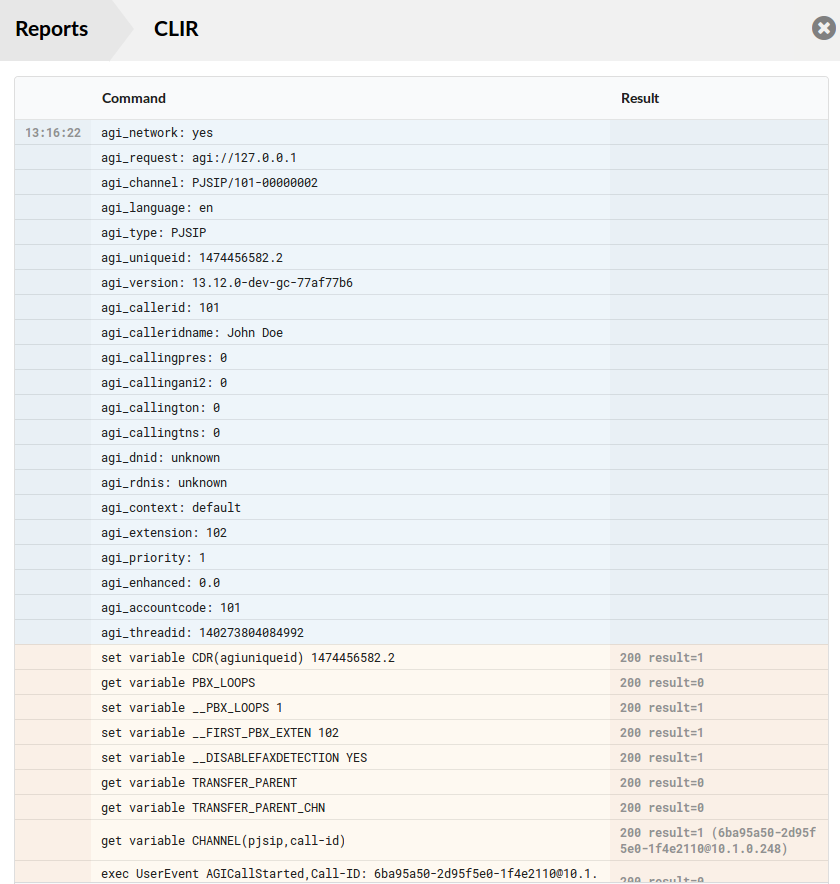
- CLIR:
CLIR (Command Line Interface Record) details
(E.g. Select a desired call record and click this button to view more technical details about the call. A small pop-up window will open with the data).
NOTE: When experiencing any kind of unexplained problems, this is the data you need to send to the technical support team
(Command Button)
CLIR report has been improved to show when the channels limit defined in the license is exceeded, the CLIR will show the exact numbers ( current > max ).
- E-mail CLIR Page
This option enables you to send the current CLIR to the desired e-mail address
- Copy CLIR Data to Clipboard
This option enables user to copy current CLIR data to Clipboard
Delete Recording
Deletes the recorded calls.
NOTE: For this command to be displayed, the appropriate enhanced service has to be set.
(E.g. Select a recorded call and click this button to delete it from the file system)
(Command Button)
Download CSV
Download data as a .csv (Comma Separated Value) file
(E.g. Click this button to download the .csv file to your desktop)
(Command Button)
CDR Summary
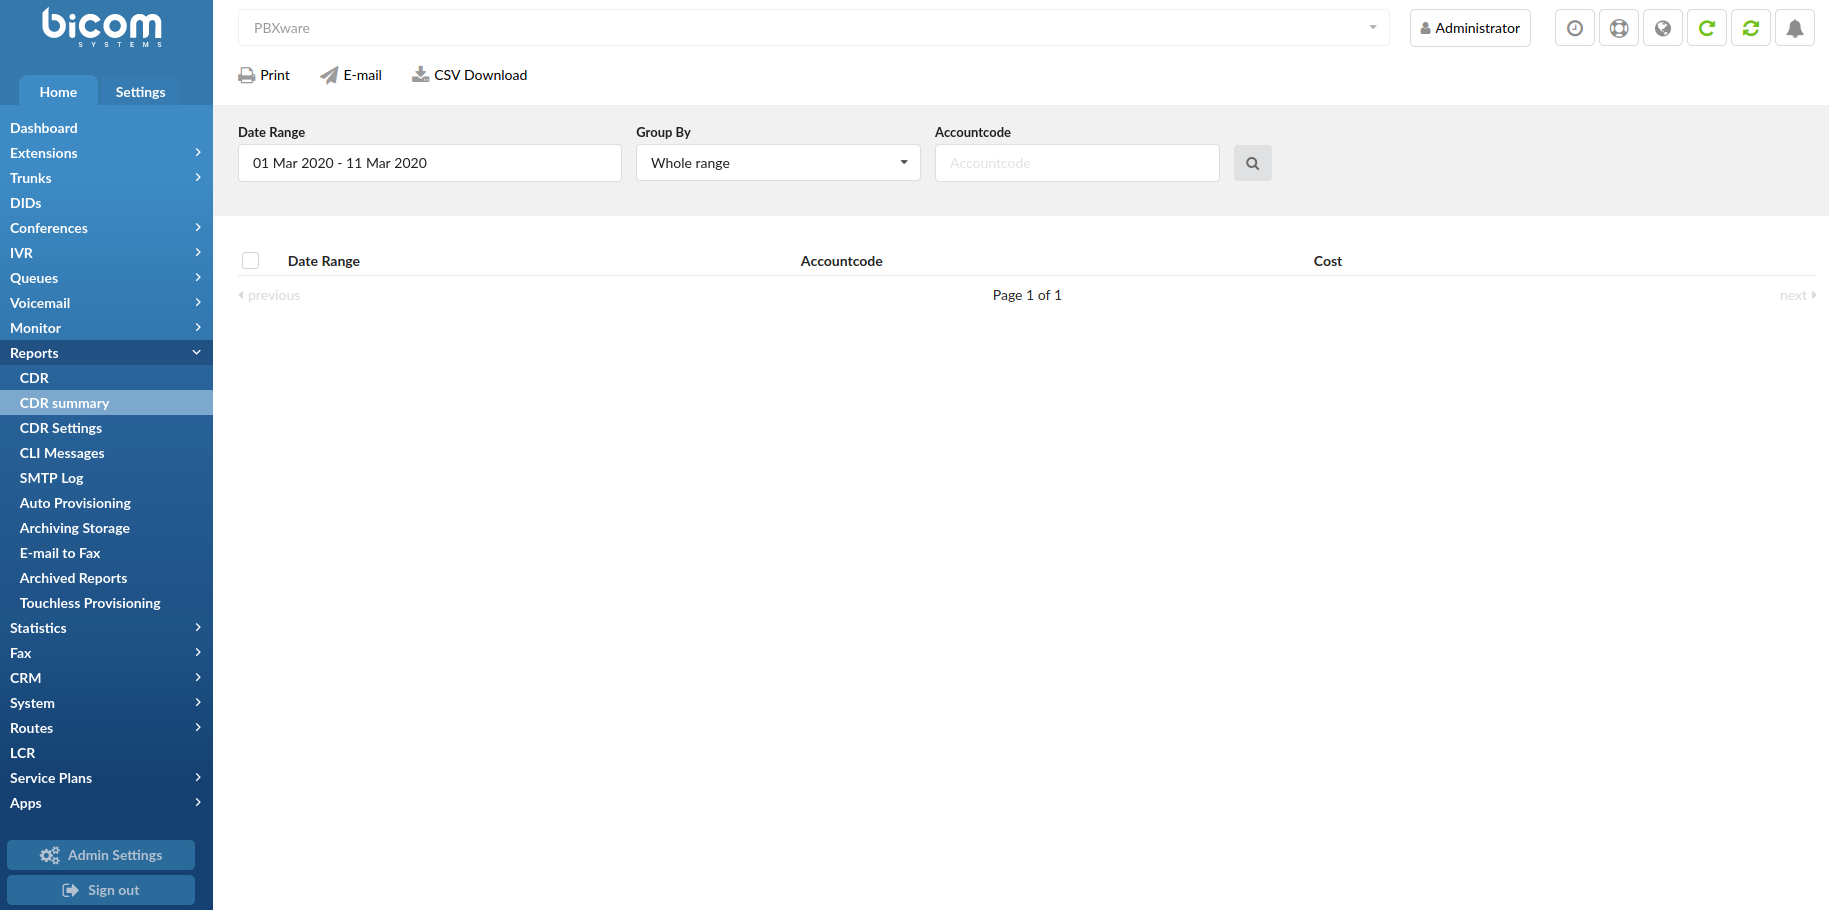
Create a CDR summary report for a selected period of time.
- Date Range:
Select a Search/Filter start date
(E.g. Click on the small ‘Calendar’ icon next to a field and select the desired date)
(Option button)
- Group by:
Group results by selecting the desired period.
Example:
Click on the field and select one of the available options:
- Whole range
- Quarterly
- Monthly
- Yearly
(drop down)
- Tenants:
Filter results per tenant number.
(E.g. 200)
([0-9])
- Accountcode:
SFilter results per accountcode.
(E.g. 101)
([0-9])
SMS

This ‘SMS’ section on Reports allows users to see all details regarding SMS messages on the system.
 Click to print selected entries.
NOTE: After users select which entries they want to print, they will be prompted to a different window and complete the configuration based on the printer they have.
 Click to send selected entries in an e-mail.
(Button)
NOTE: In order to successfully send an e-mail, please make sure that some/all entries are ticked. If not, a warning message will appear saying “No results found.” Please refer to the screenshot.
 Click this button to download a CSV file.
NOTE: This CSV file contains the data displayed on the ‘SMS’ page. Users can choose to download specific entries or select all of them.

- Date Range:
Select a Search/Filter start date
(E.g. Click the small ‘Calendar’ icon next to a field and select the desired date.)
(Option button)
- From:
Enter a number from which the SMS message was sent and have the data filtered accordingly
(E.g. +1234567890)
([a-z)[0-9])
- To
Enter a number to which the SMS was sent and have the data filtered accordingly
(E.g. +2221564879)
([a-z)[0-9])
- Direction
Select one of the directions and have the data filtered accordingly
(E.g. All/Inbound/Outbound)
- Rating (7.5)
Select an option to filter messages by their rating status.
(E.g. All/Rated/Unrated)
- Type
Select an option to filter messages by their type.
(E.g. All/SMS/MMS)

- Checkbox
Select an entry by ticking this check box
(Checkbox)
- From
Displays the number from which the SMS was sent together with the Extension name/number
(E.g. +1234567890 – M 108 (108))
(Display)
- To
Displays the number to which the SMS was sent together with the Extension name/number
(E.g. +2221564879 – M 109 (109))
(Display)
- Direction
Displays the SMS message direction
(E.g. Inbound)
(Display)
- Date/Time
Displays the date and time of the SMS message
(E.g. 30 Nov 2020 09:03:44)
(Display)
- Rating (7.5)
Displays the amount spent to send the message.
(E.g. 0.1)
- Status
Displays the SMS message status
(E.g. Sent/Received/Failed)
(Display)
- Error Message
Displays the message explaining why certain action failed
(E.g. Provider: Authentication failed)
(Display)
- Type
Displays the type of the message.
(E.g. SMS/MMS)
Bulk Messages

This ‘Bulk Messages’ section on Reports allows users to see all details regarding Bulk messages.
Click to print selected entries.
NOTE: After users select which entries they want to print, they will be prompted to a different window and complete the configuration based on the printer they have.
(Button)
Click to send selected entries in an e-mail.
(Button)
Click this button to download a CSV file.
NOTE: This CSV file contains the data displayed on the ‘Bulk Messages’ page. Users can choose to download specific entries or select all of them.
(Button)

- Date Range:
Select a Search/Filter start date
(E.g. Click the small ‘Calendar’ icon next to a field and select the desired date.)
(Option button)
- Status
Select one of the statuses and have the data filtered accordingly
(E.g. Not Active)
(Select box)
- Name
Populate the field with a name and have the data filtered accordingly
(E.g. TestBulk)
([a-z)[0-9])

- Checkbox
Select an entry by ticking this check box
(Checkbox)
- Name
Displays the name of a Bulk message
(E.g. TestBulk)
(Display)
NOTE: Clicking the name of a certain Bulk message will prompt users to the Reports page where they can access more data and information on this Bulk message.
- Sent/Total
Displays the number of sent messages and the total amount of numbers that the message was sent to
(E.g. 2/2)
(Display)
- Time started
Displays the starting date and time of the Bulk message
(E.g. 17 Aug 2021 13:17:21)
(Display)
- Time ended
Displays the ending date and time of the Bulk message
(E.g. 17 Aug 2021 13:18:02)
(Display)
- From
Displays the number/alphanumeric from which the Bulk message was sent
(E.g. +1234567890)
(Display
- CSV File
Displays the name of the CSV file
(E.g. CampaignBulk)
(Display)
NOTE: Clicking the name of a certain CSV file will prompt users to the Reports page where they can access more data and information on this Bulk message.
- Status
Displays the Bulk message’s status
(E.g. Completed)
(Display)
- Message
Displays the content of the message
(E.g. “This is just a test.”)
(Display)
- SMS Report
Displays details about the SMS report
(Display)
NOTE: Clicking an SMS report icon will prompt users to another page where they can access more data and information on this Bulk message.
CDR Settings
Please provide a number in the ‘Records per page’ field
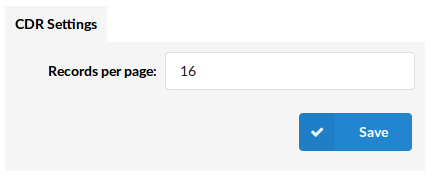
CDR Settings
- Records Per Page:
Number of records displayed per page
(E.g. When on the ‘Reports: CDR’ page, and this option is set to ’16’, the last 16 call records will be displayed. On the bottom there is a ‘Page’ field. Type a page number, e.g. ‘2’, and click the ‘GO’ button to display the next 16 call records)
([0-9])
CLI Messages
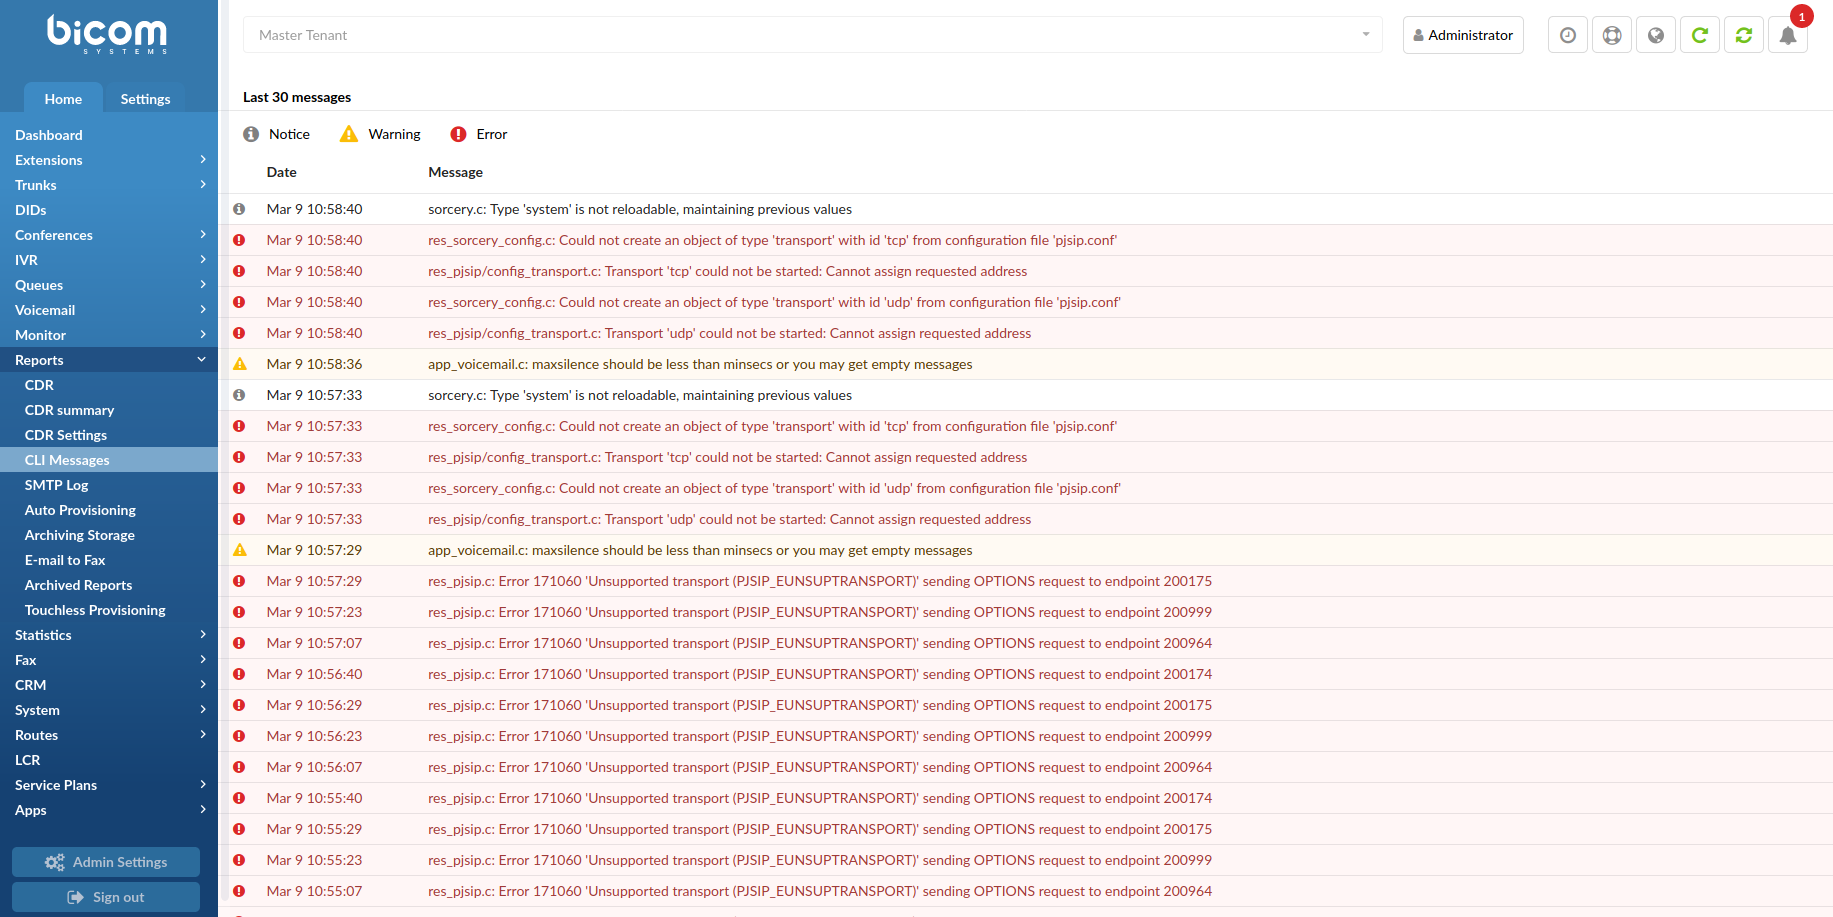
CLI messages provide a convenient method of showing messages received from the asterisk CLI (Command Line Interface). Each message is shown in the order received and, if clicked on, will open a new browser searching www.google.com with the message content text.
Available Message types:
- Notice – A notice message is simply a formal notice and does not affect the system’s operation
- Warning – A warning message of an issue that will not usually affect the system’s operation
- Error – An error message may stop or affect the system’s operation in some situations
SMTP Log
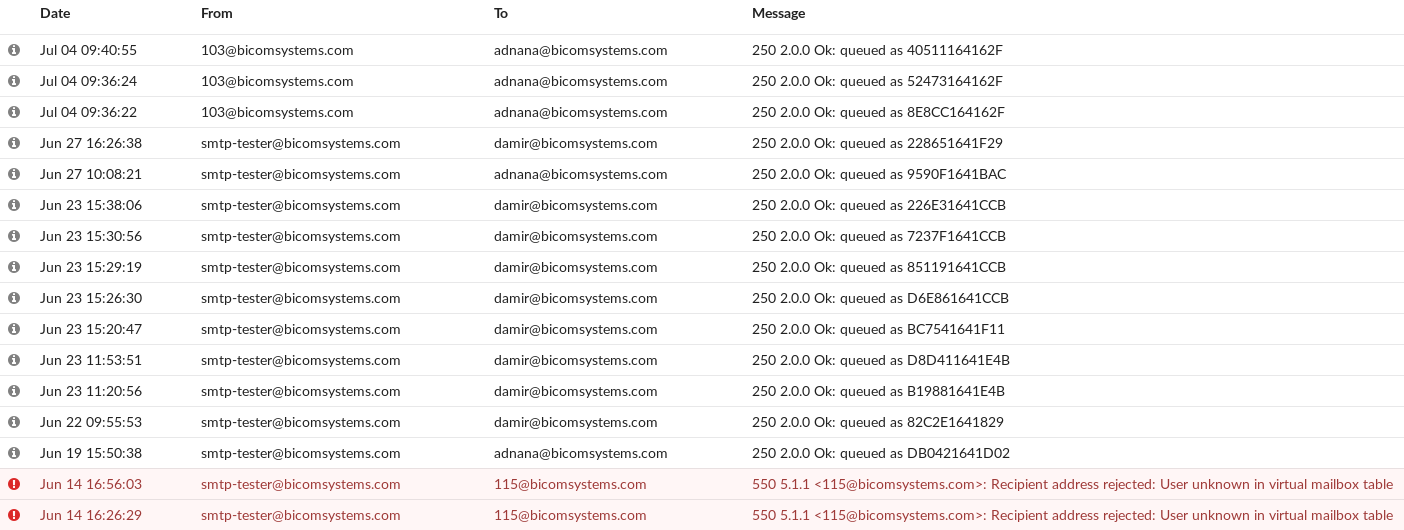
This page will allow you to see eventual errors in regards to PBXware e-mail messages and notifications.
- Notice – A notice message is simply a formal notice and does not affect the system’s operation
- Error – An error message may stop or affect the system’s operation in some situations
Auto Provisioning
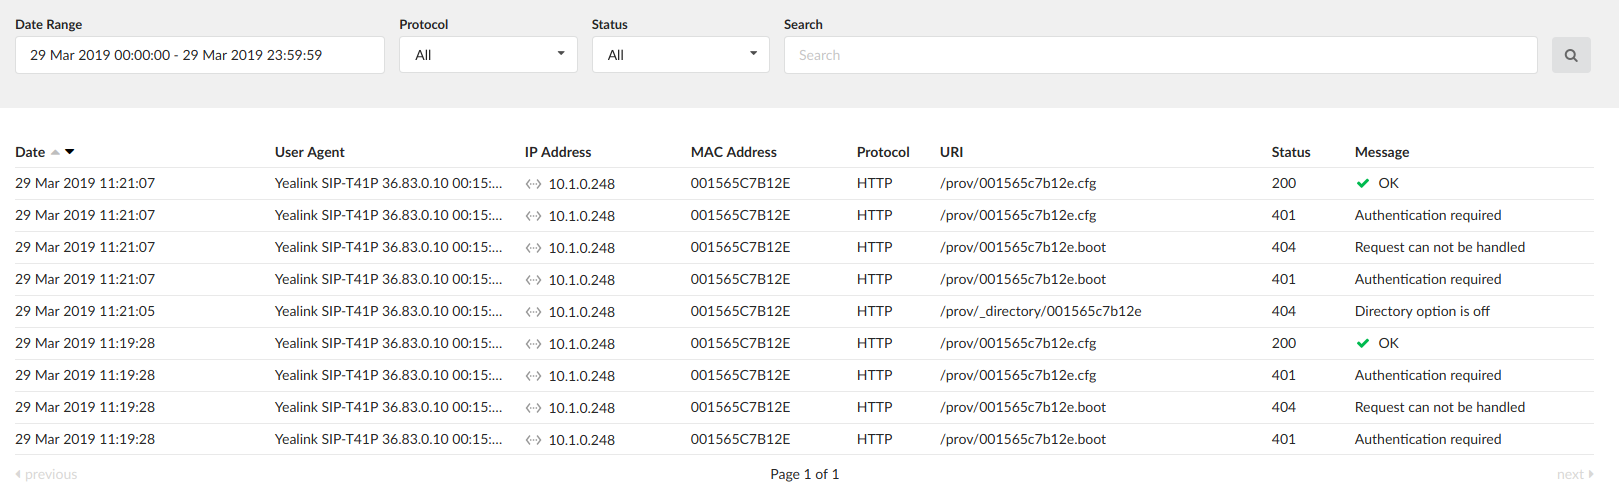
This page displays auto provisioning logs for those UADs which are being registered on the system.
The page will show 8 columns as follows:
- 1. Date: Date/Time record of when the request came
- 2. User Agent: UA string exactly as written in the request
- 3. IP Address: Country Flag (if possible to determine) + IP Address of the request sender
- 4. MAC Address: Phone MAC address
- 5. Protocol: HTTP, HTTPS or TFTP
- 6. URI: The URI that was requested
- 7. Status: 200, 401, 403, 404, 500
- 8. Message: A message describing the status in more details
The logs can be filtered by Tenant, Date, Protocol, Status and a search input which will try to match the UA, IP, MAC and URI.
Archiving
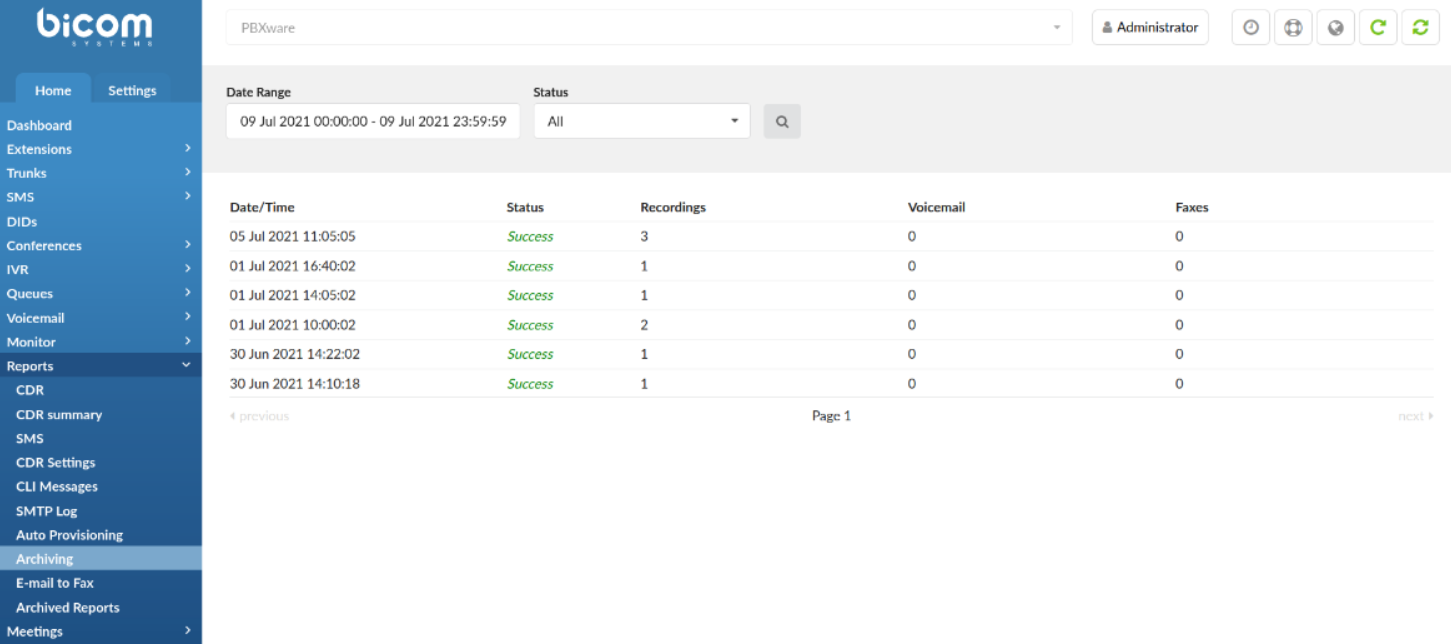
Archiving automatically copies eligible files to a remote destination on a weekly basis.
Users can store data on one of the following services:
- Amazon S3
- Microsoft OneDrive
- Google Drive
- Dropbox
- SFTP
- FTP

- Date Range
Search data by selecting a specific date range and clicking the ‘Search Now’ button
(E.g. Last 30 Days)
(Select box)
- Status
Search data by selecting one of the statuses displayed in the drop-down list
(E.g. All/Success/Partial Success/Failed)
(Select box)

- Date/Time
Displays the date and time of an upload
(E.g. 01 Jul 2021 16:40:02)
(Display)
- Status
Displays the status of an upload
(E.g. Success)
(Display)
- Recordings
Displays the number of recordings
(E.g. 3)
(Display)
- Voicemail
Displays the number of voicemails
(E.g. 0)
(Display)
- Faxes
Displays the number of faxes
(E.g. 2)
(Display)
- Chat
Displays the number of chat logs successfully uploaded in the archiving session.
- CDR
Displays the number of CDR logs successfully uploaded in the archiving session.
E-mail to Fax
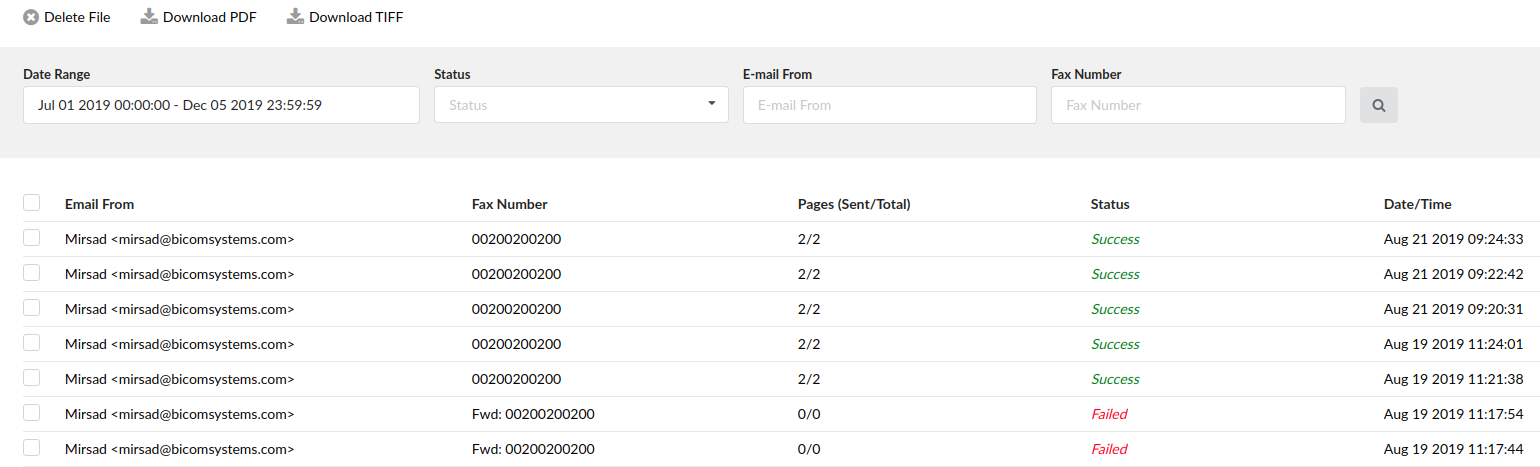
Each fax (sent or failed) will be logged. Here you can generate report and see details about each log.
Each log will show this information:
- Tenant: Tenant number (only there if system is Multi Tenant and we are viewing reports from the master tenant)
- Email From: Email address of the fax sender.
- Fax Number: The number where fax is sent on.
- Pages (Sent/Total): Shows how many pages were sent.
- Status: Success or Failed
- Date/Time: Date showing when the fax was sent.
The reports can be filtered by Date, Tenant (only on master tenant), Status, Email From and Fax Number.
On this page there are three action buttons:
- Delete File: This will delete the PDF and TIF files from the system for selected reports, if they are available.
- Download PDF: Download PDF for all selected reports. If PDF file corresponding to that report does not exist that report will be skipped.
- Download TIF: Same as the Download PDF button, but it downloads TIF file format.
Archived Reports

On new installations, CDR will be partitioned automatically. We will keep up to 1 year of data by default, but customers will have the option to change this period in the ‘File System’ section, if necessary.
The ‘Archived Reports’ page allows users to see the logs and how the partitioning process went.
- Date Range:
Select a Search/Filter start date
(E.g. Click the small ‘Calendar’ icon next to a field and select the desired date.)
(Option button)

- Table
Select a specific table and have the data filtered accordingly
(E.g. CDR)
(Check box)
- Period
Displays the date of partition
(E.g. Dec 2020)
(Display)
- Table
Displays the database table
(E.g. CDR)
(Display)
- File size
Displays the size of a file after archiving
(E.g. 42 bytes)
(Display)
- File
Download the archived partition as a file
(Button)
NOTE: The file is downloaded as a .tsv file.
Touchless Provisioning
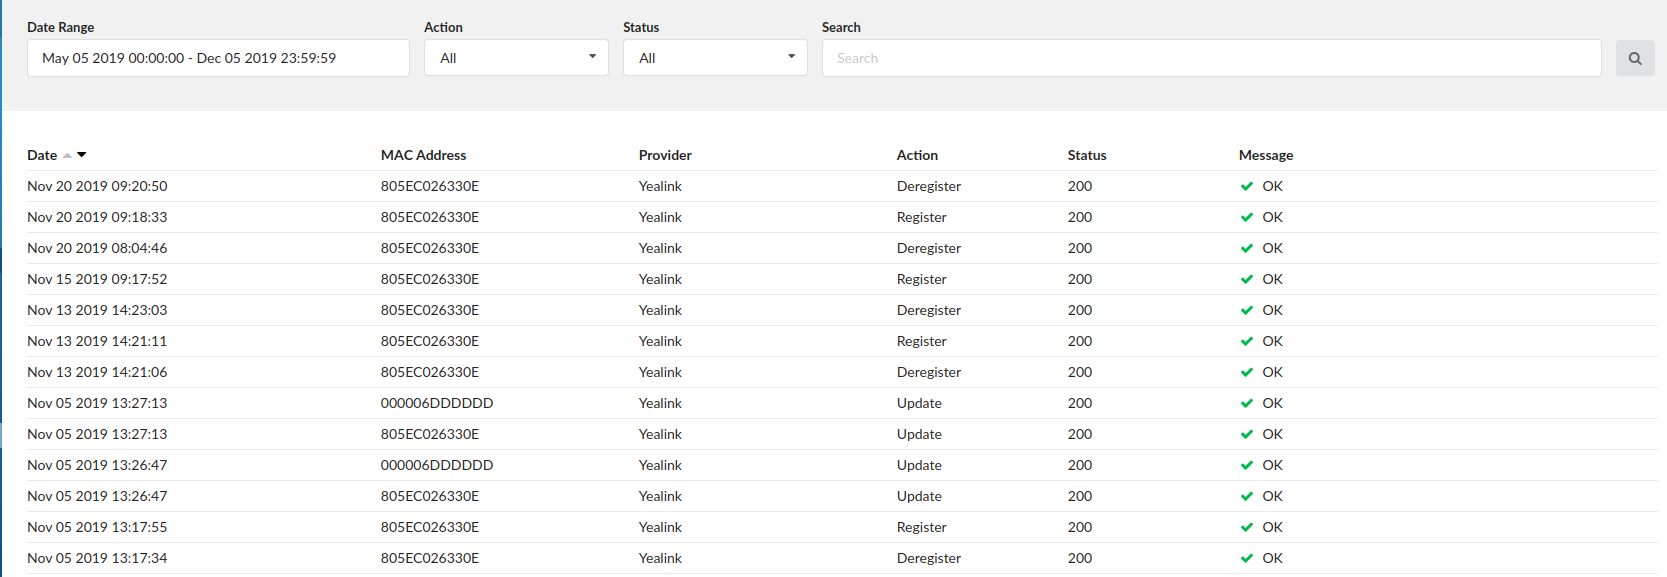
This page will contain last logs regarding ZTP.
Each log will show following information:
- Date – Date/Time of record
- MAC Address – Phone MAC Address
- Provider – UAD Provider
- Action – Action took: Register, Deregister, Update.
- Status – Status of action
- Message – In case of error, detail message will be provided
You can filter the logs by date, action, status or type in a search term which will be matched to a Mac address or a UAD. If the page is open on Master Tenant then the logs can be filtered by Tenant as well.
Directory Sync Management
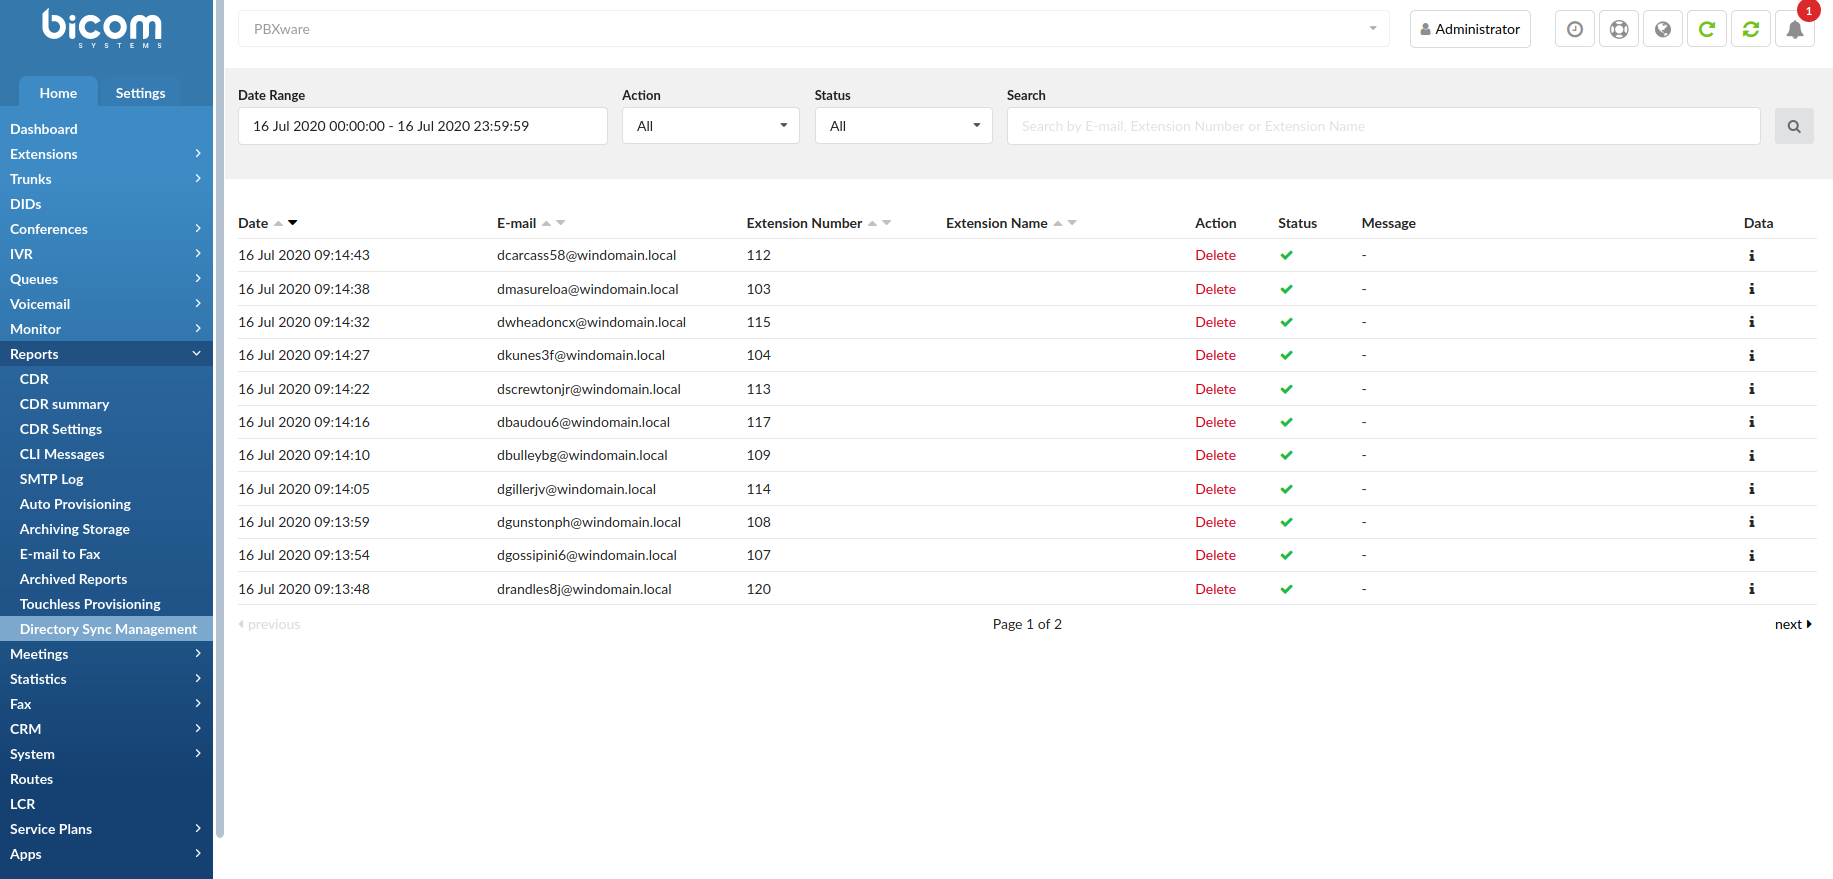
- Date Range:
Select a Search/Filter start date
(E.g. Click the small ‘Calendar’ icon next to a field and select the desired date.)
(Option button)
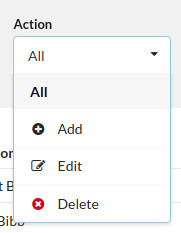
- Action:
Select one of the three Actions and have data displayed for that particular ‘Action’
- Add – Upon selecting, it will display added synced Extensions.
- Edit – Upon selecting, it will display edited synced Extensions.
- Delete – Upon selecting, it will display deleted synced Extensions.
(Select box)
- Status:
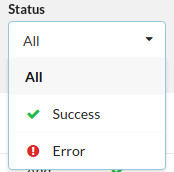
Select one of the two Statuses and have data displayed for that particular ‘Status’
- Success – The Extension sync was successfully completed.
- Error – The Extension sync failed.
(Select box)
- Search
Search data by ‘E-mail’, ‘Extension Number’, or ‘Extension Name’ and have it displayed accordingly.
([a-z][0-9])
- Date
Displays the Date of syncing
(E.g. 14 July 2020 16:09:20)
(Display)
Displays the name of the synced Extension
(E.g. ebranthwaiteng@windomain.local)
(Display)
- Extension Number
Displays the Extension Number
(E.g. 103)
(Display)
- Extension Name
Displays the Extension Name
(E.g. Emmott Branthwaite)
(Display)
- Action
Displays data based on the selected ‘Action’
(E.g. Add)
(Display)
- Status
Displays data based on the selected ‘Status’
(E.g. Success)
(Display)
- Message
Displays the message explaining why certain sync failed
NOTE: If the Status of the sync is ‘Error’, the ‘Message’ section will provide users with further information on why certain sync failed.
(Display)
- Data
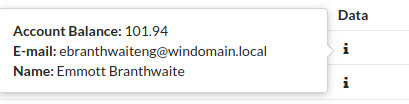
Displays additional information regarding the synced Extension
NOTE: In order to see the data, a user has to hover his/her mouse over the icon.